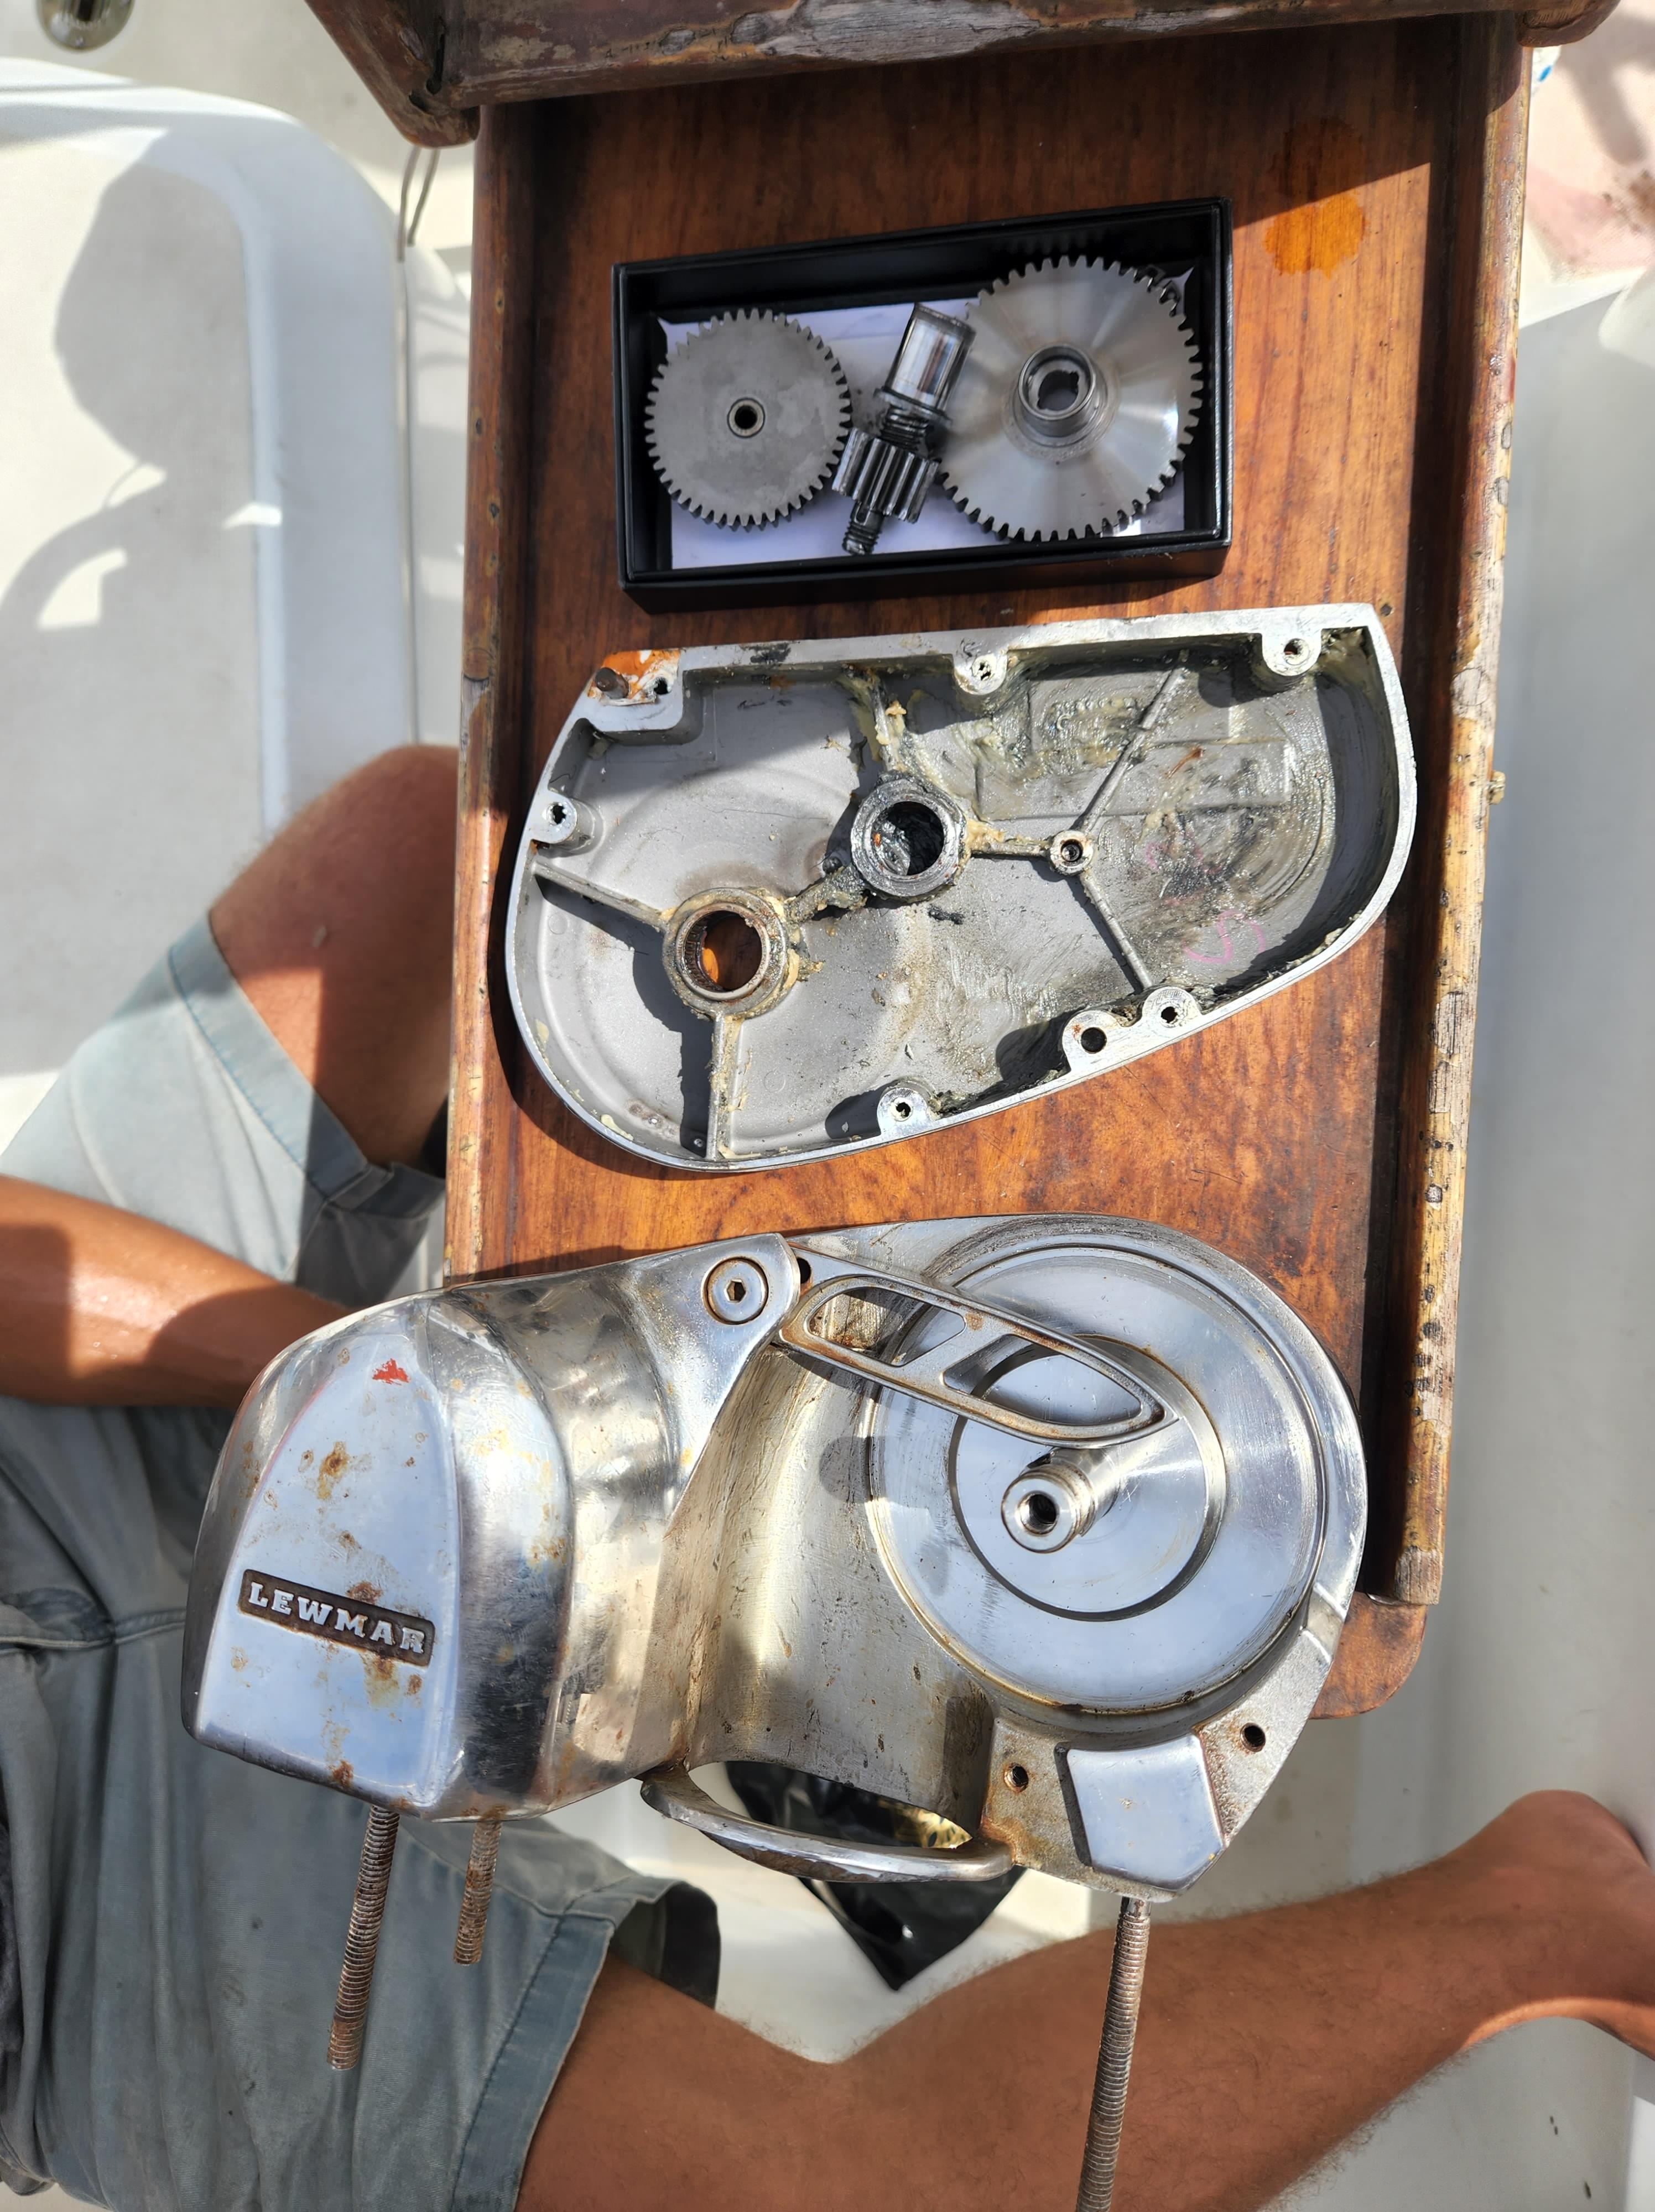
We didn't necessarily intend to spend a long time in Cartagena, and even less to go to a marina there when there is a protected anchorage really close to downtown and the gorgeous historic center. Yet, our windlass (the electric device that pulls up our anchor at the press of a button) decided otherwise. Indeed, the anchorage in Cartagena is protected most of the time but there are also sudden winds called 'culo de pollo' - literally chicken ass in reference to the shape it gives to palm trees apparently! - that can occur without notice. In such instance, being able to quickly lift up anchor is a must. And anyway, we needed a dock to be able to repair the windlass itself. Dirk, the German guy we met in San Blas on the catamaran Moin had spoken highly of Manzanillo marina club as a place both cheap to stay and well located and serviced for boat repairs and maintenance. So there we went and indeed, it was. We attended our urgent repairs like the jib and the windlass, but also used the opportunity to get help with a few projects that were on the list for a while, in the meantime advancing other projects on our own. All in all, we spent a month in Manzanillo marina. An intense month of work and repairs that worn us out a little, especially when there was fiberglass work on the boat. Here is a glimpse into the not-so-glamourous part of cruising... As Yalçın puts it, you have to take care of the boat on land so that the boat takes care of you at sea.
Project 1: the windlass
The windlass gave its last breath after turning very slowly, drawing a lot of current (100A or so). Neither up nor down was working anymore. There was no current flowing either. The manual operation proved impossible too, the whole mechanism was jammed. This was after we pulled the anchor one last time to reposition the boat in the same anchorage we just arrived. Marie dropped the anchor by hand the second time and pulling it up was going to be my task.
Trying to avoid the potentially back breaking job of retrieving the anchor, I opened the windlass side cover to investigate. Broken metal washers greeted me, not a good sign. I watched a couple of YouTube videos that showed how this unit is put together, Lewmar pro series 1000h as a reference. I decided that a piece was broken inside, seizing the unit, and the excessive current just burnt the electric motor. A very inconvenient and expensive failure...
I decided that there's nothing I can do without more tools after spending hours, maybe a full day. Do you know how hard it can be to take off a snap ring without proper pliers? I learnt the hard way...
Few days after we arrived to Cartagena, I took off the windlass from the bow and we put it on a bench. The electric motor was surprisingly functioning. I didn't ask why it wasn't working a few days ago. The rest however was a mess.
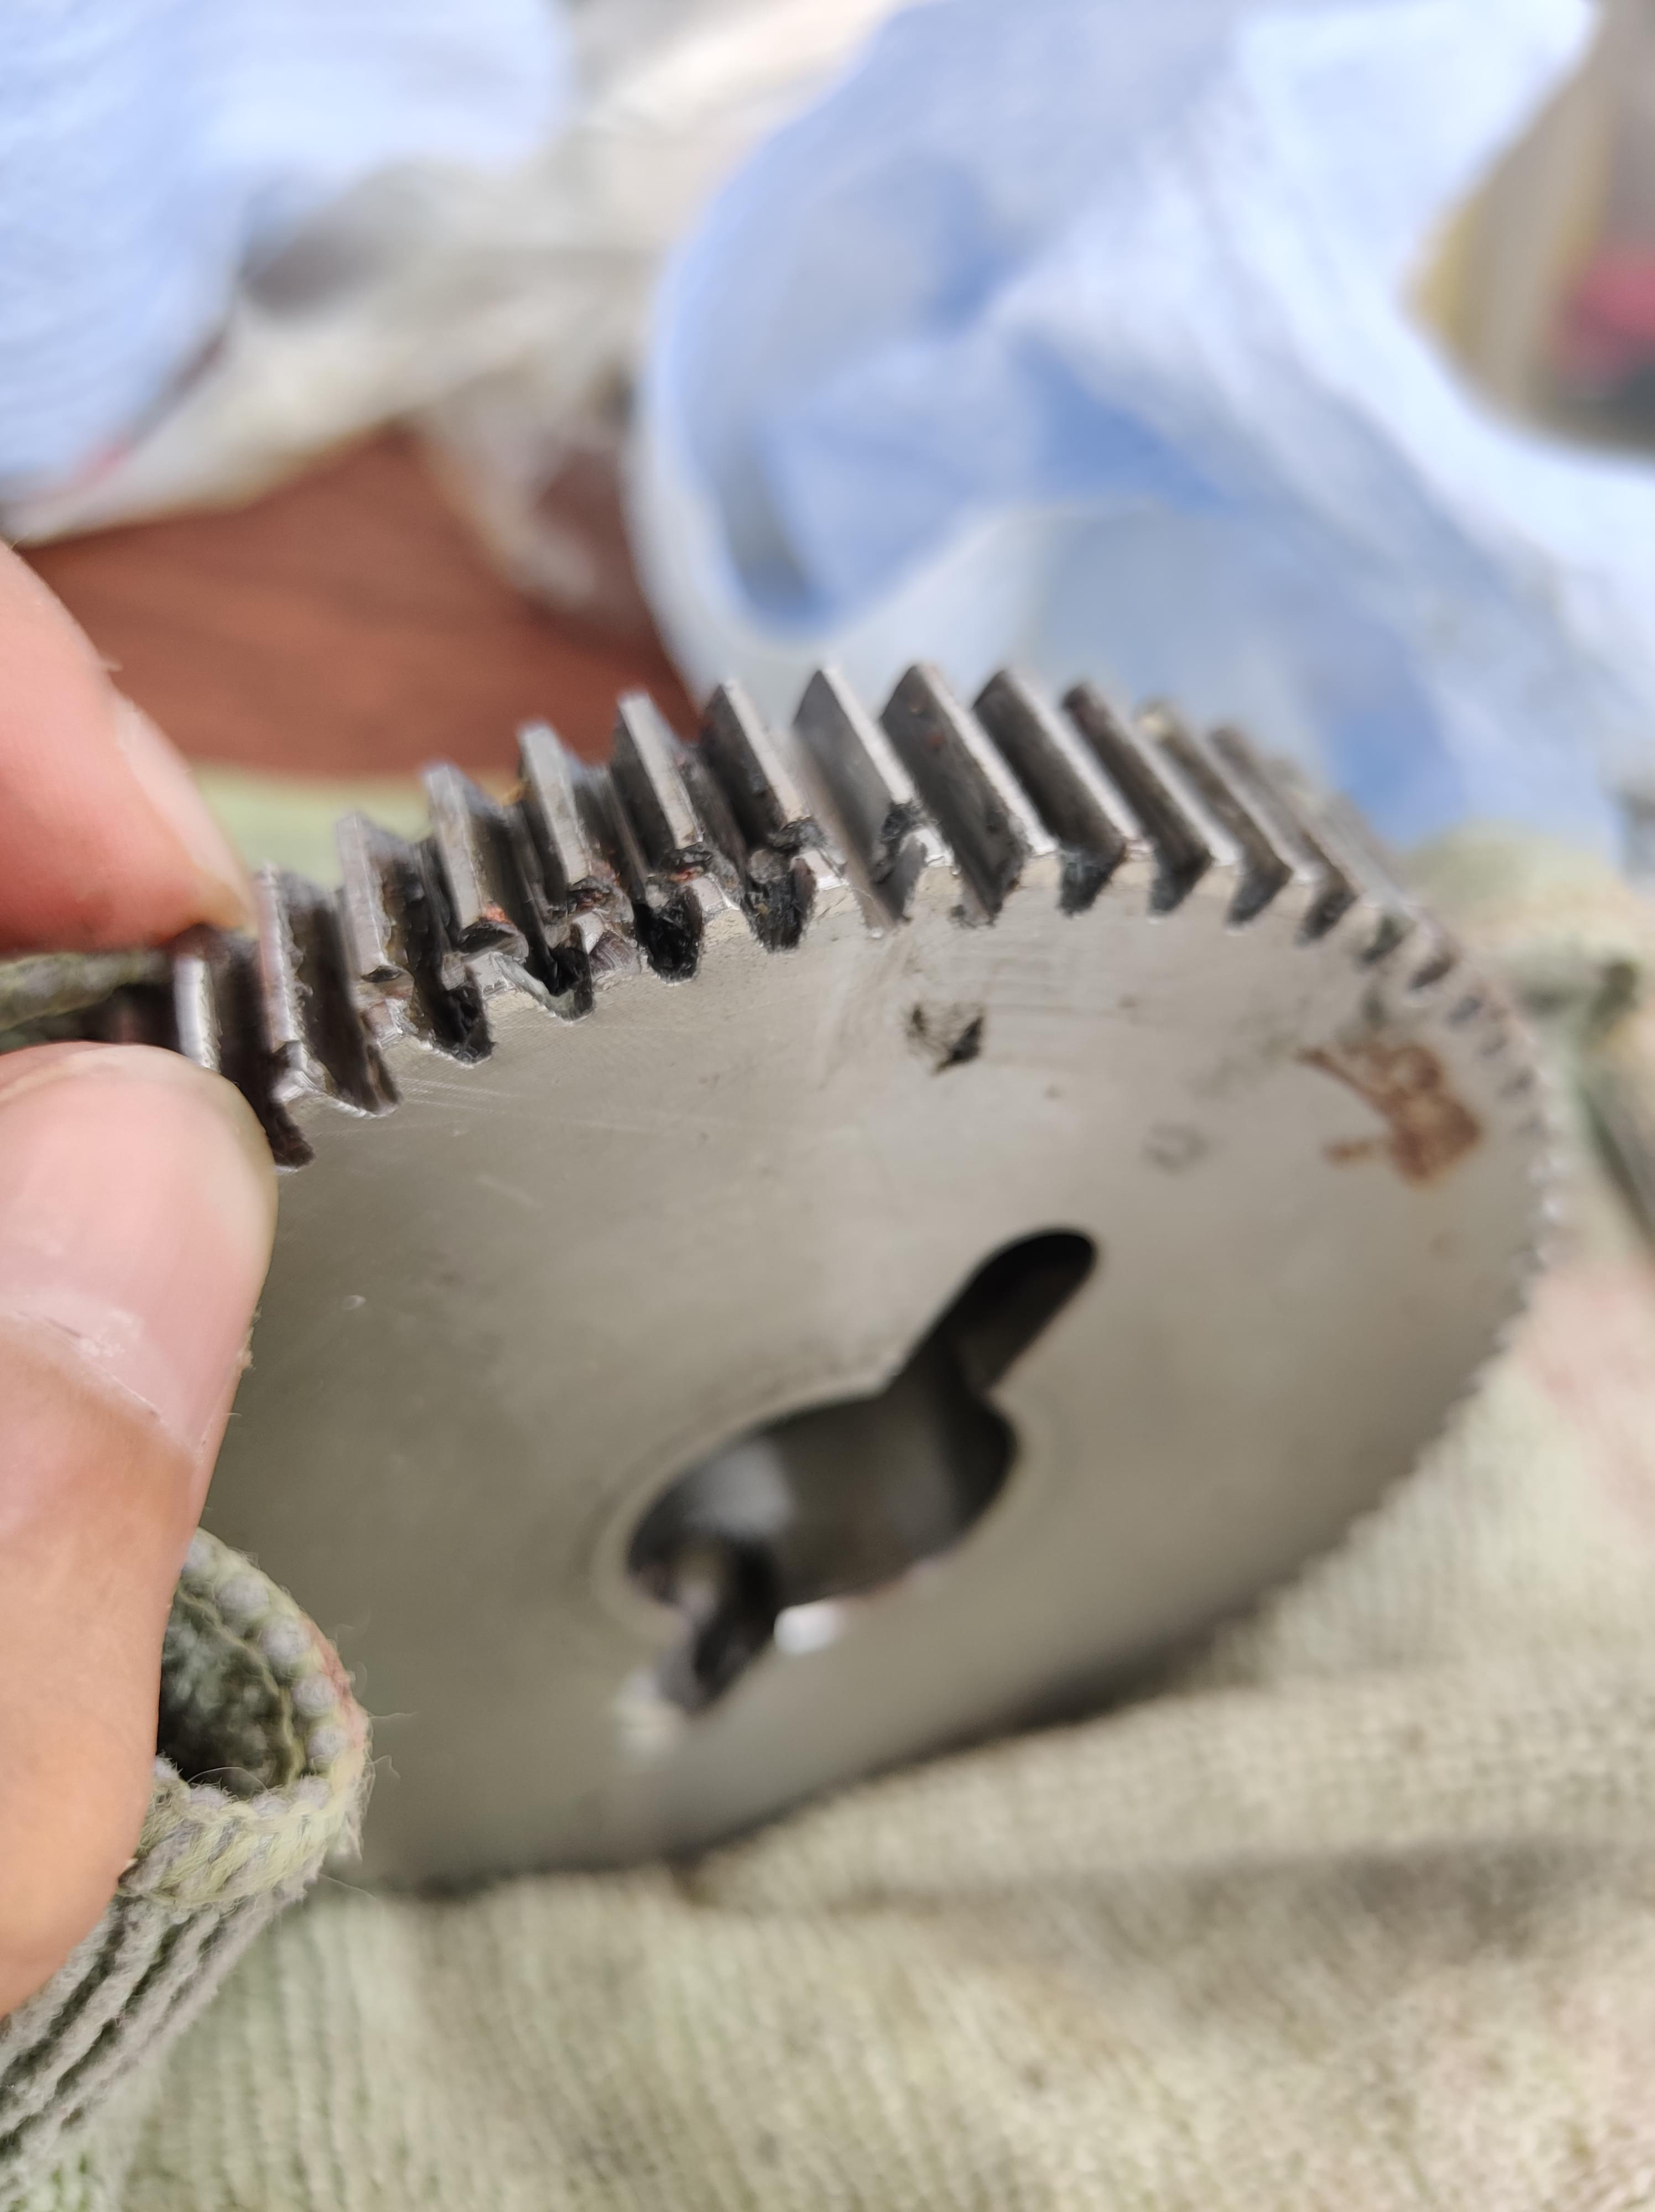
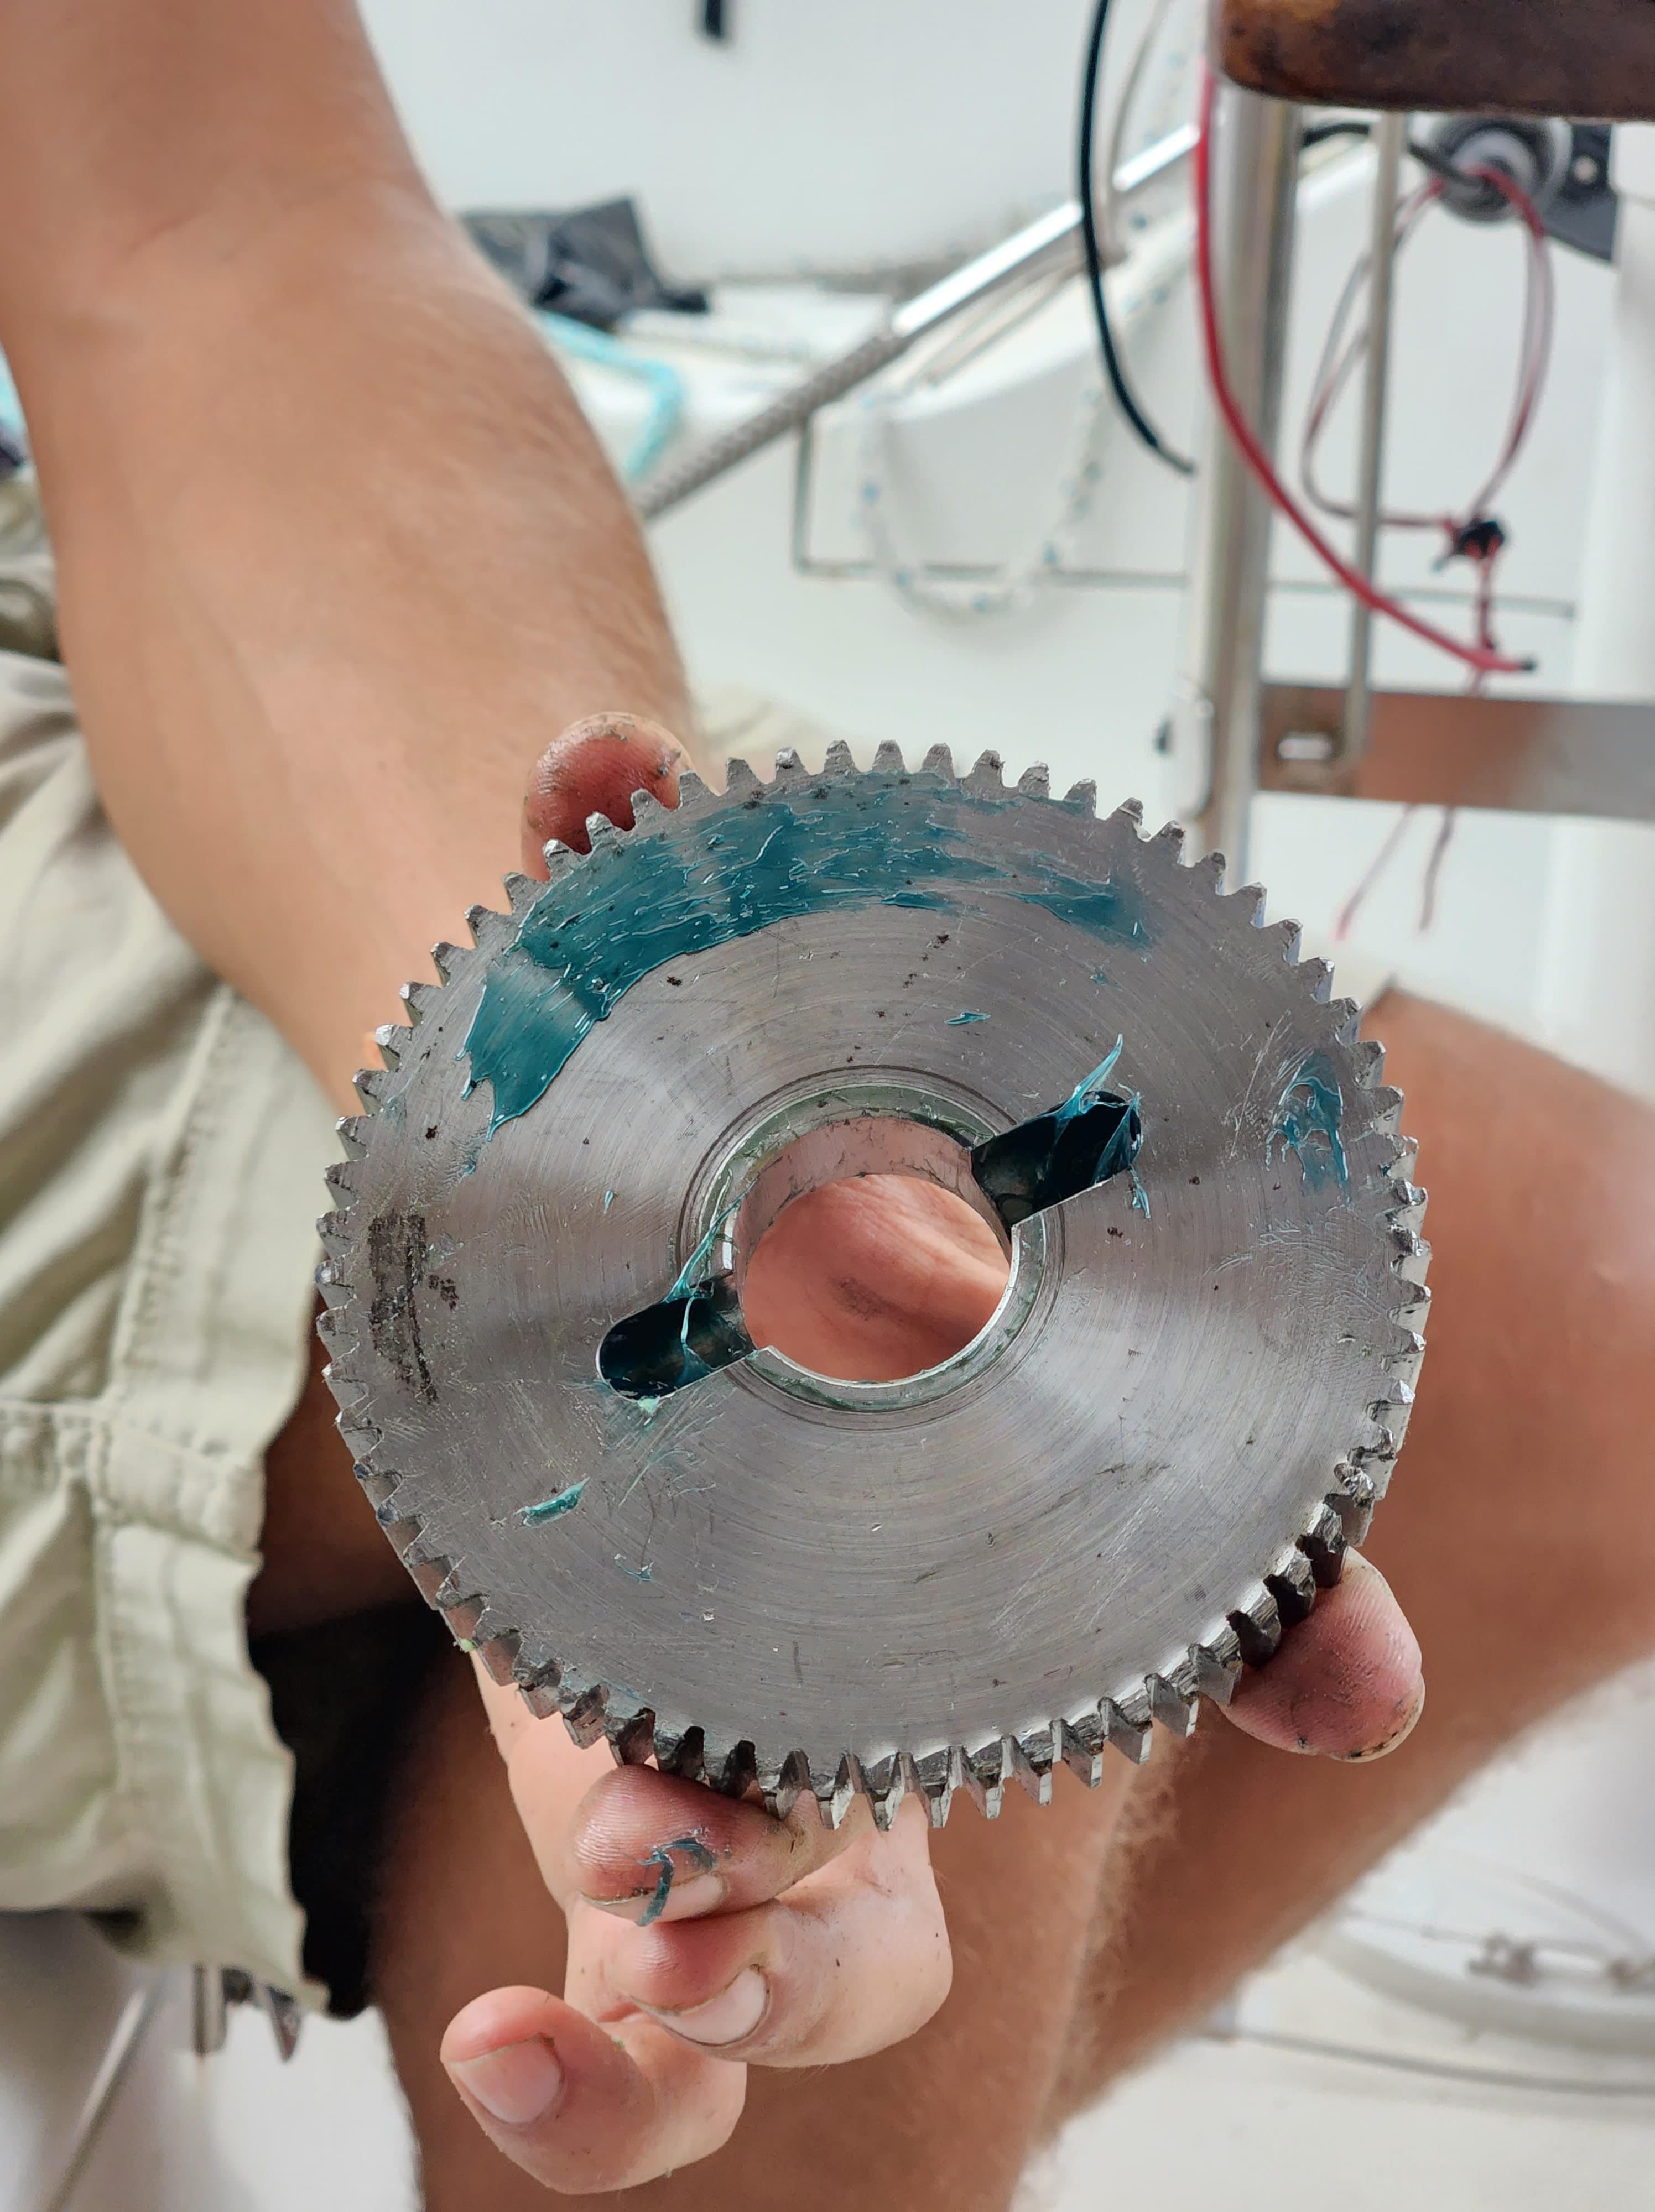
There are a set of gears inside the windlass casing, increasing and transferring the force from the electric motor to the gypsy, the rotating part outside the windlass case that is shaped to grab the chain. In order to accommodate the bi-directional movement of the windlass but also to make sure the it holds the chain tight when there's force on it, the intermediate gears are put together in a very particular way. Our intermediate gear assembly had a broken washer-like piece called a thrust-bearing, which allowed excessive movement of one of the gears on its shaft. This gear was no longer in full contact with the main gear, the last gear on the system with the greatest force. This misalignment eventually caused another piece, a spacer with a sharp edge, to come in contact with the main gear, damaging its teeth. The intermediate gear shaft was also in bad shape as the threads on it were all damaged in the process.
So where do we go from there? The main gear was still attached to the main shaft and it needed to come off. The gypsy should also come off. It was stuck though, very stuck. With Waldo's help, the mechanic in Manzanillo Marina Club, we put a gear puller on the gypsy and start loading it. Nope, it wasn't moving. A bit more force? Let's do it! Waldo politely handed the wrenches to me. He was uncomfortable, he did not want to be the person who breaks it. I carried on. It should just slide off, according to the video I watched and according to the diagram in the manual. Wrong!
So a bit more nitty gritty: On the main shaft, there's the gypsy, the friction cone, and the clutch nut. Gypsy is free to rotate on the shaft. It does so when the windlass is in free fall mode. If you want to deploy the anchor quickly, you loosen the clutch nut and gypsy is free to rotate with the anchor chain on it. This is something we never actually did. We never used the free fall method. Friction cone is coupled to the shaft with two little pins. And there's the clutch nut at the end which presses the friction cone onto the gypsy to couple it to the shaft. We took off the clutch nut easily and normally the little pins should just fall. We should be able to shake and loosen the cone, take it off, and then the gypsy should follow too. Unfortunately, the little pins were corroded and jammed. It's understandable since all this is outside of the windlass, exposed to salt and water. When we were pulling the gypsy off with the gear puller, we were also pulling the cone and the pins with it. The cone is okay to pull but the pins hit the threads on which the clutch nut threads on. We finally took out the gypsy but the threads on the main shaft was also damaged in the process. Damn! One more thing to deal with...
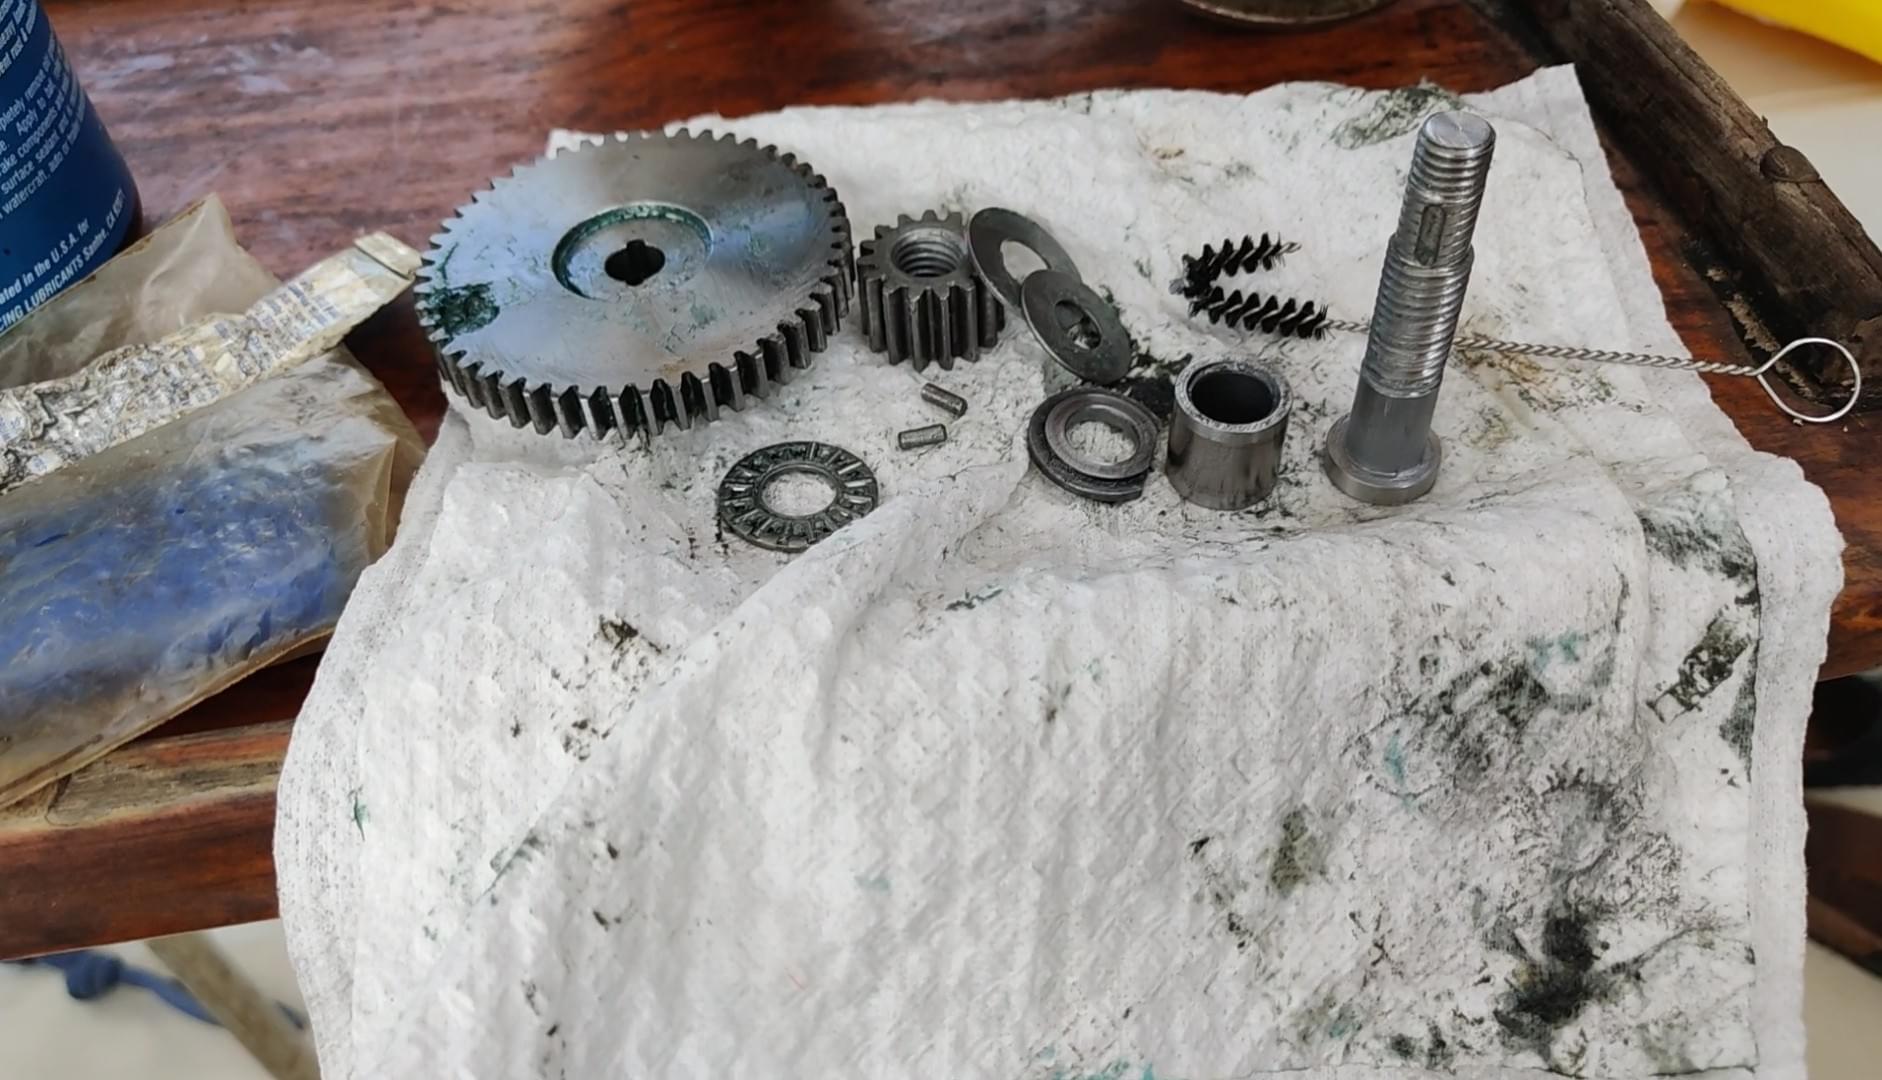
Now that the gypsy was off, we tried to get the main gear off but it also was pretty stuck. The readily available 3 arm gear puller was too big to hold the gear, we needed a small two leg gear puller. Not an easy find. The next day, Waldo drove us in town from machine shop to machine shop to get quotes on fixing the main gear, the intermediate gear assembly and we were looking for someone with an appropriate gear puller.
The trip with Waldo was amazing. He is a nice, happy guy with a big smile and we were amazed by how helpful he was. It was quite a bit of a drive, and we chatted about Cartagena (mainly Marie). We found the gear puller in a steel foundry, took a quote for remaking the little shaft for the intermediate gear and came back. Nobody wanted to fix the main gear, they said they can make a new one but it would be expensive. Some material was gone and welding just was not an option. At this point our options were to file the teeth and live with slightly less strong gear or order the new gear set from Lewmar (and figure out how to get it delivered). We went with the first option as it was cheaper and we thought it would be faster.
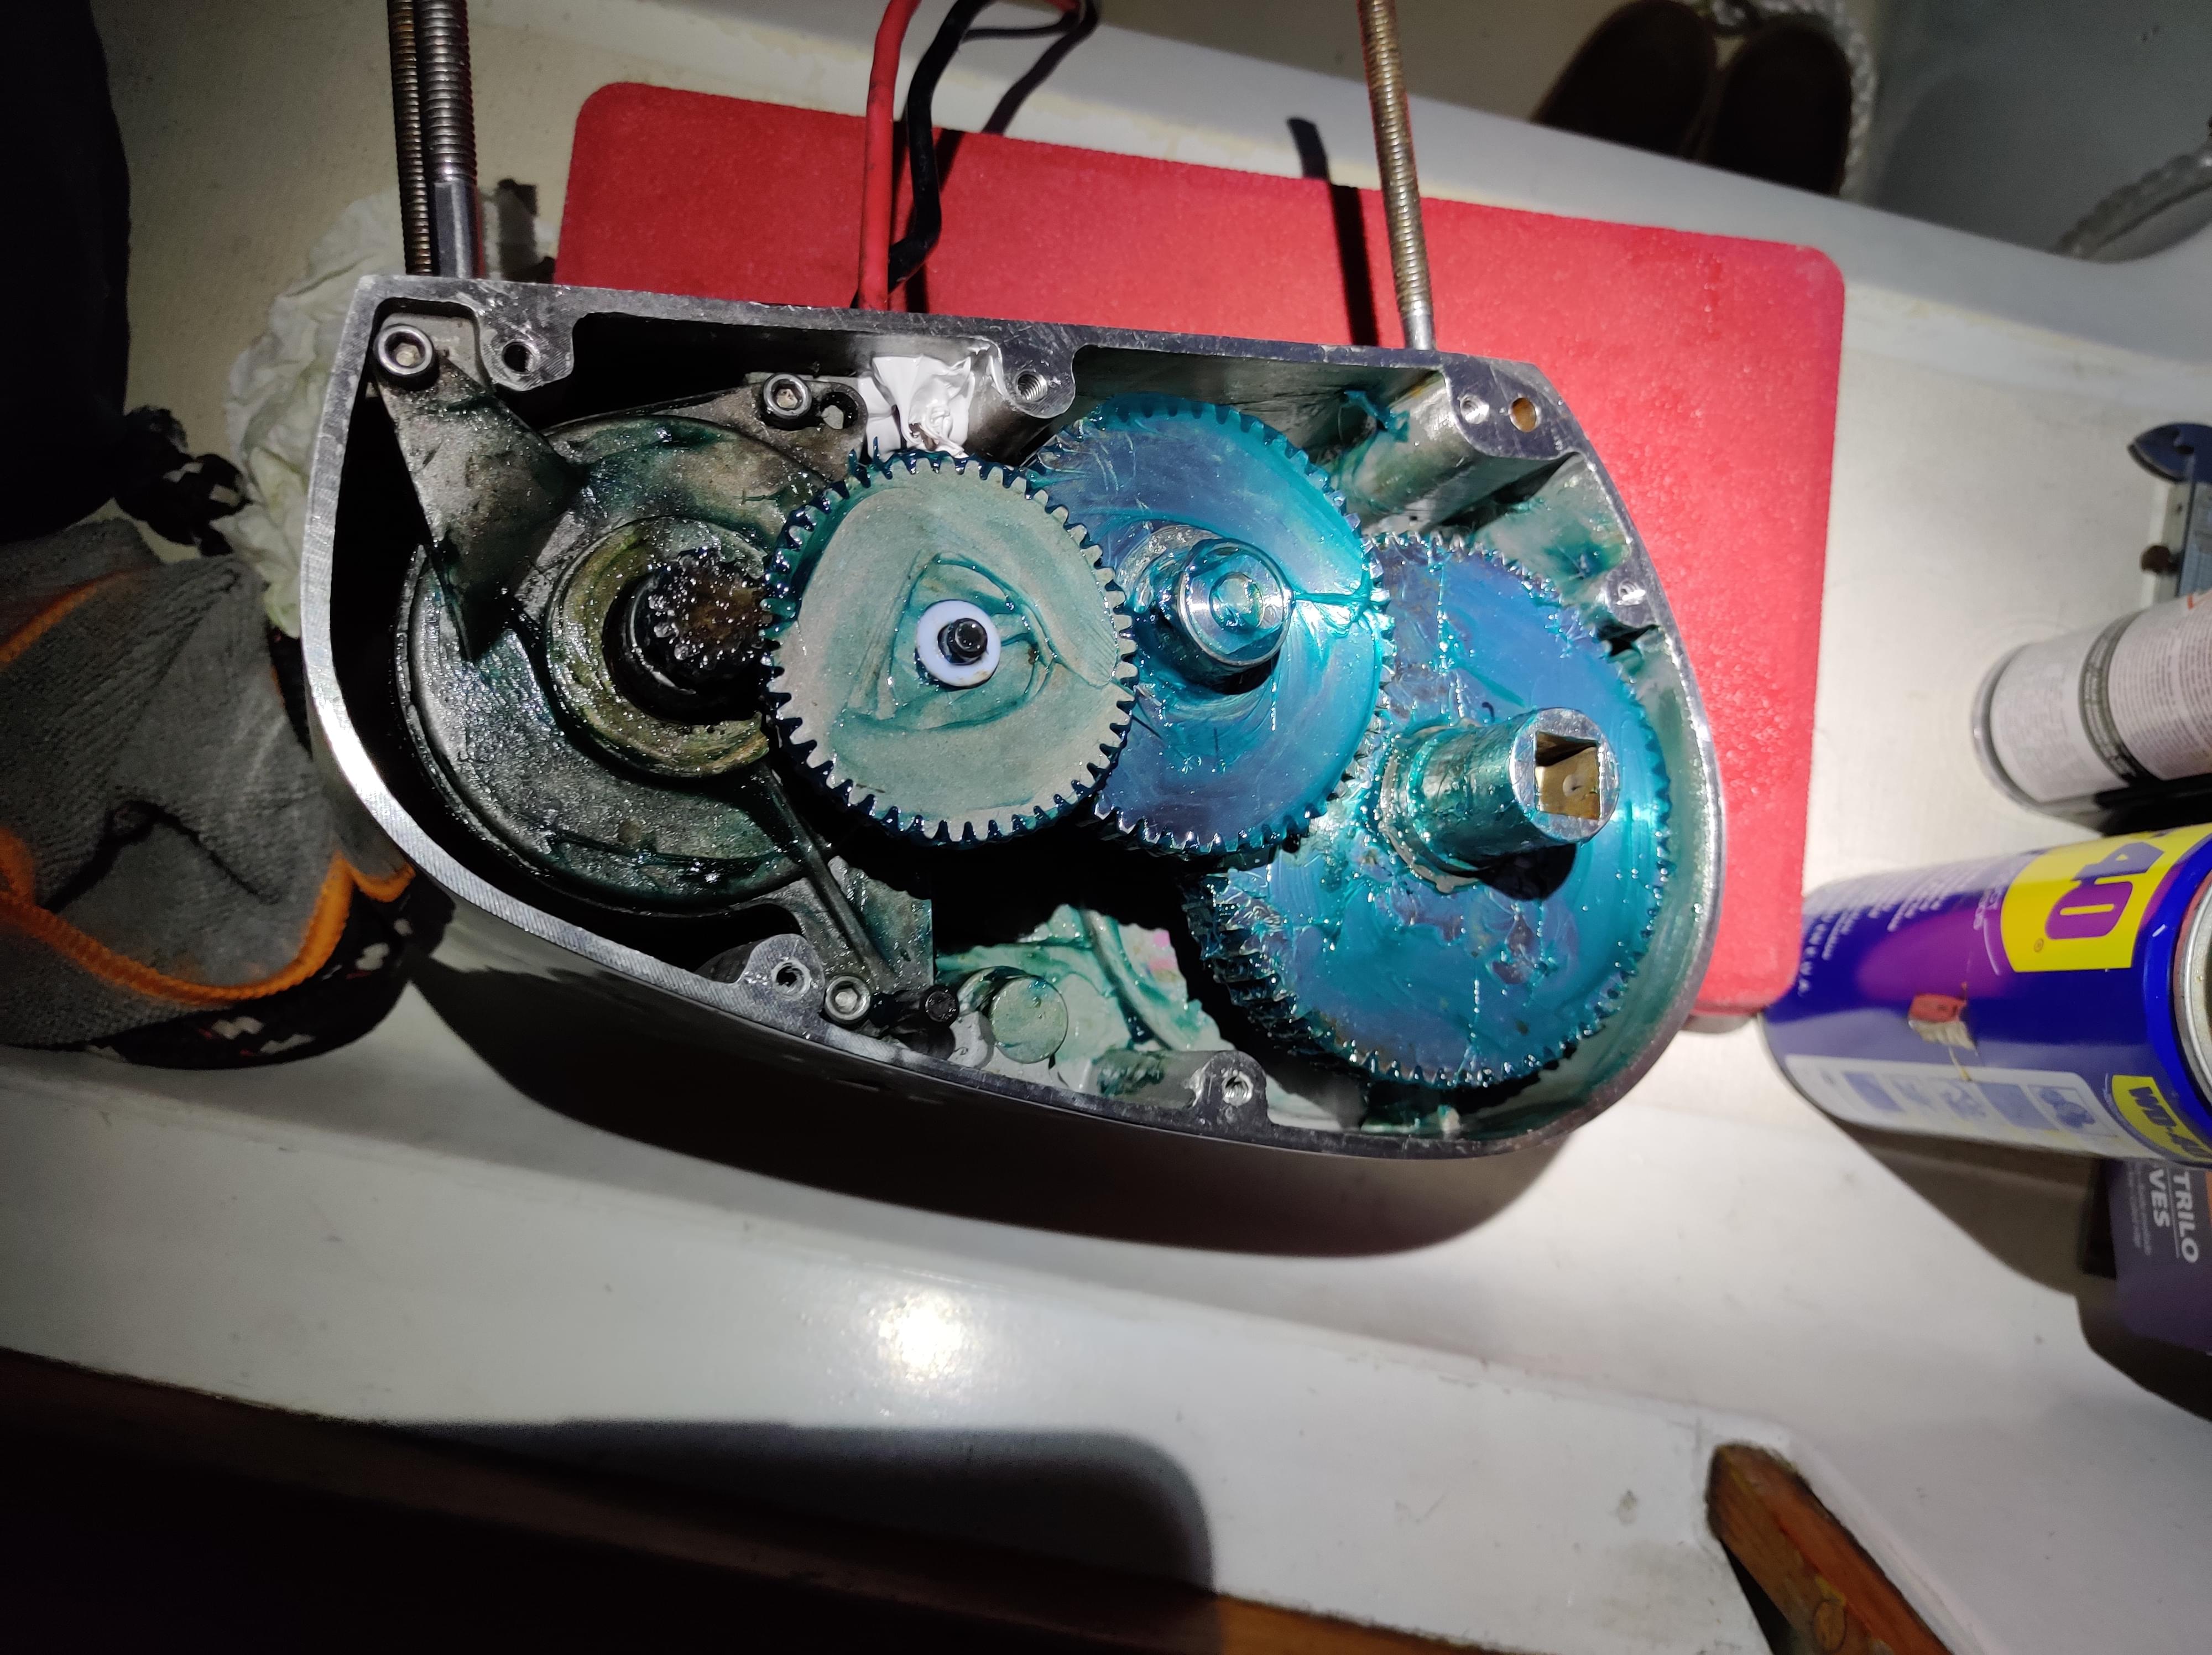
The whole project took about 2 weeks after that point. $5 for the quick use of the gear puller in the foundry, $80 for a new little piece to be manufactured, $4 or so for the thrust bearing that broke and caused all these problems in the first place, and a lot of cleaning, filing, sanding, greasing etc. The pieces on the main shaft (the main gear, the gypsy, the cone) were getting jammed on the shaft. To put them together easily (and to be able to take them off later) I sanded the shaft which took a loooong time. The threads of the clutch nut also needed to be cleaned. The new Dremel bit we ordered from Amazon helped a lot with cleaning the threads, I recommend it. It's called "rotary thread - thread chaser". And also, just get a snap ring pliers even if you don't think you need one.
I put the whole thing together with a lot of lithium grease and sealed the side cover with 3m 4000 as best as I can. This seal is crucial to protect the internals as the windlass is very exposed at the bow. The lessons I learnt from this project: Regularly clean and regrease the gypsy and the friction cone, which are outside the windlass case. Also, operate the windlass in free fall mode from time to time to prevent the gypsy from seizing onto the shaft. Open the side cover to check the internals maybe bi-annually, clean and grease inside. And the last but not least, carry a snap ring pliers even if you don't think you have snap rings...
Project 2: rebuild the vent box
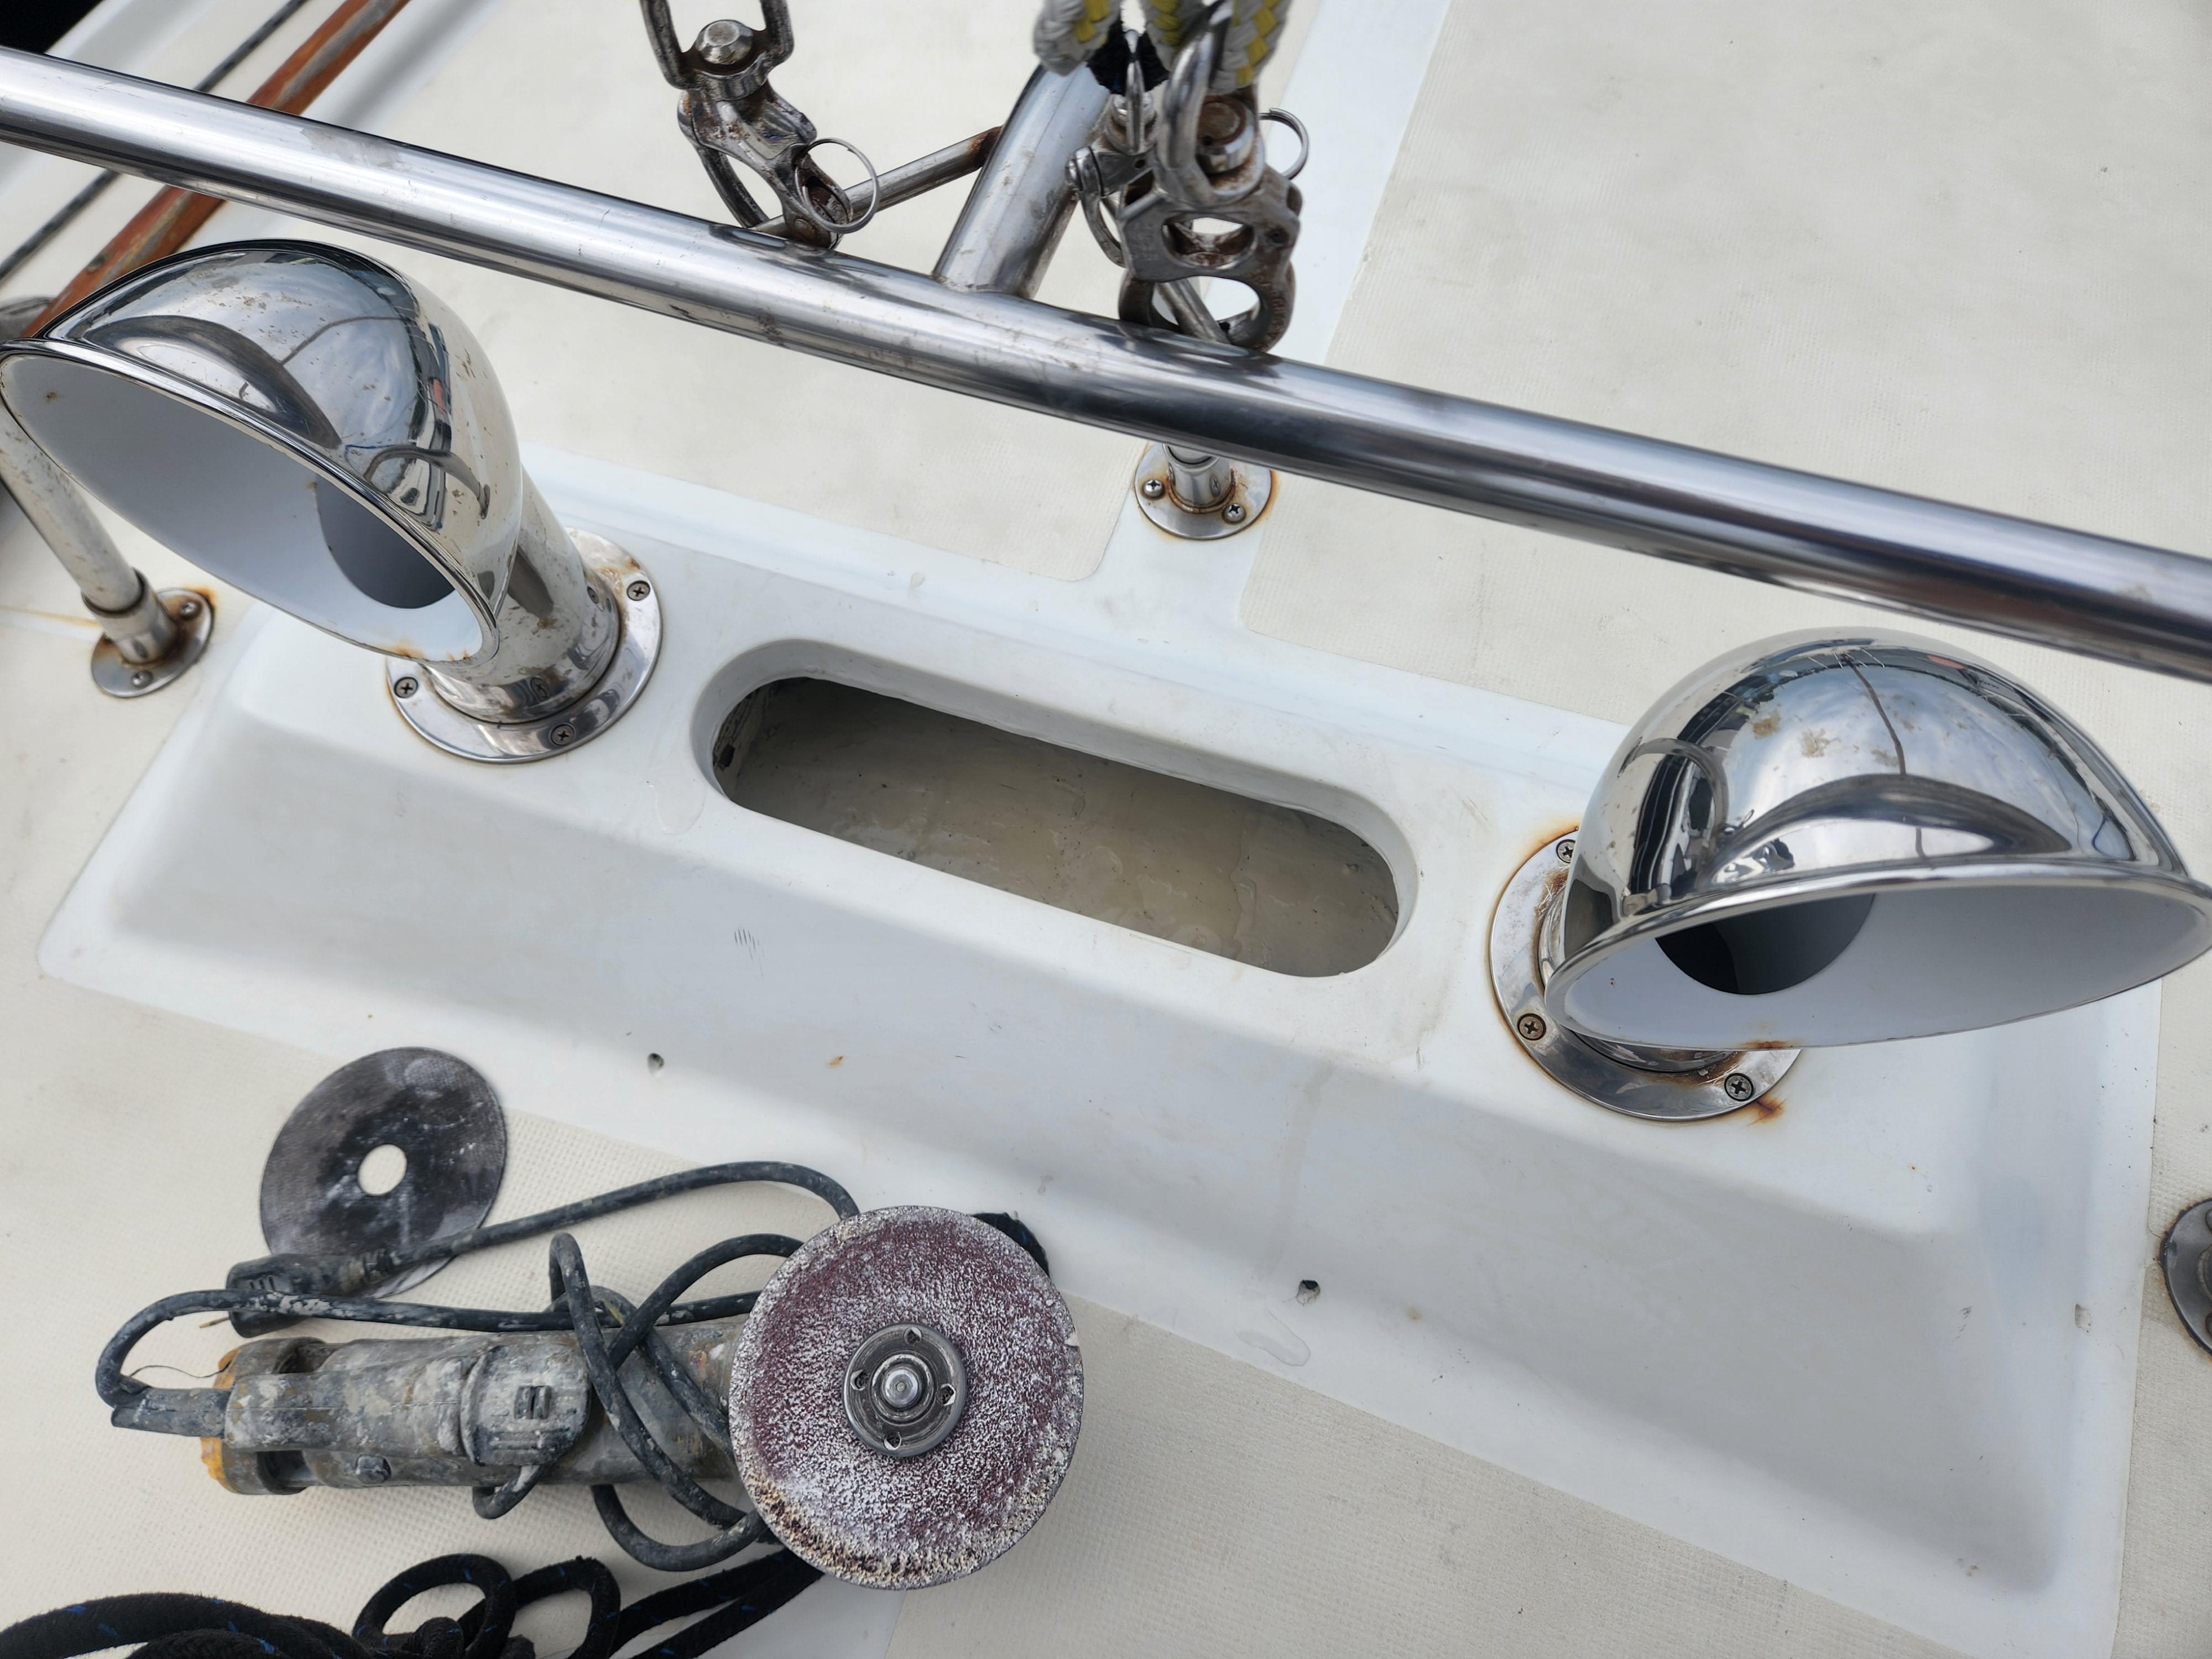
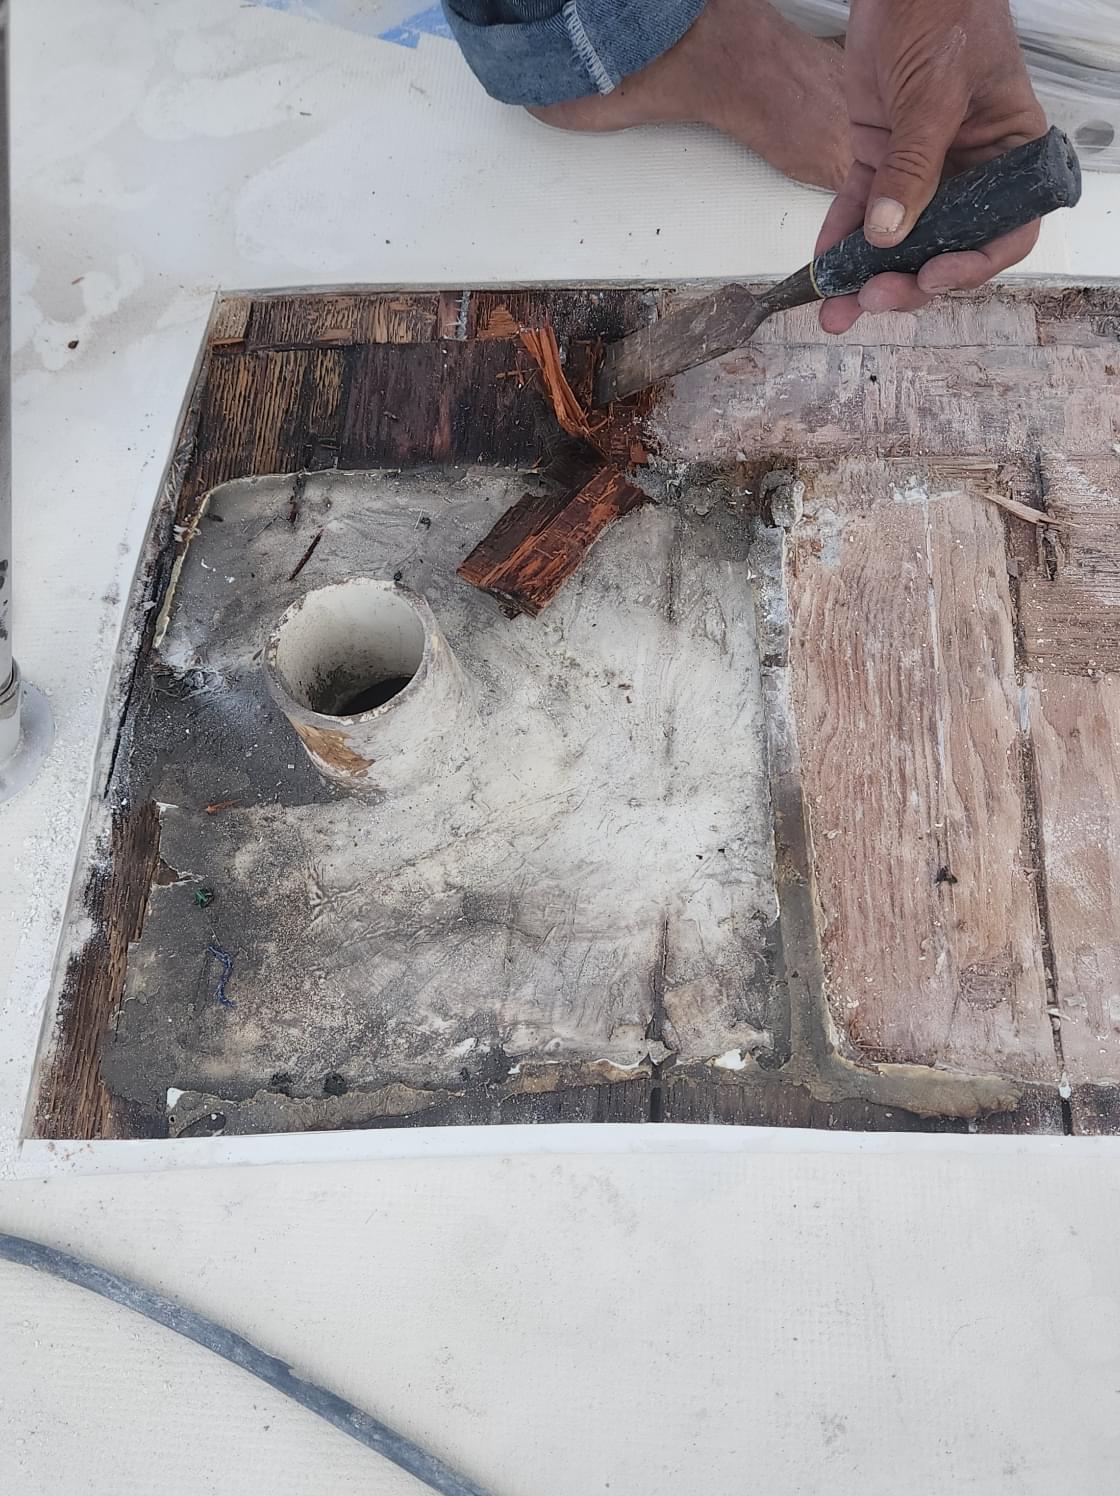
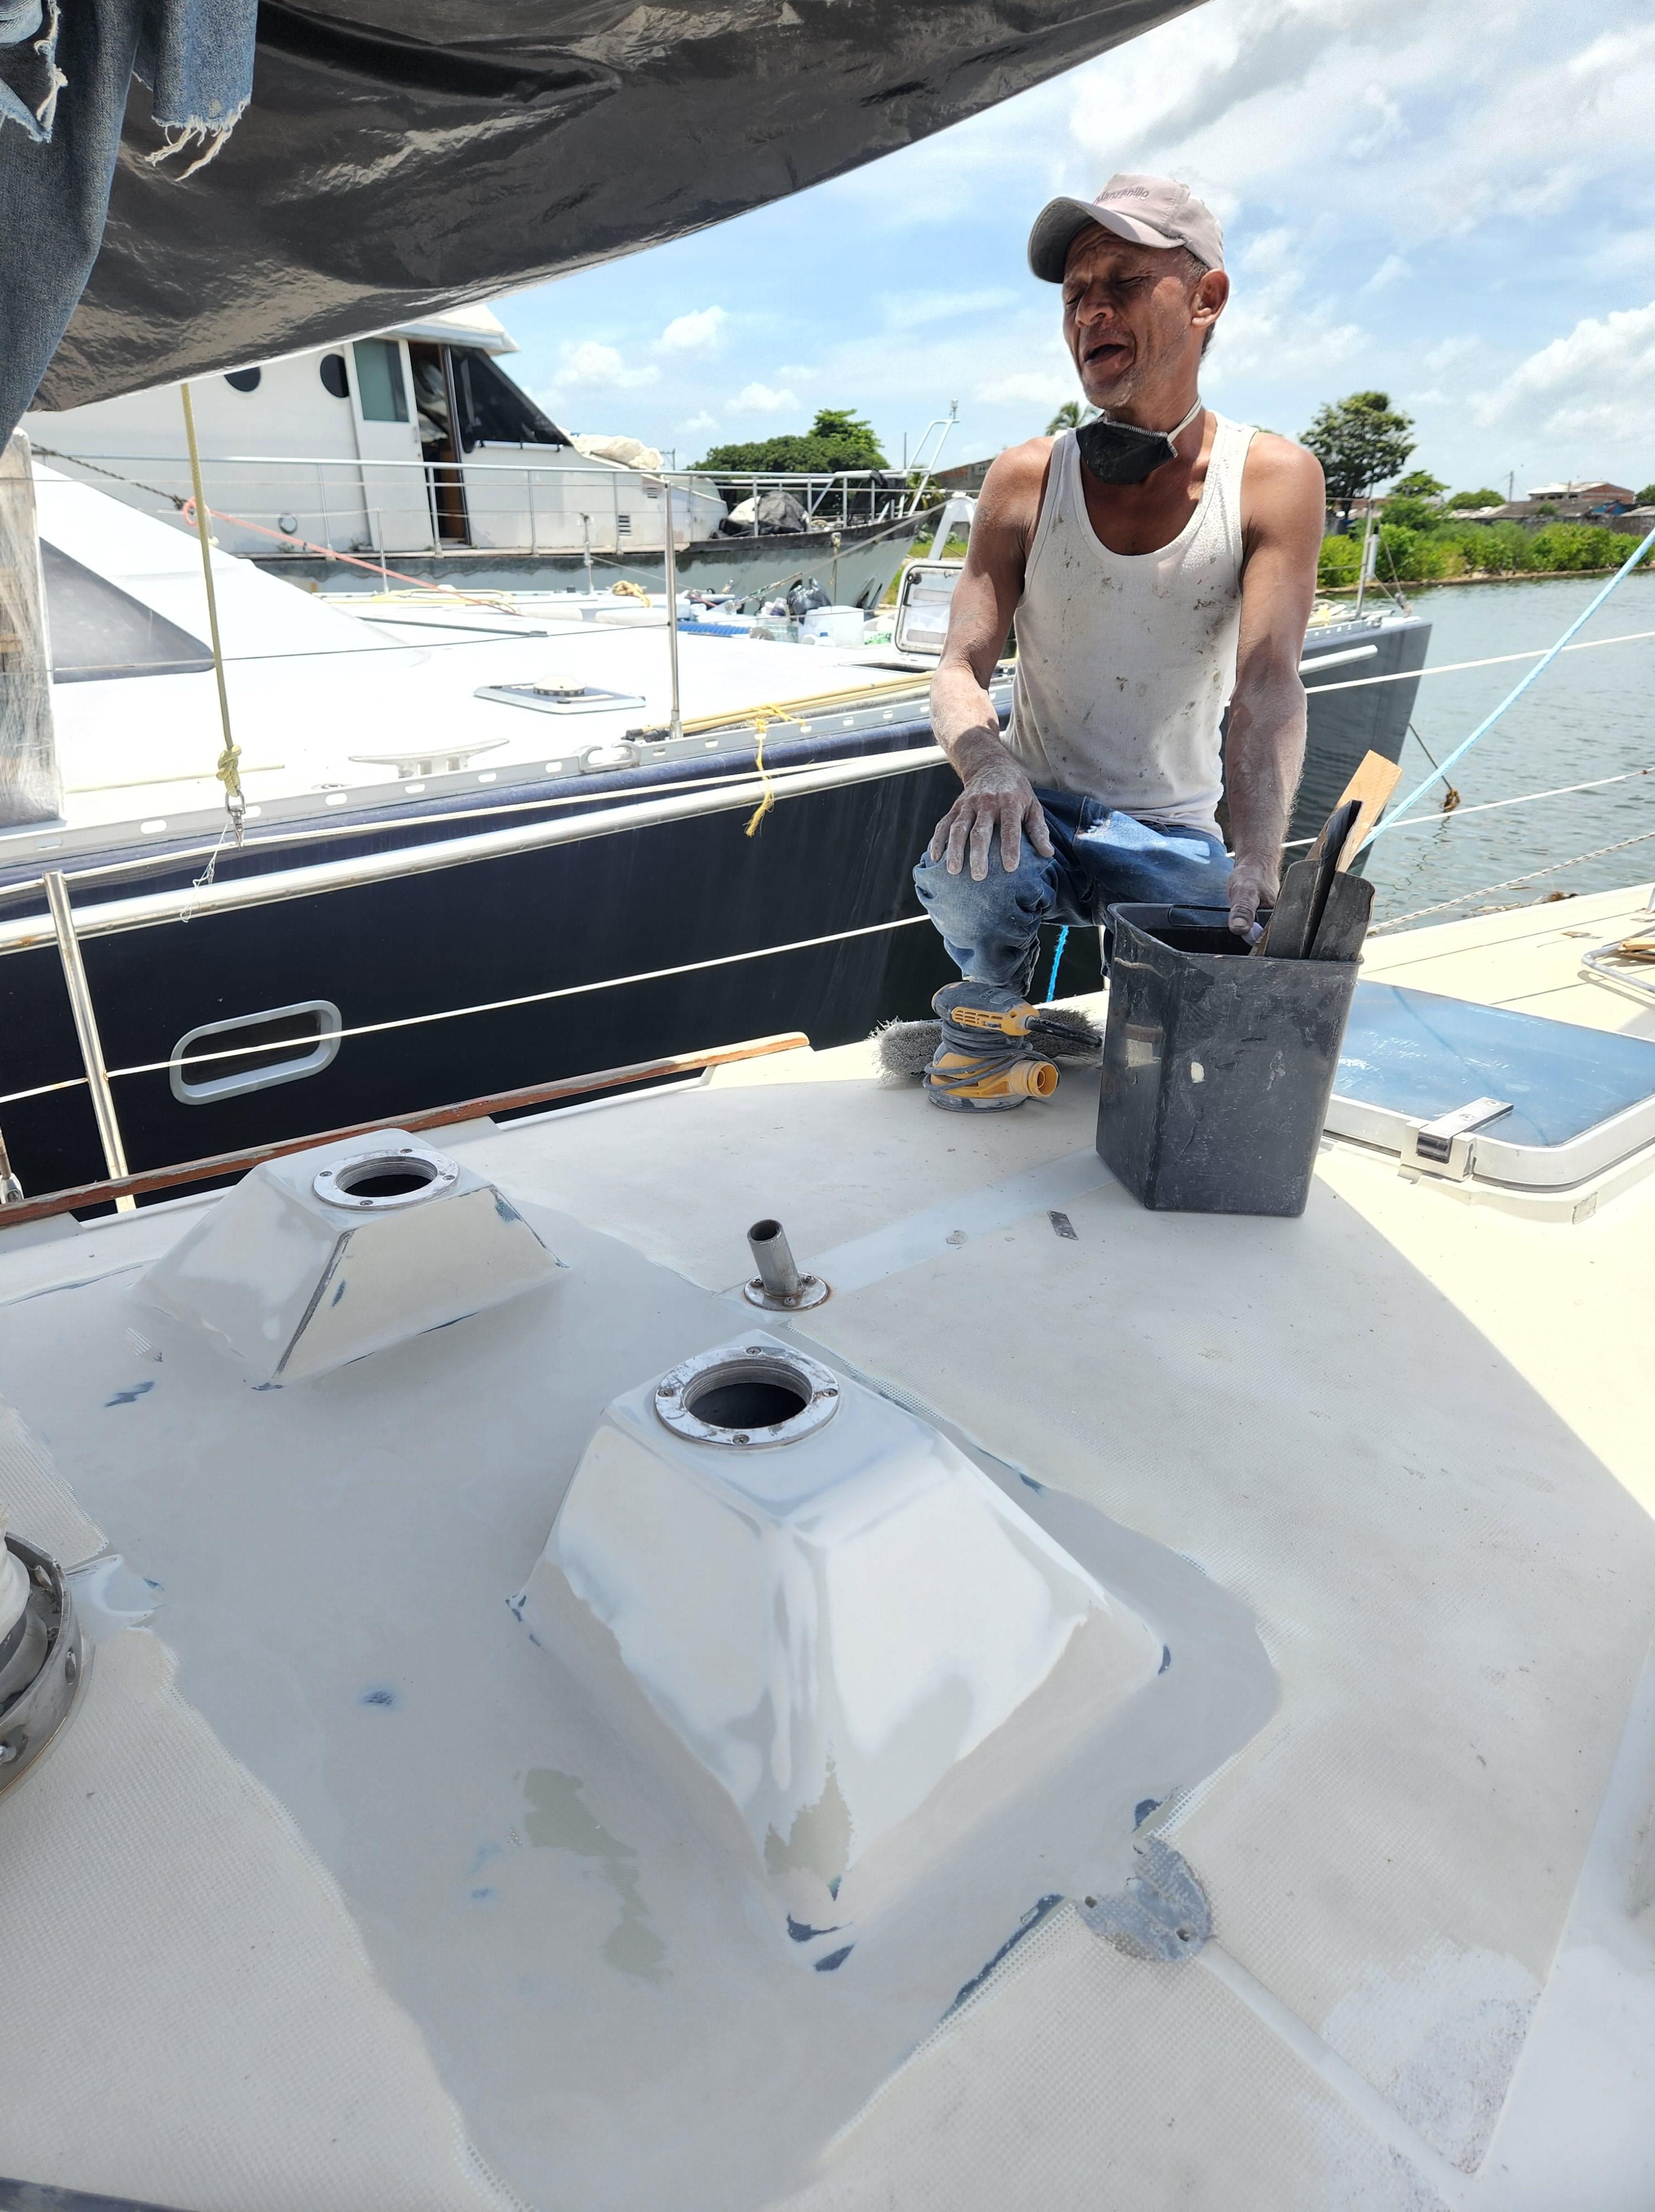
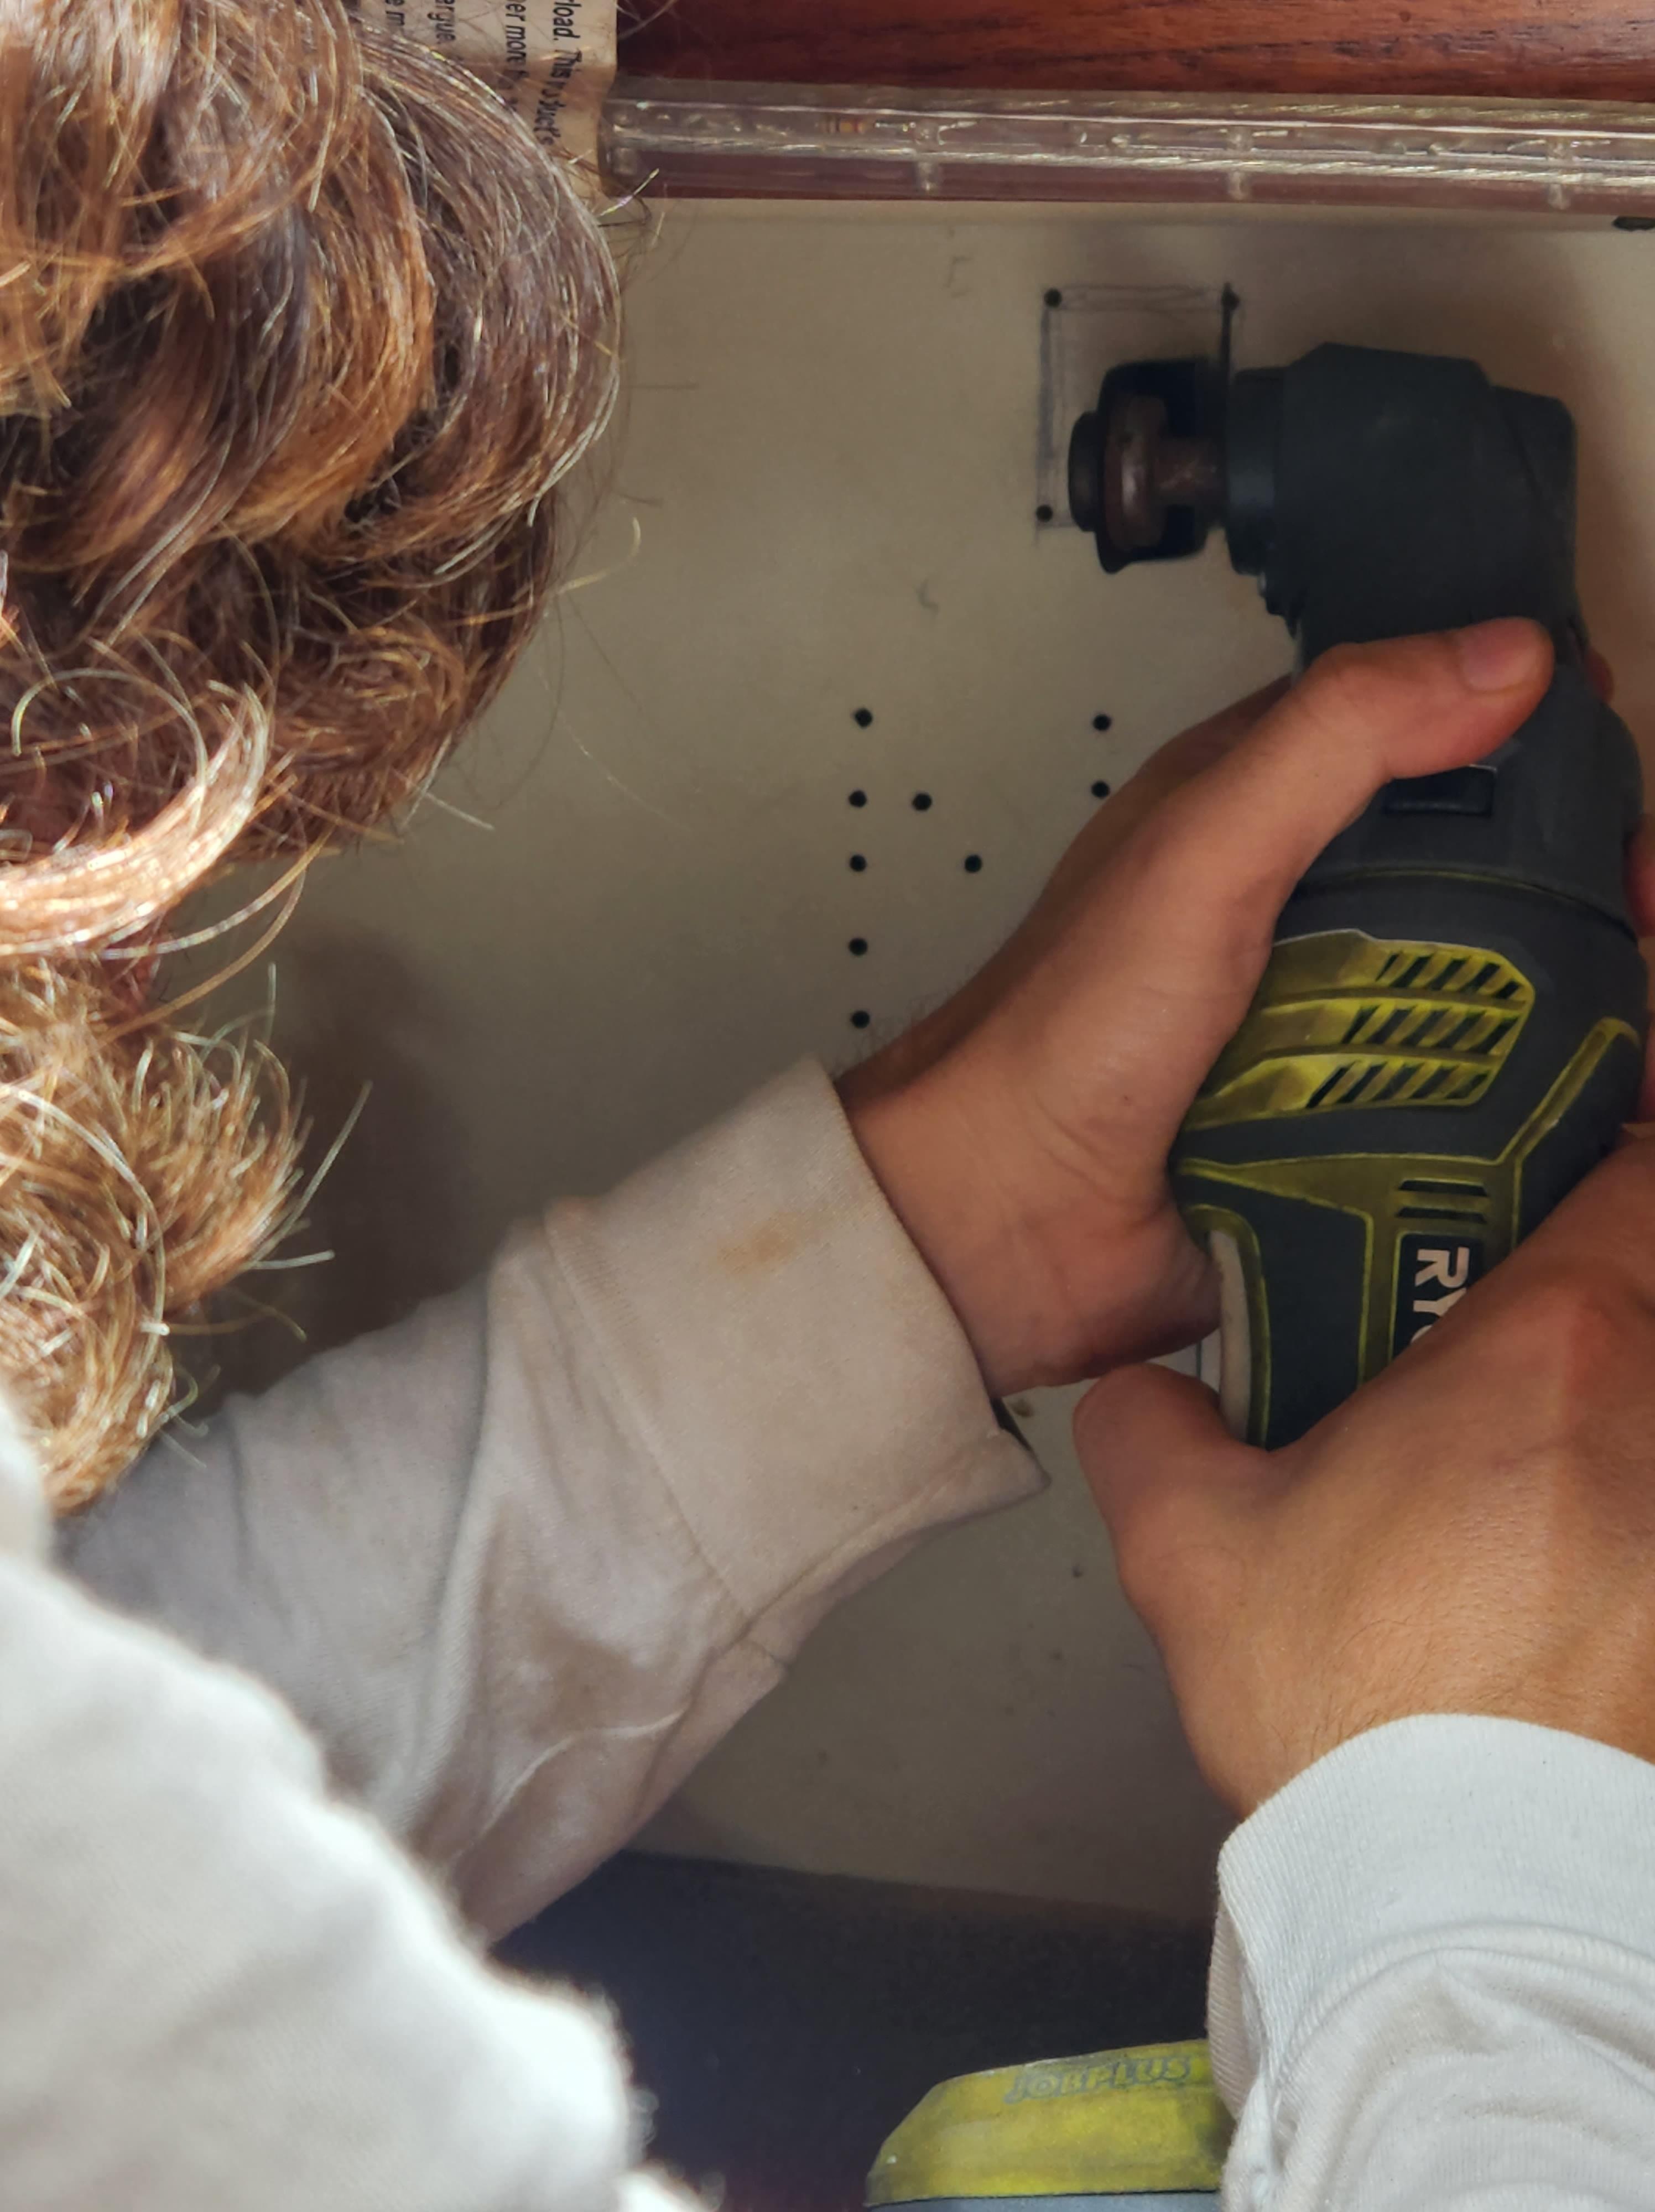
A problem we discovered as we reached heavy rain places, was that we had a leak around the vent boxes on deck in front of the mast. We had given a go to investigation and repairs in Costa Rica without success to end up realizing that the vent box was simply poorly built exposing some of the wood core that is sandwiched between the two layers of thick fiberglass that we see on the outside and under the ceiling liner on the inside. From this opening, the water travelled inside and exited in the cabin in a non negligible quantity when it was pouring outside. We had put out the problem for a while now as the repair wasn't that straight forward. The plywood in the sandwich of fiberglass is structural and simply closing the opening could trap humidity and lead to rotten wood and ultimately a weaker deck. When you start talking structural, you get worried sailors. At least, we were... It seemed likely the wood needed to dry or be removed altogether but what was unclear was the extent of the humidity. And on top of that wood, was a fiberglass box, which we decided we'd remove. We had had some workers from the yard do a small fiberglass job by the anchor locker and were quite satisfied how it turned out and how much it cost, so we decided it was the time and place to finally tackle our deck problems. After sorting out the paperwork, on a Monday morning, El Monito showed up and started opening our vent box with an angle grinder.
It was a little nerve-wracking to see our boat being somewhat chopped off, but we also realized that trying to do it ourselves would have been a nightmare. El Monito was cutting with confidence where we would have had second thoughts and doubts at every step. Around noon, the box was off and we were opening the decks and discovering soaked wood under. It was to be expected but kind of bad news at the same time. The worker left for lunch buying us time to decide how much more to open. We eventually went for opening more and removing the vent boxes after getting a quote for the new job. El Monito diligently grinded and sanded all the bad wood away down to the lower fiberglass, which turned out to be quite thin, almost only for insulating the wood it looked like.
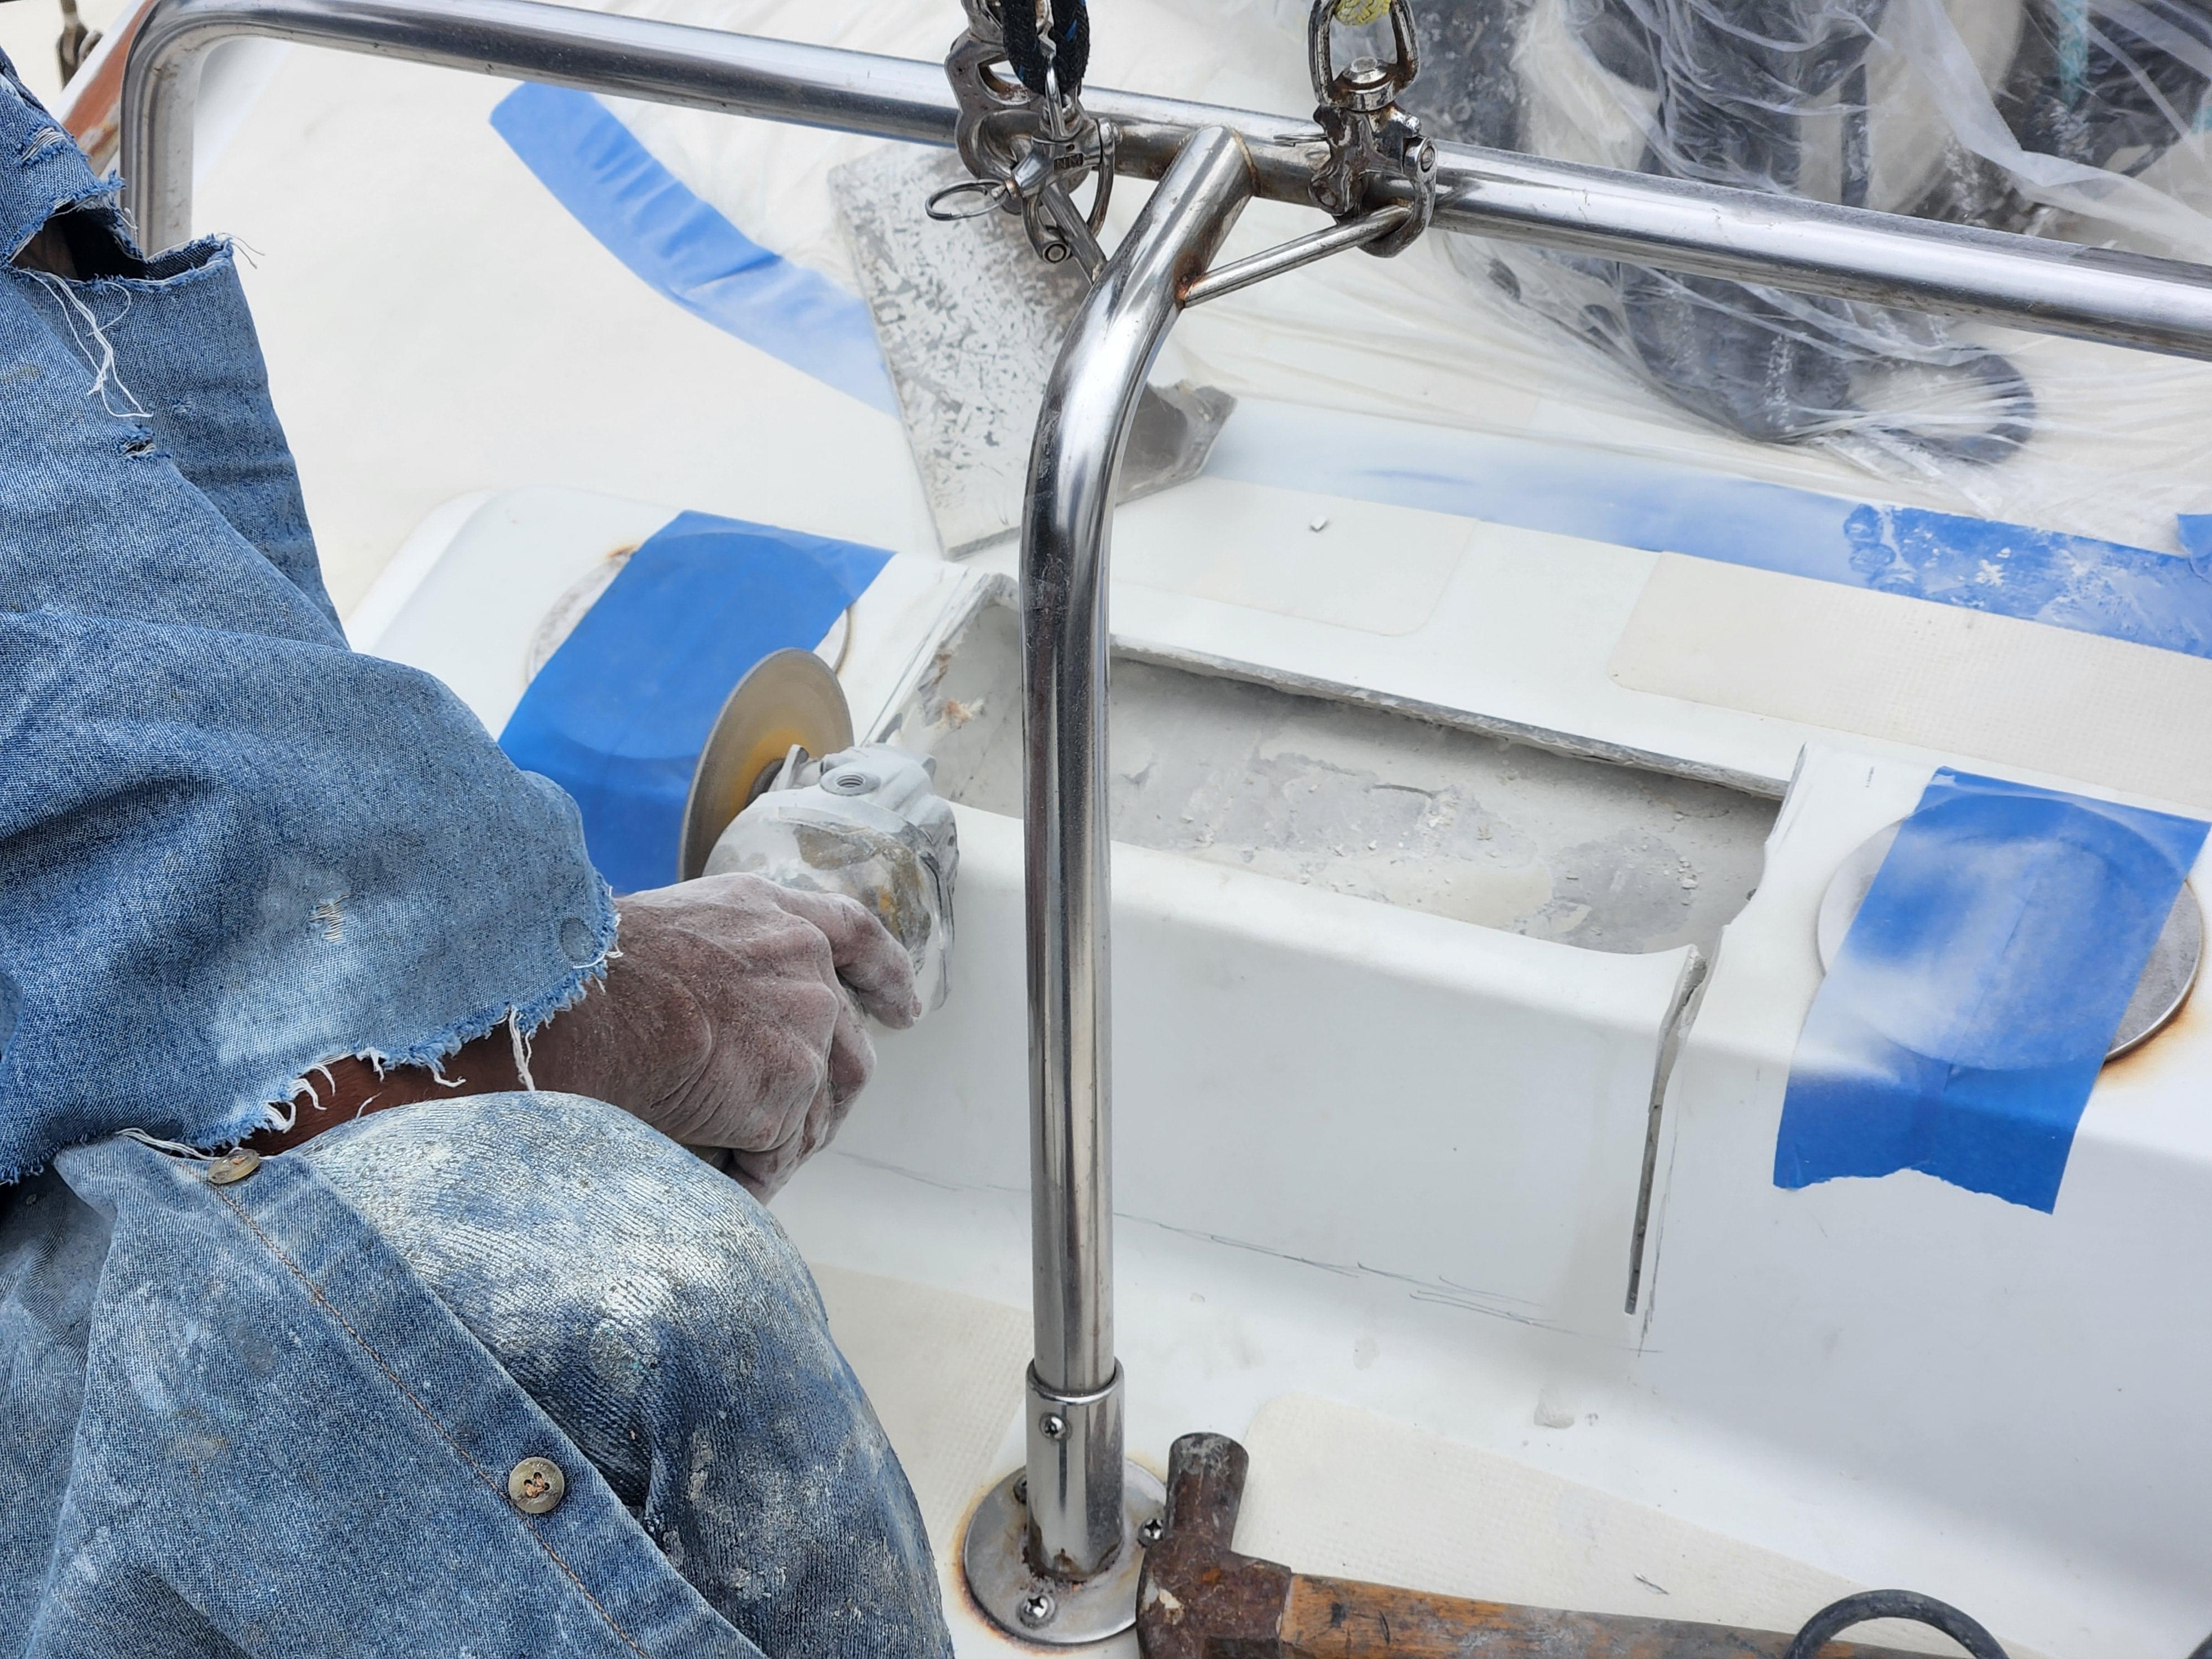
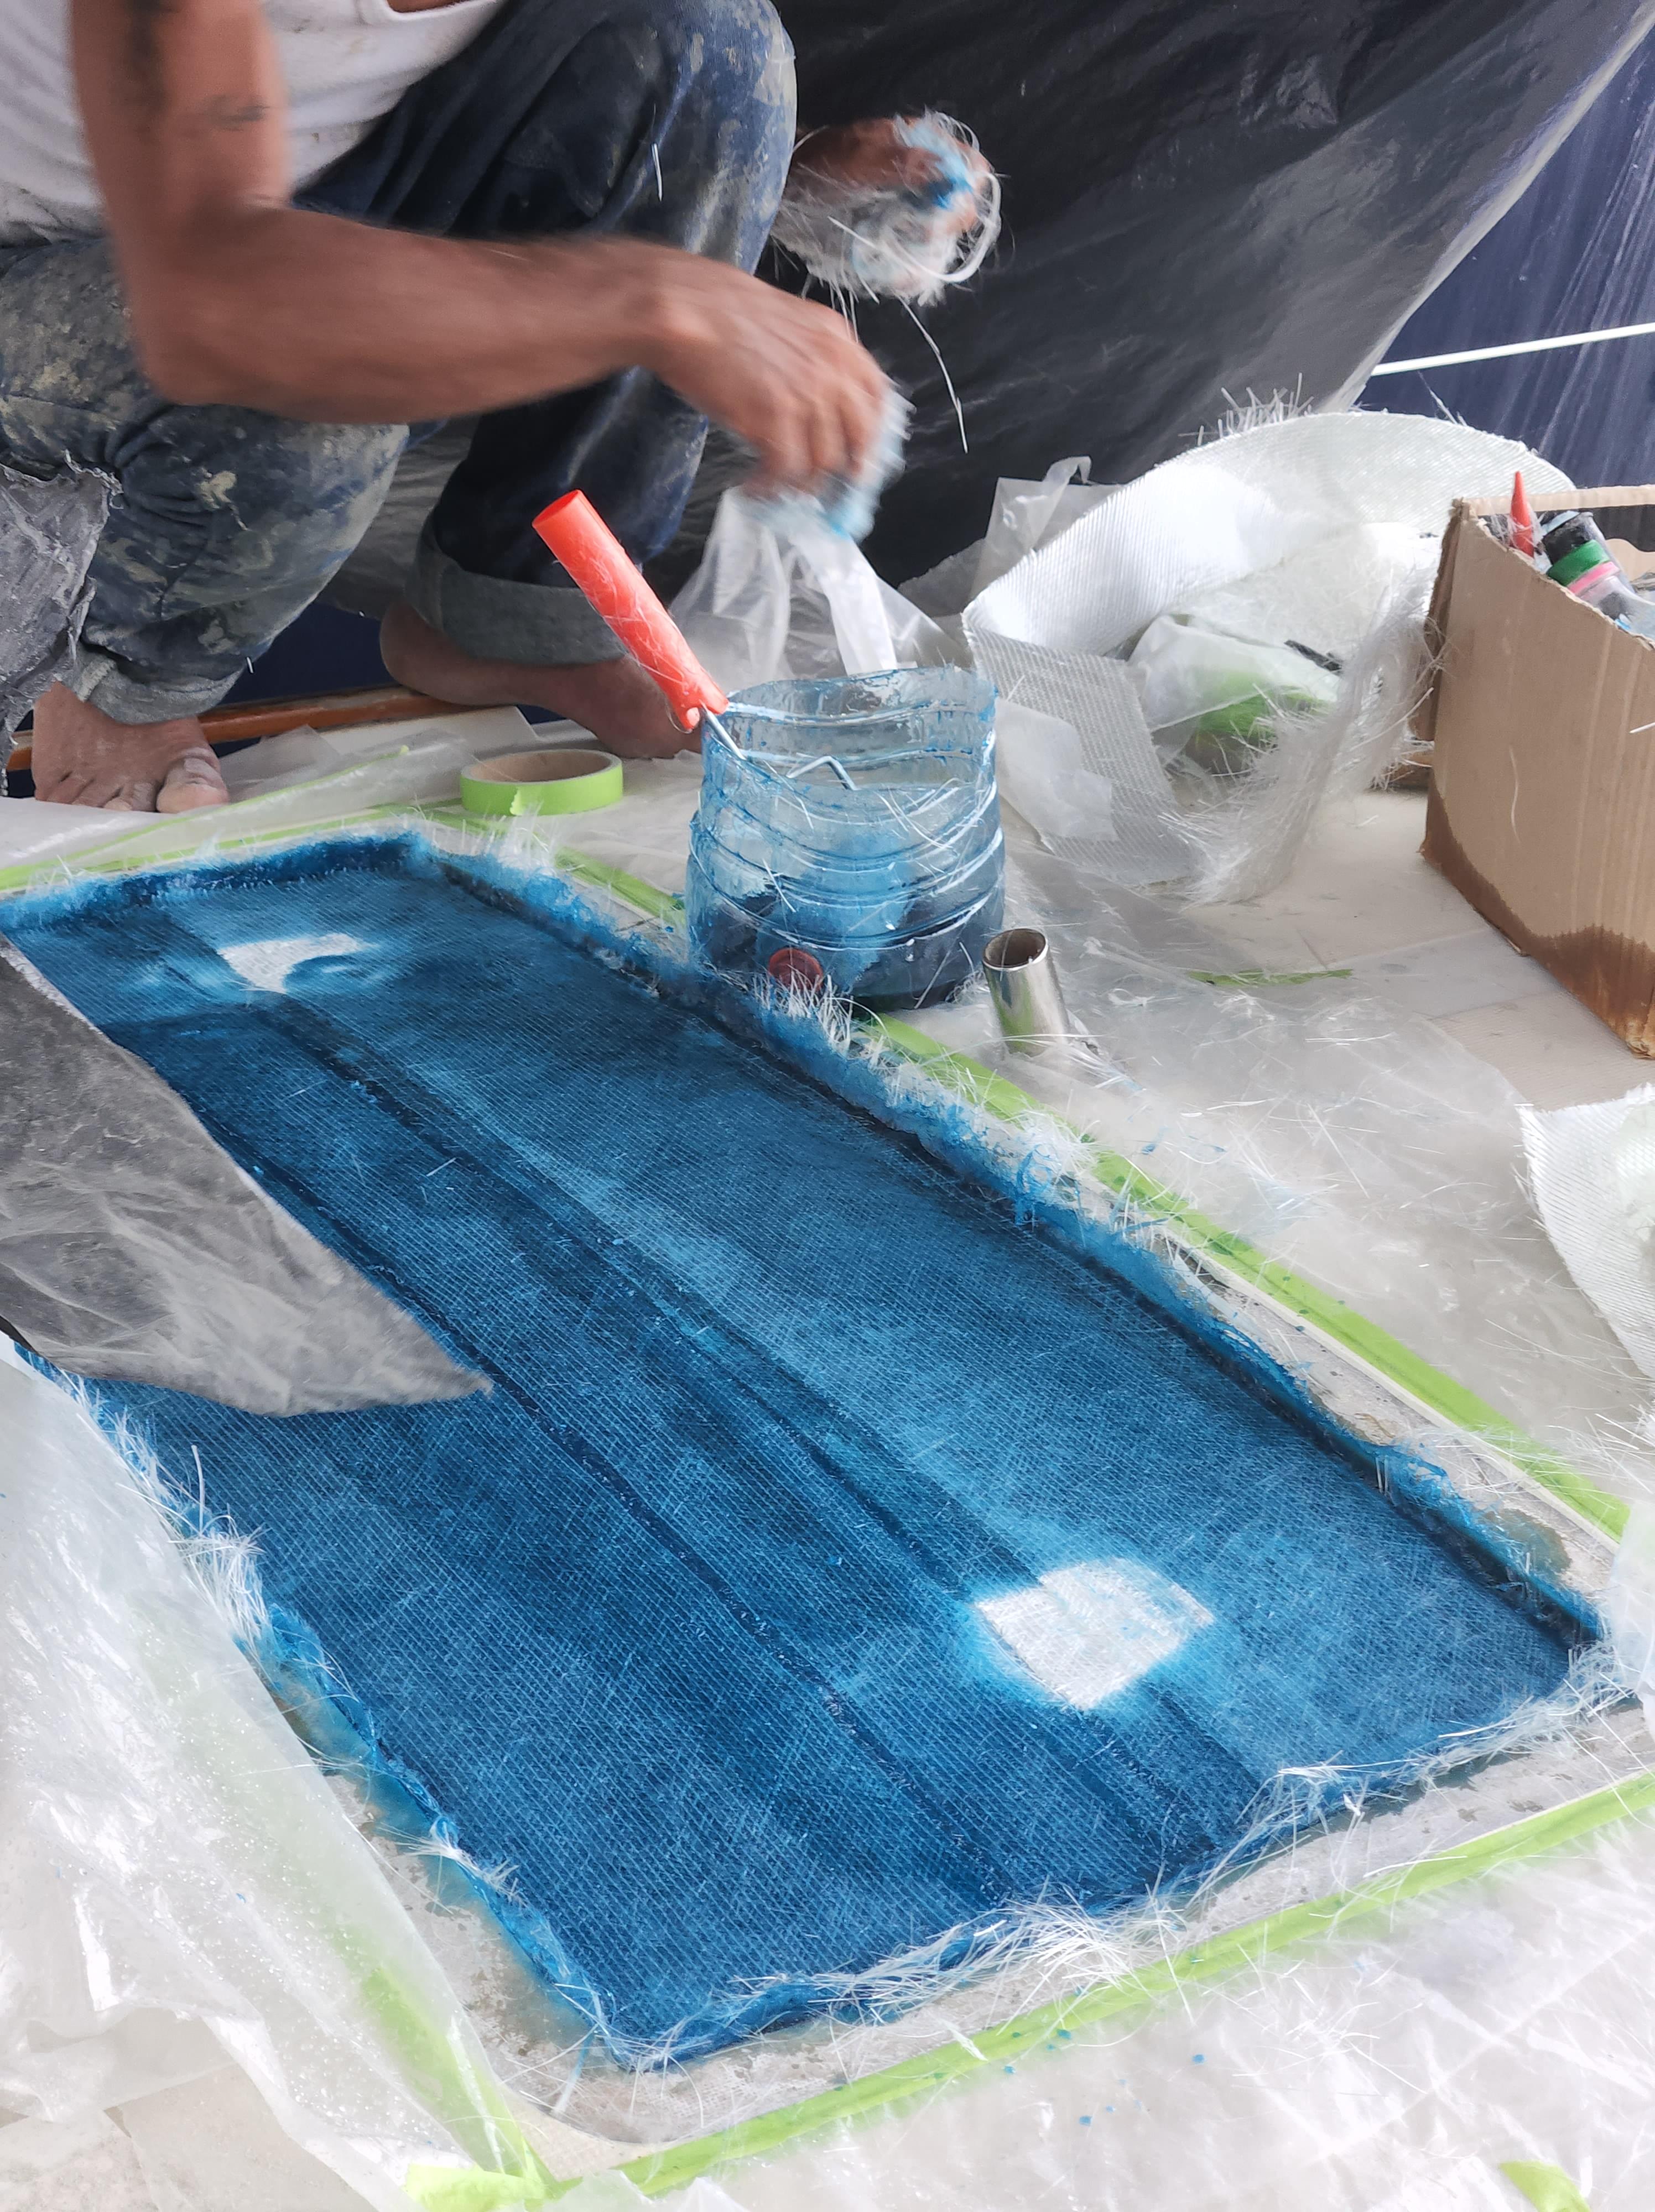
That part put wood dust and pieces everywhere, which, even though the workers were cleaning every evening, we thought was a lot. At the time. Once happy with the quantity of plywood removed, El Monito had to insulate the sides of the wood and rebuild the deck thickness with fiberglass and CoreMat. This step involved a lot of sanding of fiberglass, all happening by the deck opening for the vent, meaning the scratchy fiberglass will infiltrate everything: the cabin, our clothes, our bed sheets, turning a time that should have been restful since someone else was working on the boat for us, into a plain nightmare. Even on deck, the dust was everywhere and the workers couldn't get everything at the end of the day. Only one week later, when the decks were closed and painted, would we be able to hose off all the dust and it would take several passes. Not sure if it is all gone yet to be honest...
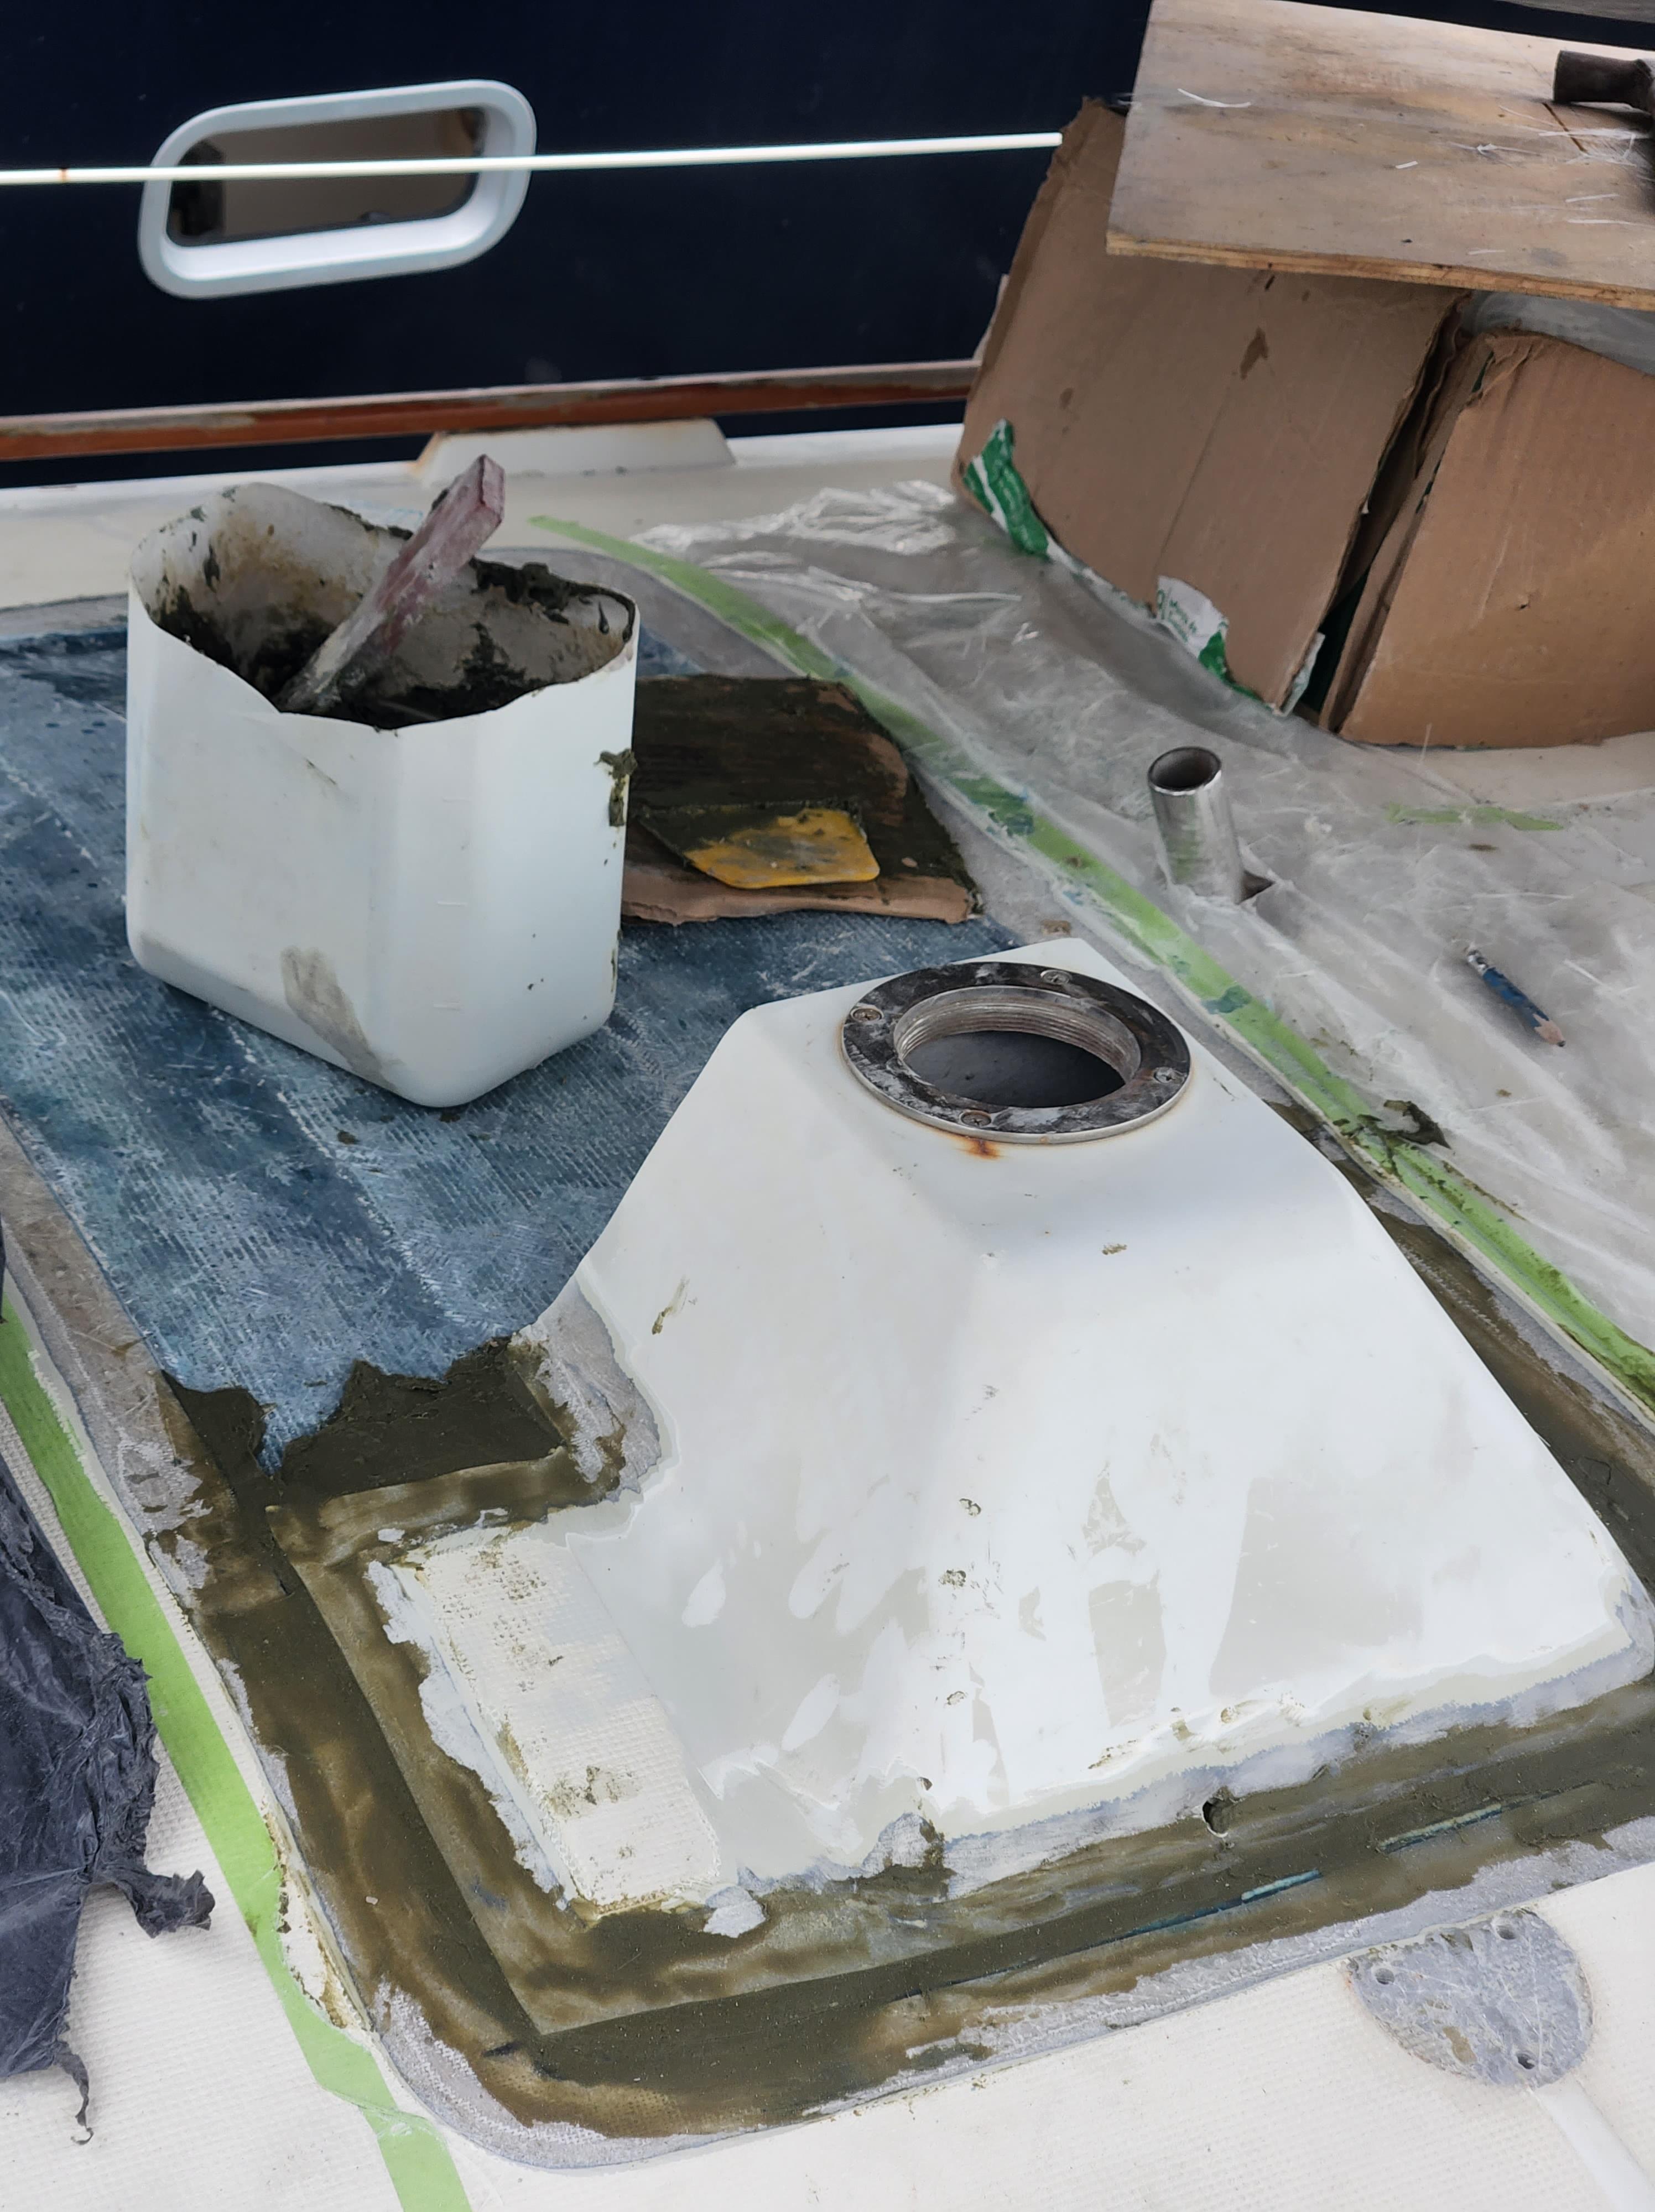
So we watched El Monito layer our deck back and refit the tubes for the vent and the vent boxes on top, sanding in between. We were keeping a careful eye on his work, not only to make sure we were on the same page about the work (the communication in Spanish wasn't to be trusted 100%) but also to learn as much as possible for when we'd need to make such a repair on our own. El Monito started to be chatty and enjoying our company. He was talking a lot, with the fast paced Colombian Spanish which apparently characterizes Cartagena. I wouldn't understand everything but appreciated his curiosity about our life, the boat lifestyle, our past jobs, did we have kid? Had we seen this place in Cartagena? He would come up with a different topic everyday. El Monito was a character, a 'zigoto' as we say in French (not sure there exists any translation, maybe close to 'muzır' in Turkish), going around the yard trying to work out things. For instance, once, we found him negociating at the door with the doorman for being able to take out a broken car mirror that seemed abandoned. The workers and contractors were strictly controlled at exit to make sure they don't take anything out without authorization. El Monito tried to argue and appeal to his companero, but the doorman didn't buldge and El Monito went back speaking out his discontent. Othertimes, he would be amazed to see me also working on the boat. It comes from a pretty womanizing vision of society but as we were approaching a month of boat work which takes a toll on mental well-being, it was quite satisfactory to feel awe at what I was doing.
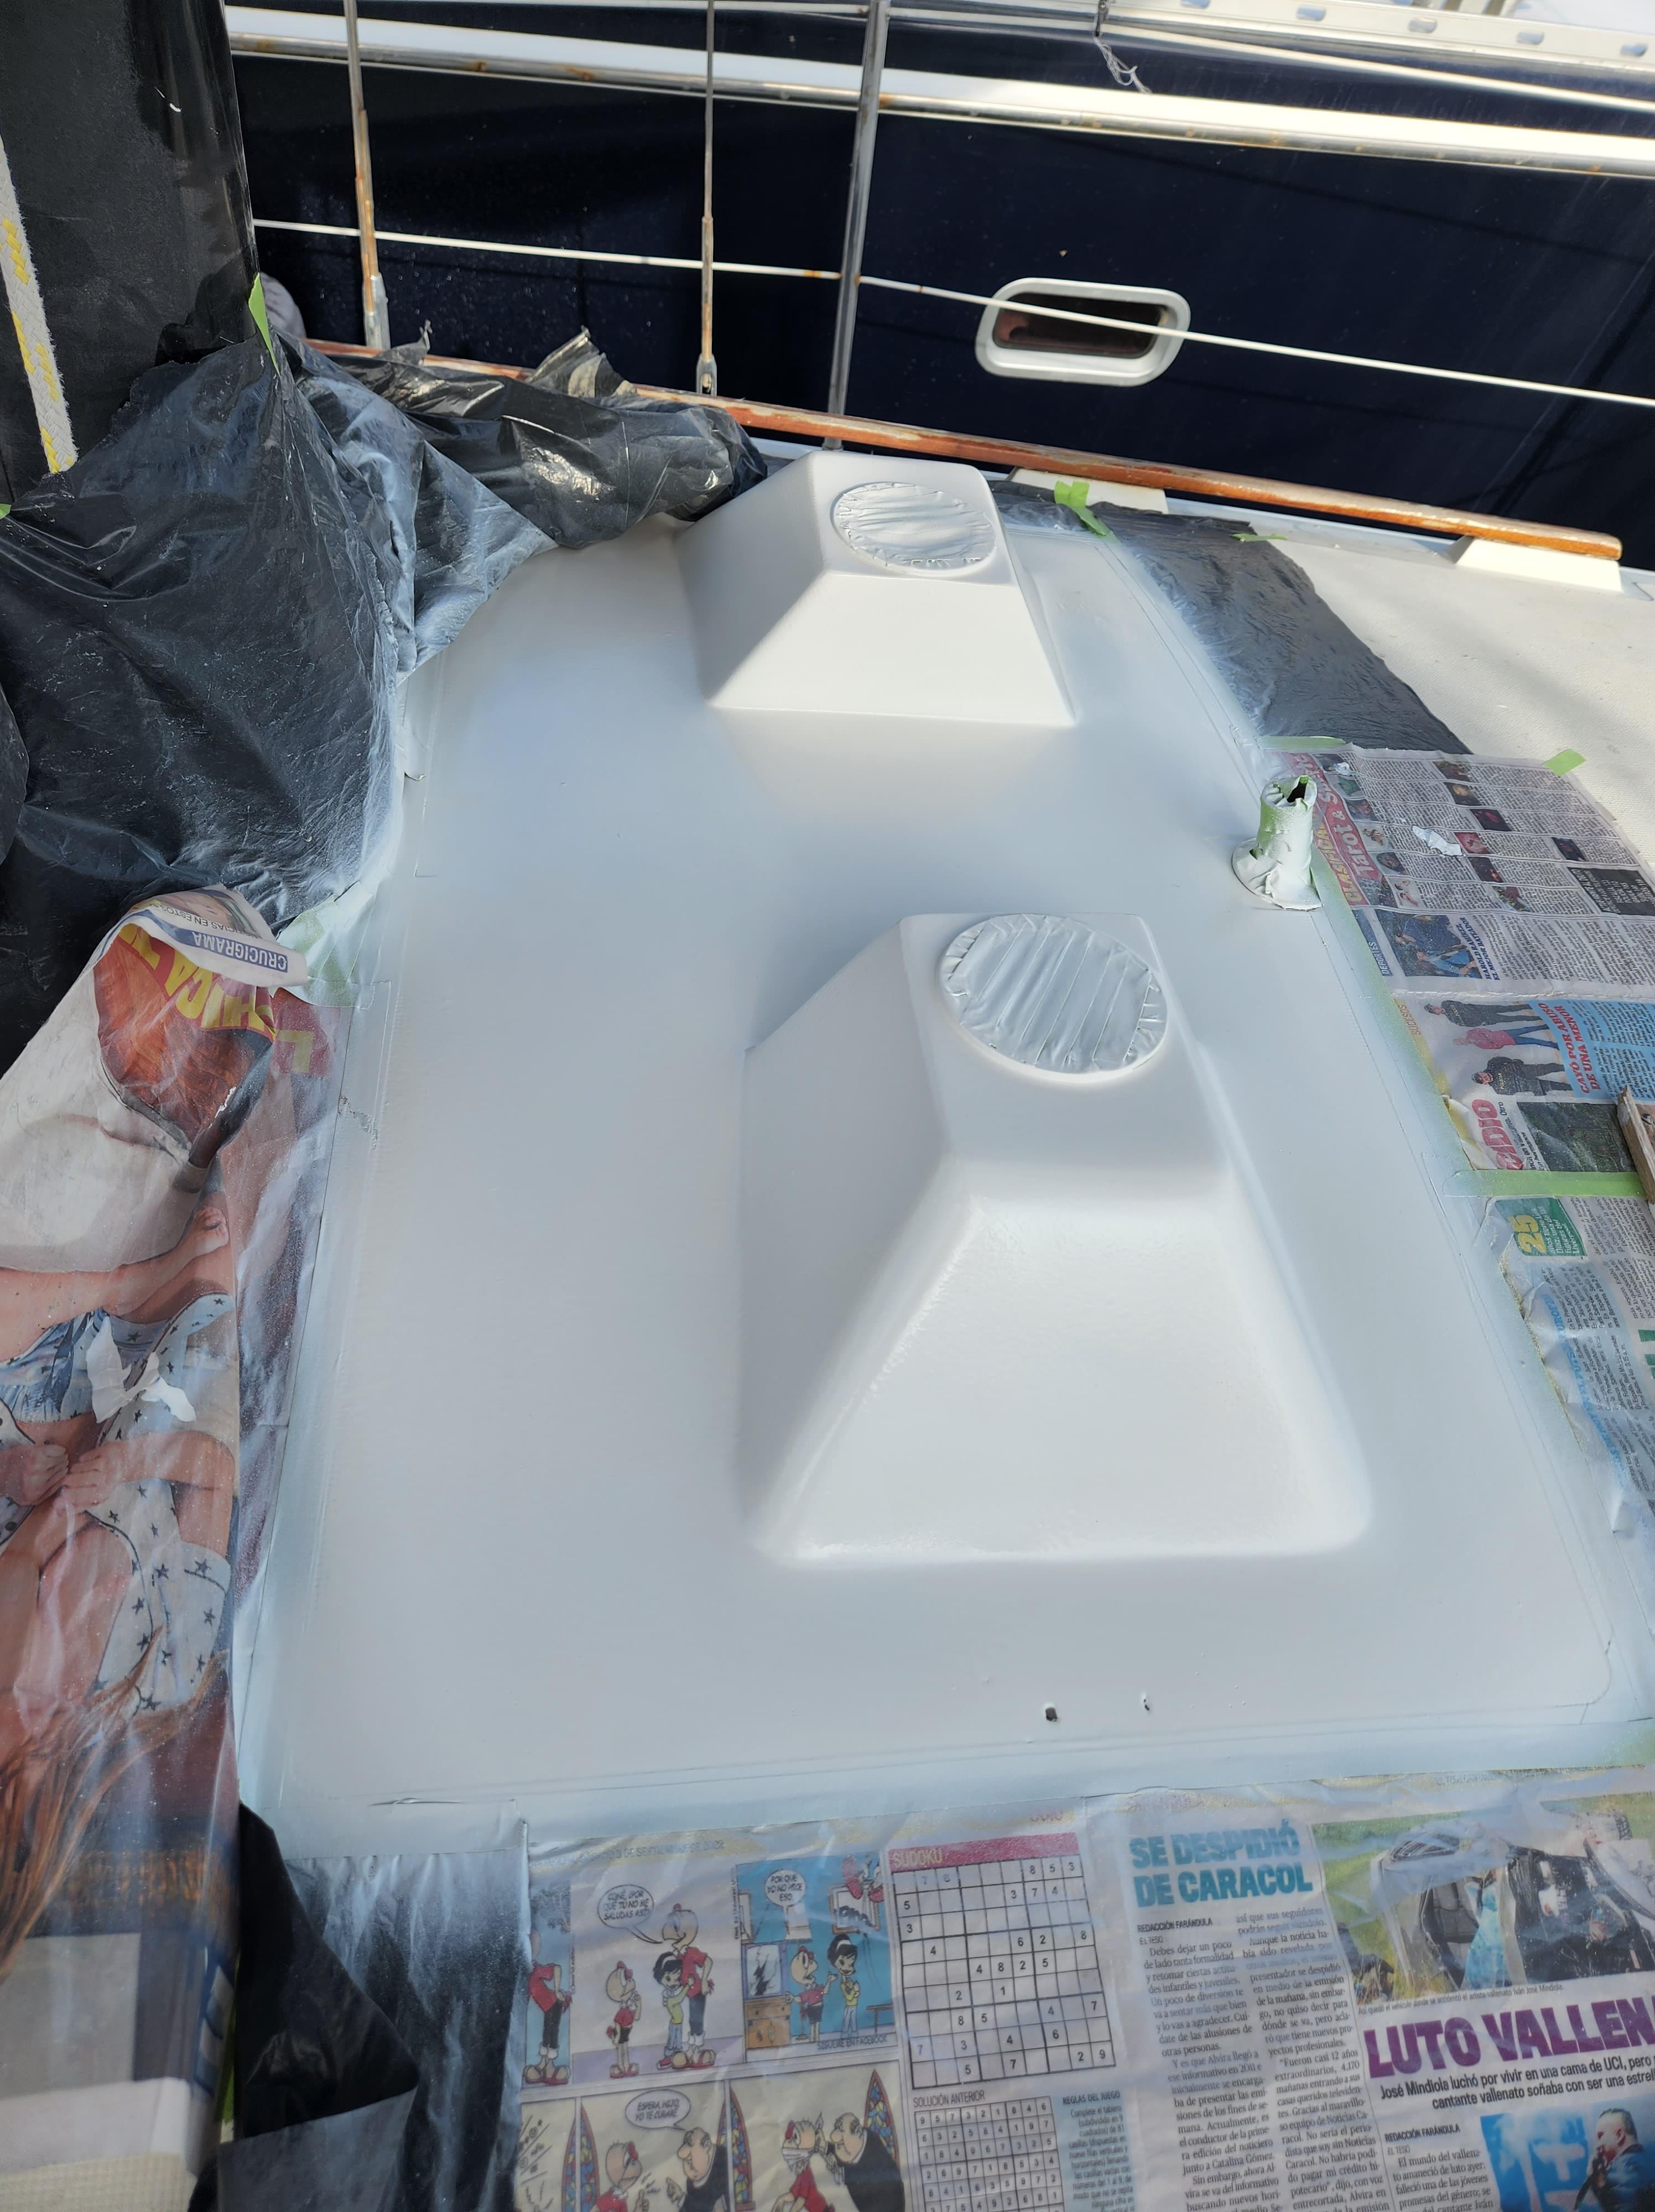
After Monito finished the shapes, Emile, his boss, came with the spray compressor and they gel-coated the vent boxes. We were happy a new deck was born and it looked quite good. A little too white, maybe? Why didn't they color match? Emile argued that he couldn't color match to faded colors and that it would look less bright quite soon. It did. The gelcoat had to be touched up on a few places where it appeared, after sanding, that not enough had been deposited in the first place; they drilled the draining holes on the vent box sides and tried to clean some of the putty that had accidentally spread on some of our foredeck, that was more or less successful, but it was our chance to meet Carlos, another worker, also superfriendly.
And then, after one week, that was it. Our deck was water tight again. It took us a few more days to put the bar back as it is hard to access from the inside of the boat. The fasteners are behind a liner that we had to take down as well and now had to clean and restapple. Above all, it was a relief not to leave in fiberglass dust anymore, to be able to open our windows again and not bake at night. Even if we didn't do the work itself, it really downgraded our living conditions onboard and was almost as straining. Definitely worth it though!


Project 3: install a fresh water filtration system
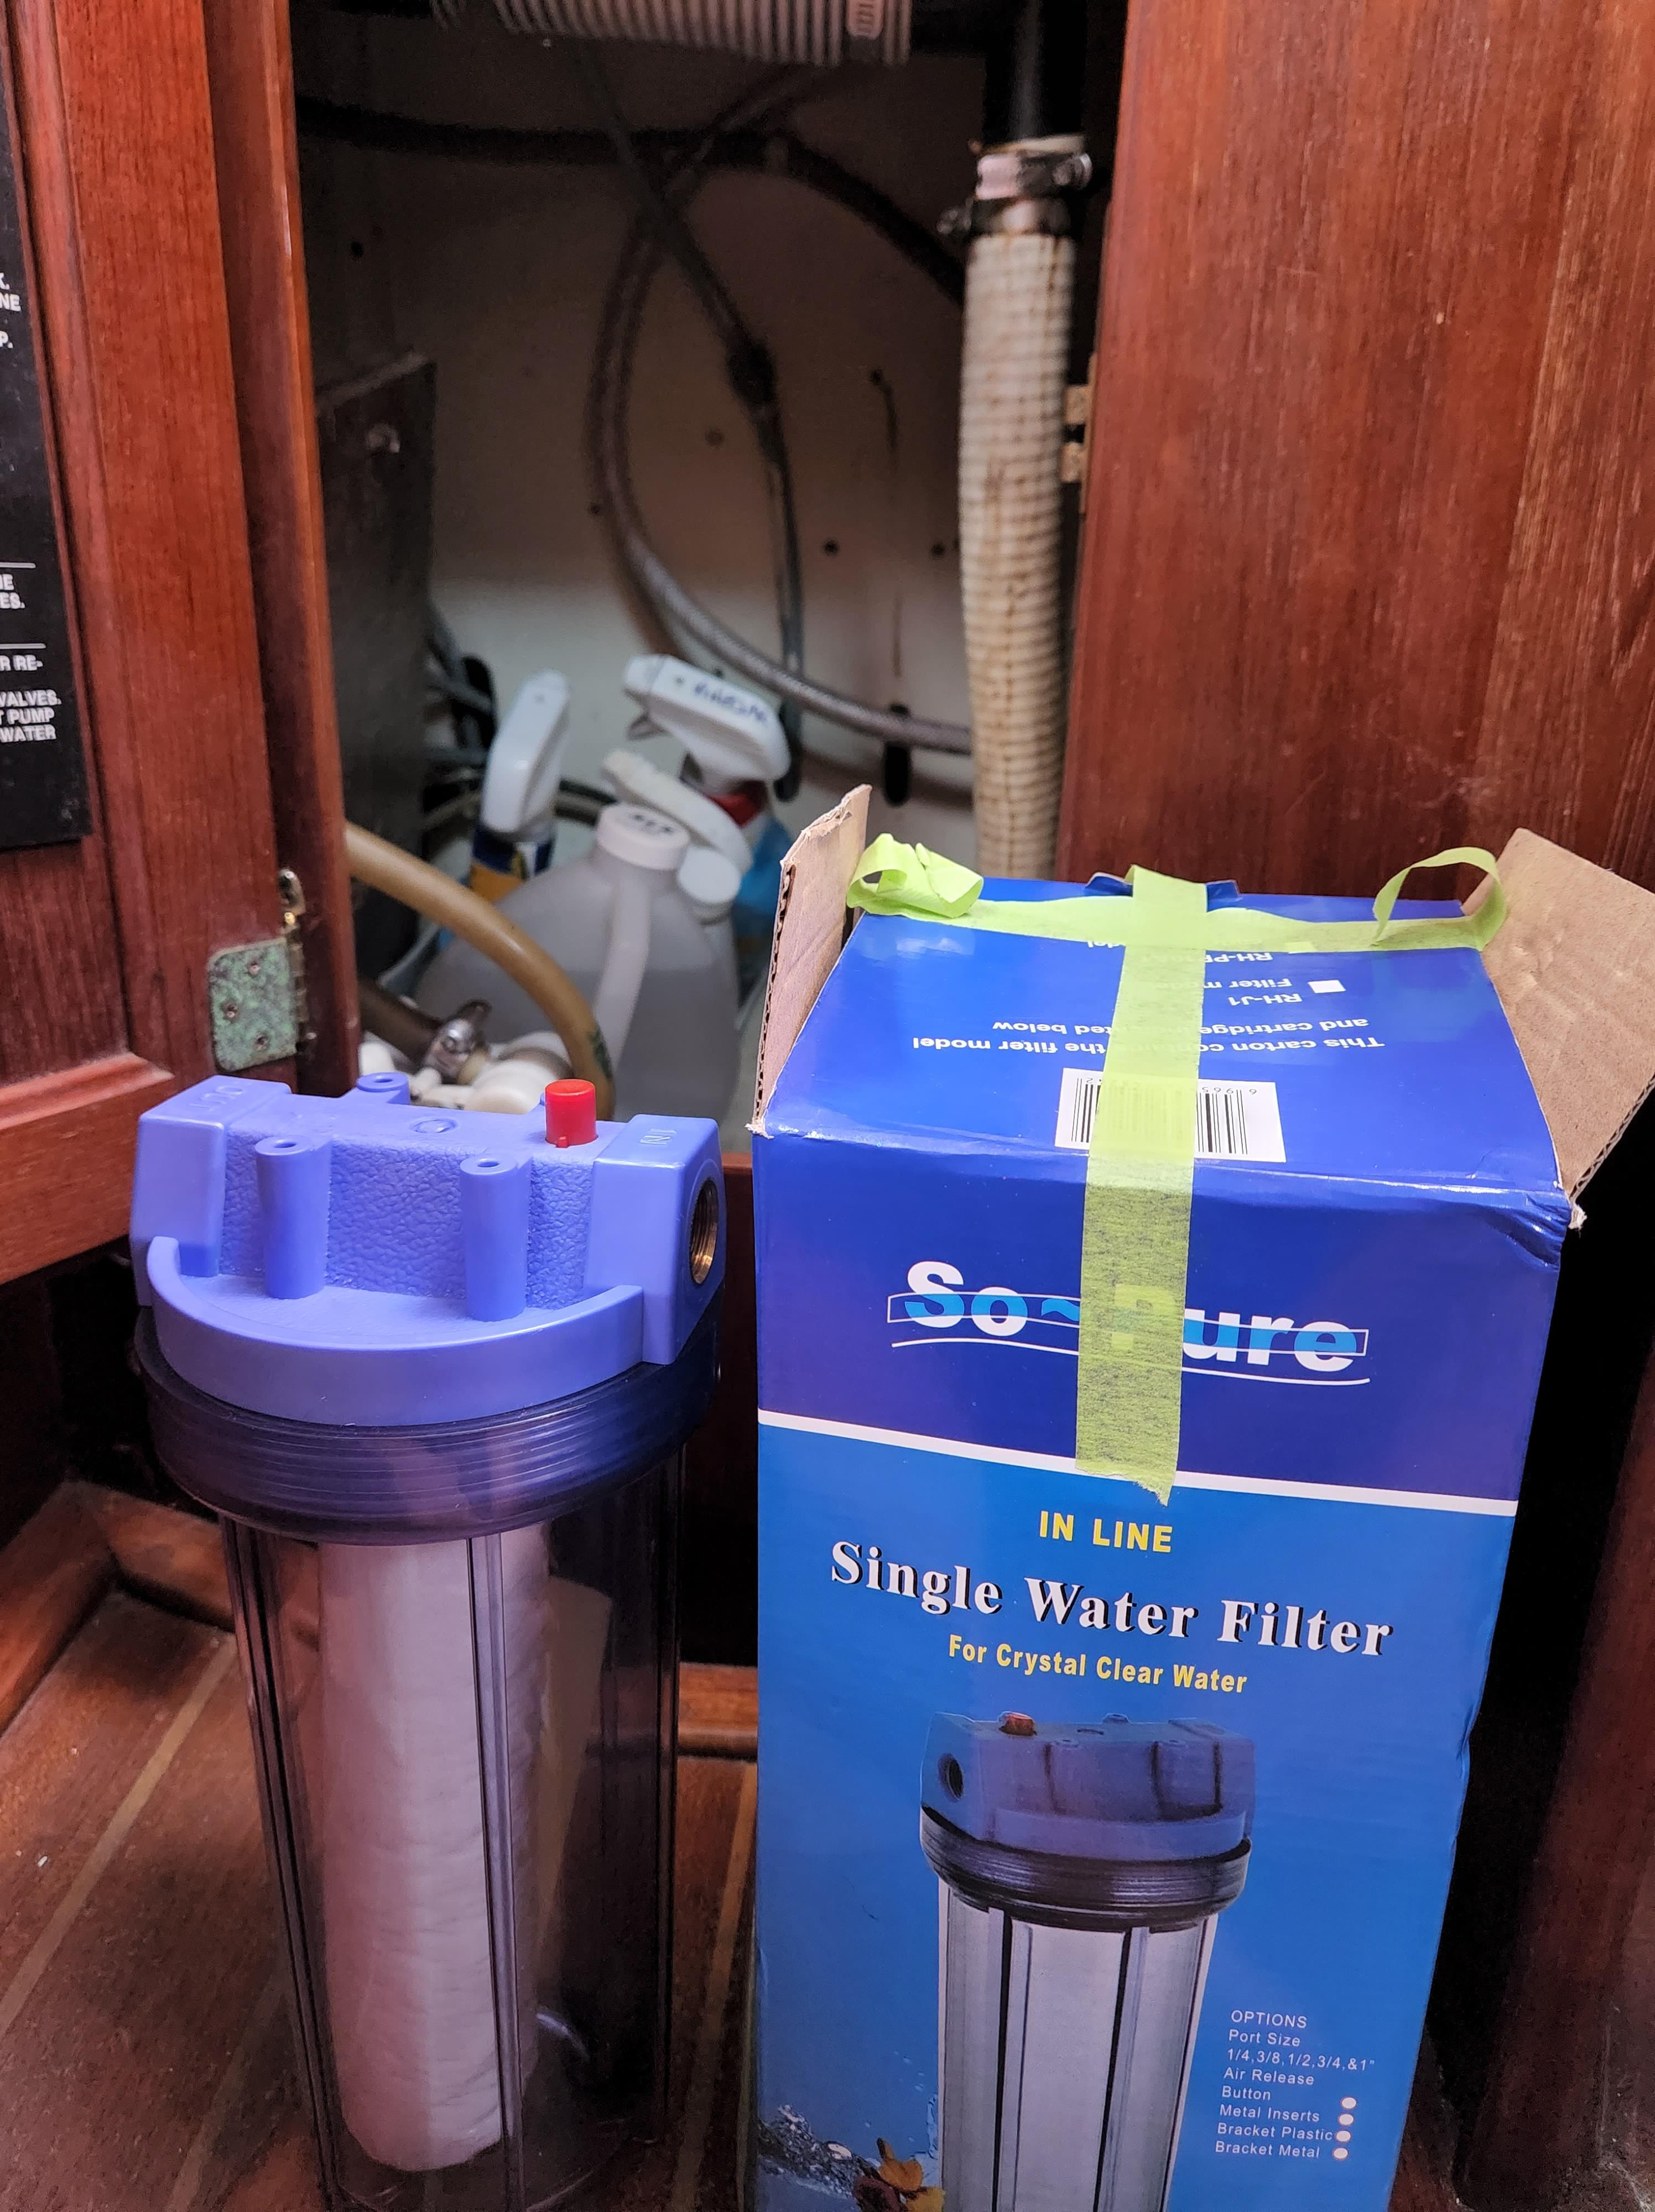
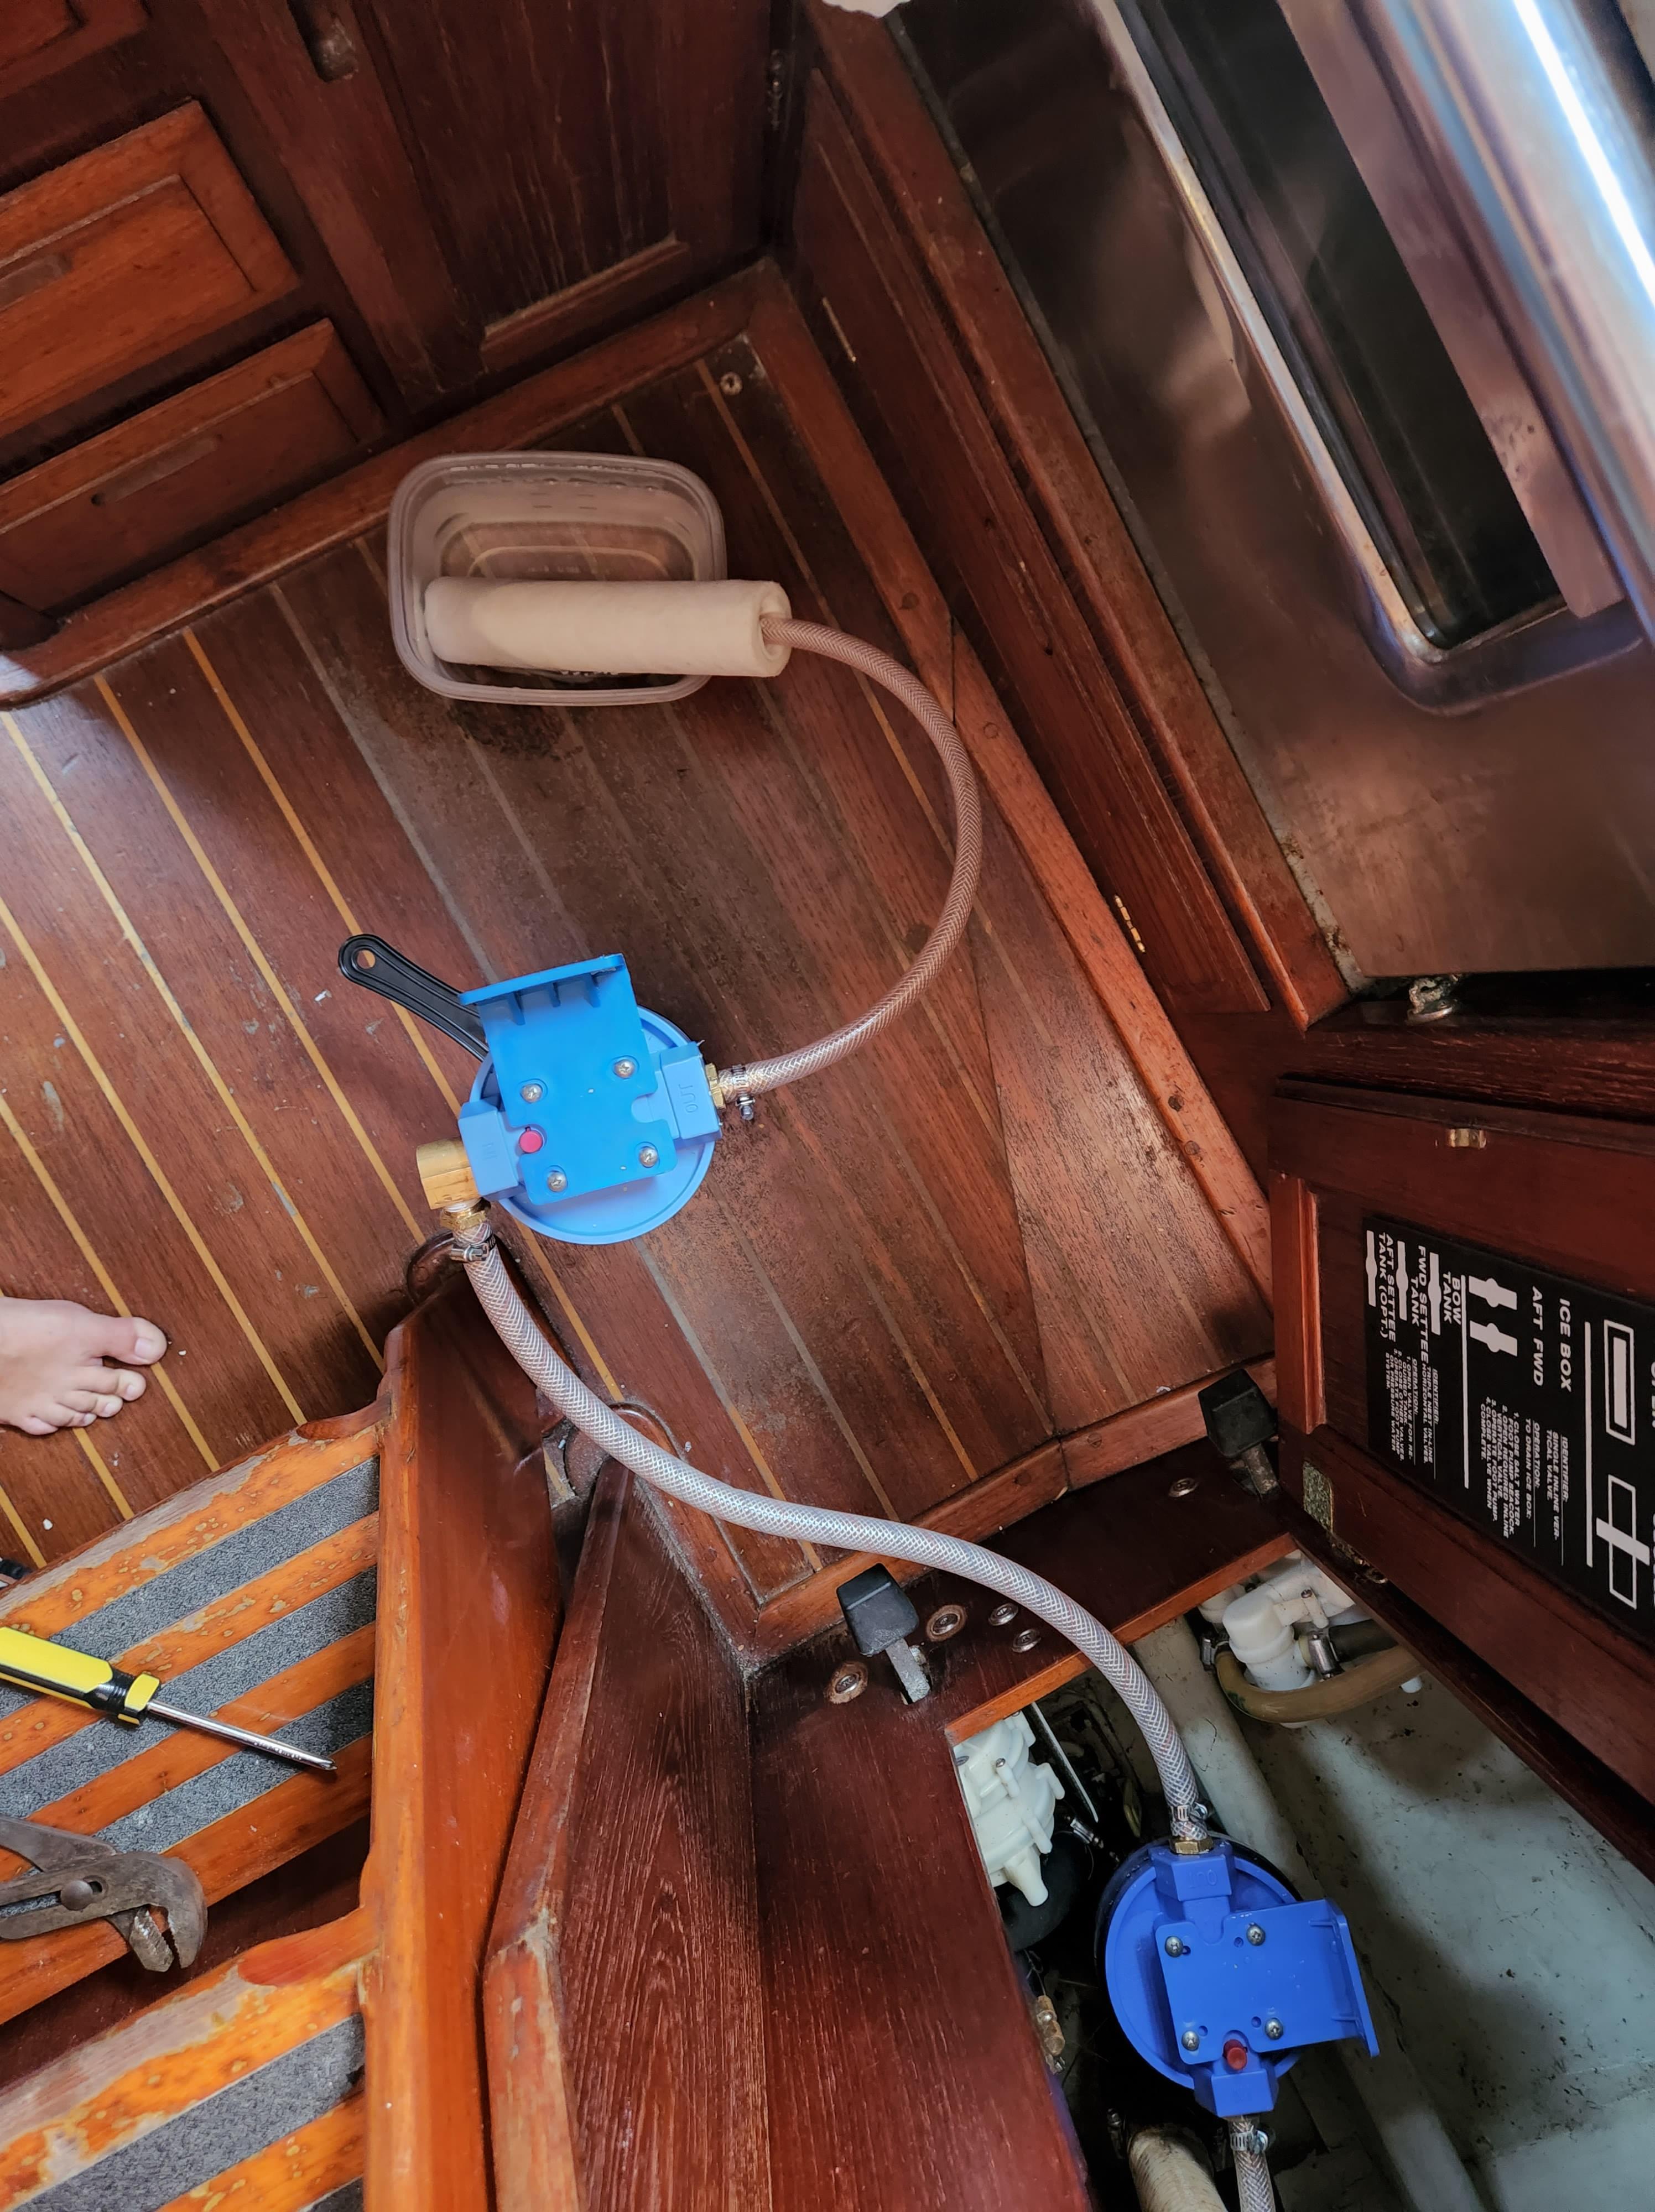
For a few months, we had noticed sediments coming out of our fresh water tap. We have three water tanks among which one we can't open, one which we can open but is too deep to reach all the way to the bottom, and a last one we can nicely open and clean. So, that's what we did and we indeed found some sand inside, which probably was on the deck when we filled the tank. Nothing too worriesome, but we had the idea of adding filtration downstream of the tanks for a while in order to solve the problem. We even bought a filter in the little village of Puerto Lindo in Panama, but didn't install it as we figured the installation may take a significant amount of water so the job would be better to carry some place where we could easily get water, as opposed to the San Blas islands. At the marina in Cartagena, no excuses. We cut the hose connecting the pressure water outlet to the tap in a leap of faith, and installed the new filter with all the appropriate fittings we had gotten at the same time.
I have experienced it before: boat projects rarely work on the first trial, but it all looked straight forward and I couldn't help hoping when we started the water pump and the water level rose through the transparent casing of the filter. Maybe it was going to work right away that one time... Of course, it didn't. The water level rose and when it reached the top started pouring from the rim of the filter. We stopped the pump asap, and took everything off to understand what the hell was going on and... there simply was no gasket where the water exited. Of course, there should have been one and all would have worked smoothly but there was none, which meant we had been sold a non-working filter back in Panama. I guess that's what you get to when you buy parts in remote areas...
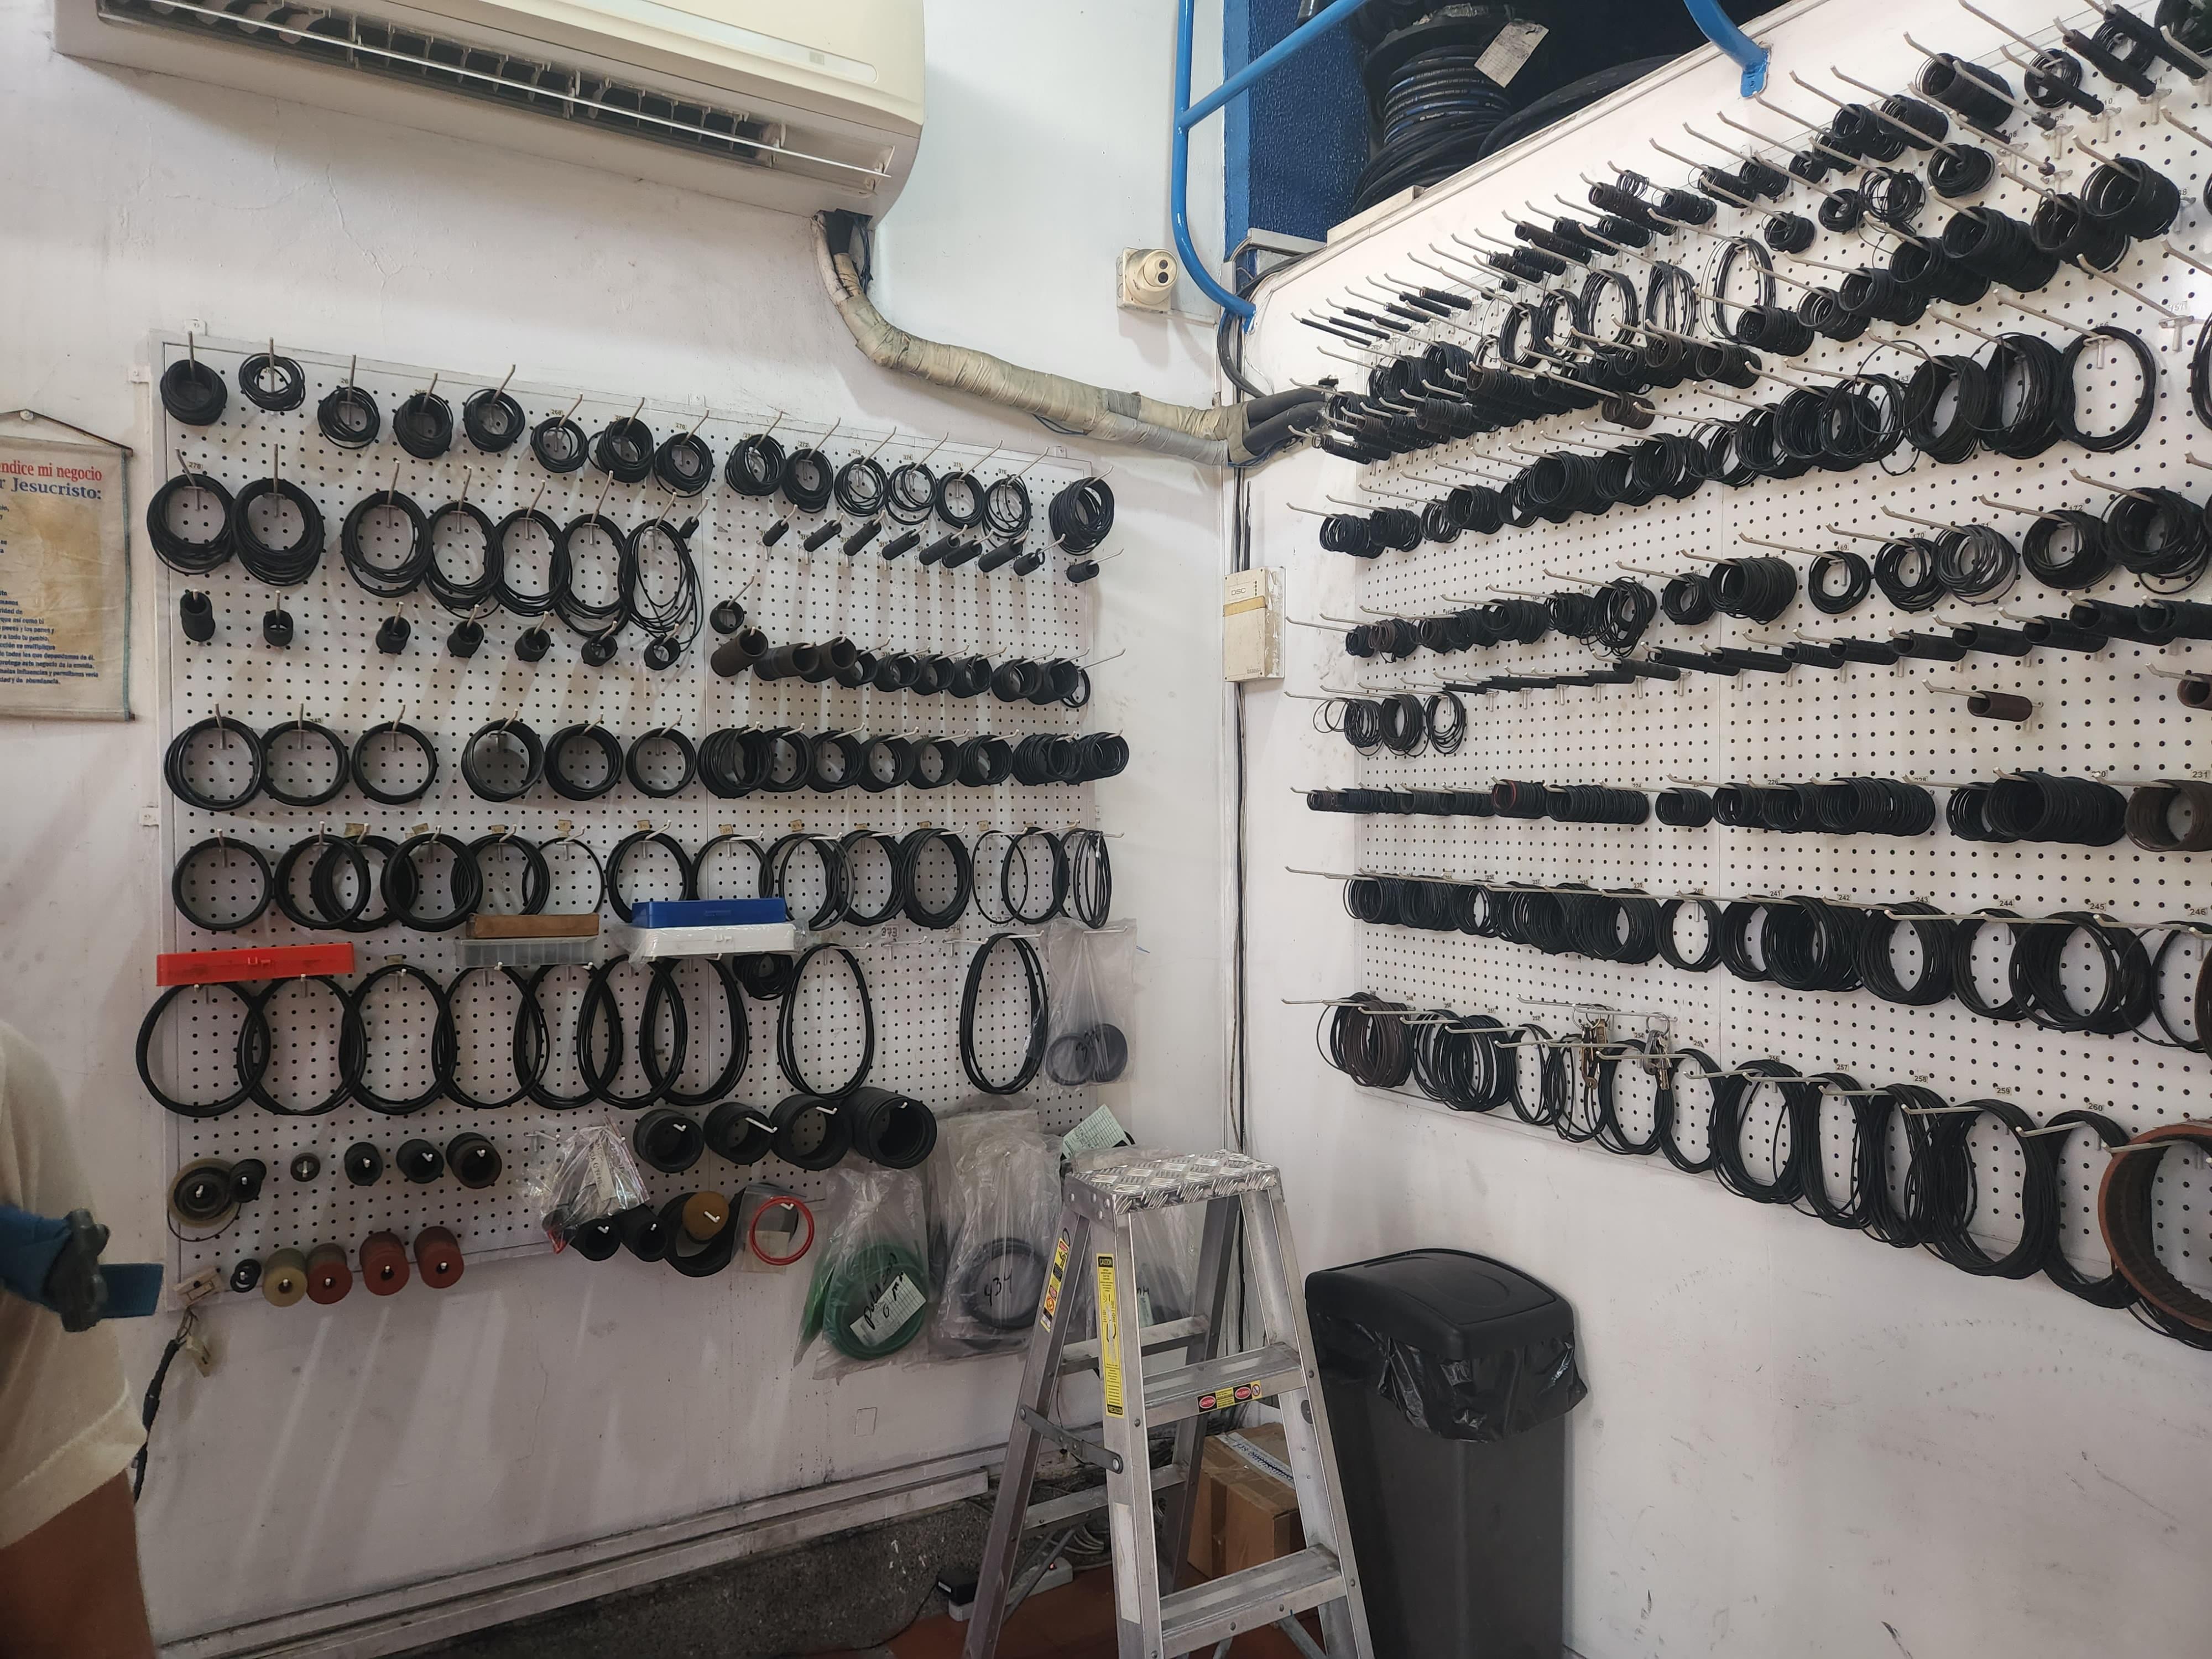
So we tried to look for a replacement gasket. The one marine store we knew was highly unhelpful - they WhatsApped me saying they had it in stock thinking gasket means filter, and when we went to check for maybe buying another filter altogether, they didn't know the inventory price and told us they weren't for sale because of that. Great! We found a store called Filtrozono, within walking distance of the marina. They didn't have the proper gasket to sell but recommended us a 'mangueria' a few blocks down the road that had a wall of O-rings. We got two sizes hoping one would fit. It did. The project could have stopped there but we had bigger plans. A simple filter would probably take care of the sediment but a series of inline filters could help us eliminate possible microbes and parasites in the water and allow us to get rain water or water in less charted water sources. We then went back to Filtrozono to buy another filter, and later the appropriate cartridges. Another mangueria sold us the appropriate fittings, which we needed to change a few time as space was limited under our sink. After several days of back and forth, to get the perfect fittings, the perfect gaskets, a leak proof-ish system and a metal sediment filter Yalçın got from Amazon, we finally have pure water running from our tap! We now have a formerly hot-water tap for unfiltered water (for the dishes for instance) and a cold water tap for filtered water for drinking. The water is first going through a 40 micron mesh (that's for the sediments), then through a 5 micron carbon filter, which in addition of getting rid of larger parasites that can sometimes be found in water, also filters out chemicals like chlorine, and finally a 1 micron filter which should take care of most bacteria. For bacteria, you usually want to go down to 0.8, which is what we used in the lab, or even 0.5, but then the water flow is strongly reduced and those filters weren't available anyway.
The lady at Filtrozono was extremely lovely and helpful. She helped us several time to teflon tape for water tightness and even reopened her shop on a Saturday afternoon for me to get the cartriges I needed. We still should probably silicon grease the gaskets of the filters to further improve the watertightness around the leaky gaskets which still isn't perfect, but a month later, we still haven't gotten to it yet!
Project 4: install a bilge alarm and emergency bilge pump
This project dates far back. All the way to Avocet times... I had removed a float switch from the Canadian Sailcraft I had back then and installed another bilge pump. Since then, I carried this float switch and with Tire-bouchon I wanted to install it on the keel bolts and connect it to an audio alarm. Well it took roughly 4 years but it's done now.
The kicker motivation came after our sail to Portobello Panama (Hi Graeme!), during which we found water sloshing on our floorboards. We were not sinking at any significant rate it turned out but we just did not empty the bilge to a reasonable level before we left. With the close hauled sailing, the bilge water traveled across the beam and lots of equipment in our tool locker were soaked. All would have been avoided if we had an automatic electric pump that drained the bilge or if we had an alarm that warns us if the water reaches to a high level.
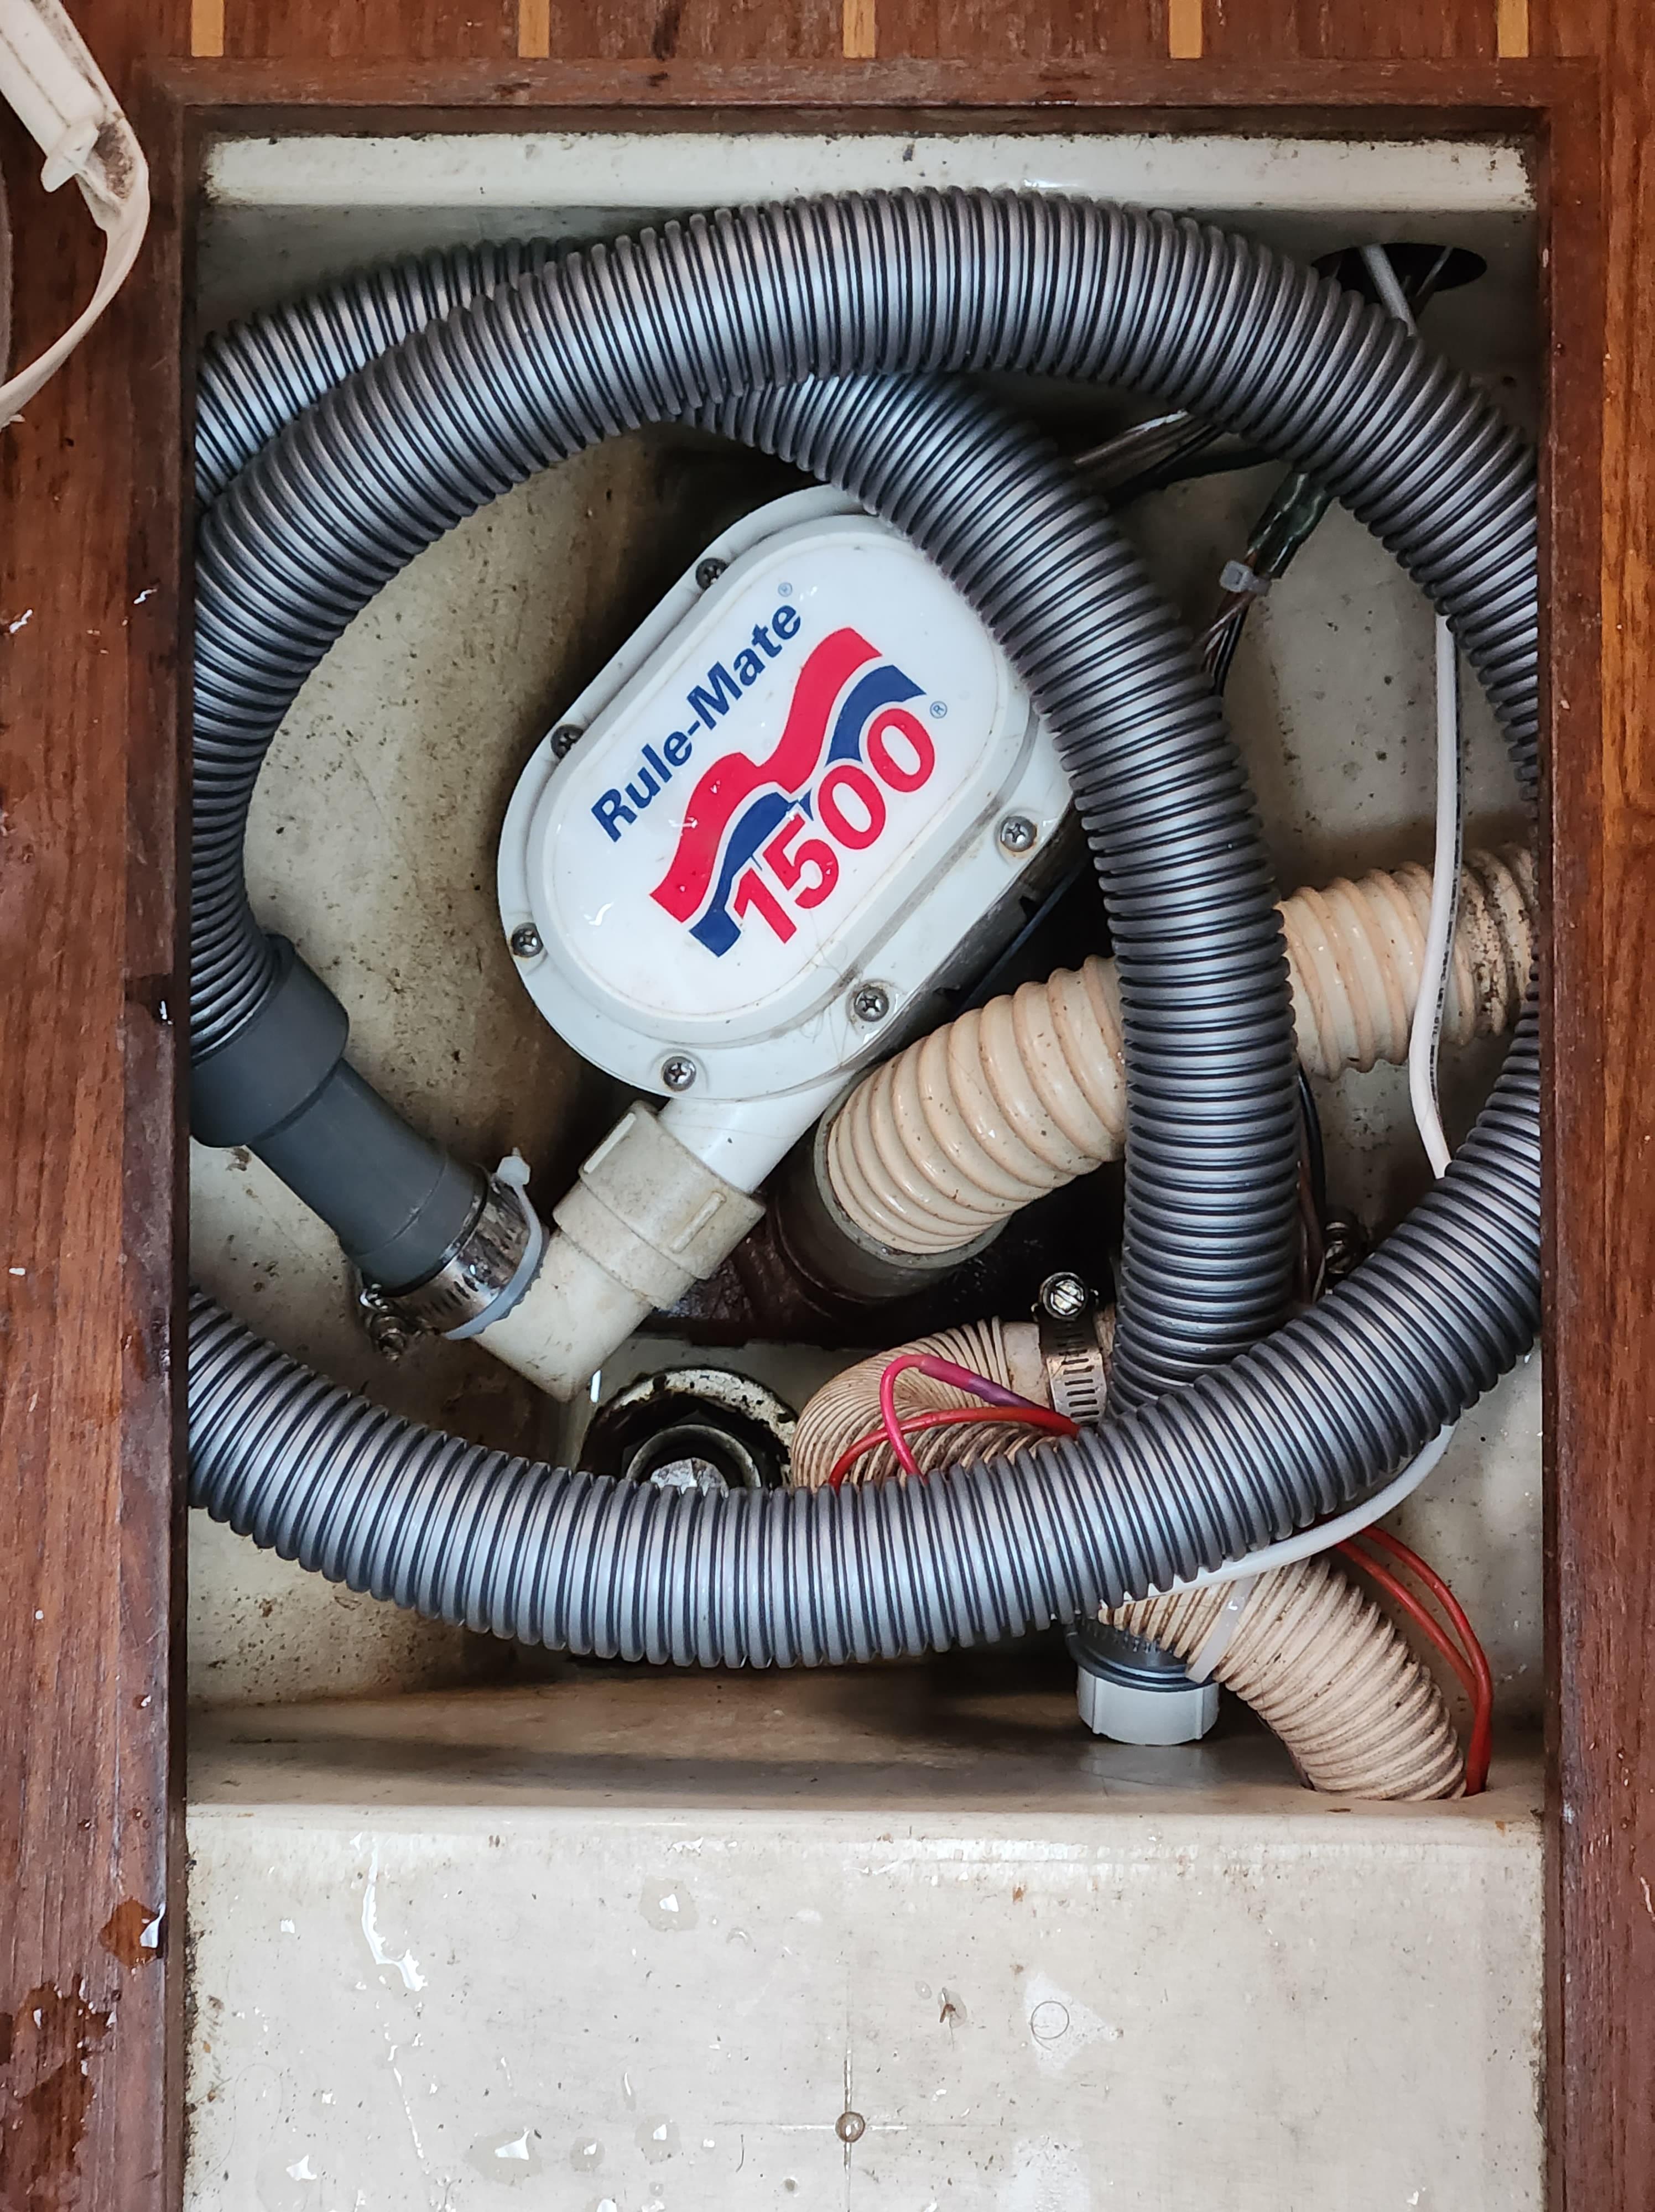
During our last trip to the US, we brought back another electric bilge pump, smaller version of our existing main electric bilge pump. The motivation was its size. This one fits between the keel bolts instead of sitting on top of them, allowing us to have a lower default water level. Unfortunately, it's impossible to have it completely dry, but that is okay. Installation of this small pump is straight forward, cut the three cables of the old large pump, disconnect it's hose, crimp the new ones cables, position the pump and connect the hose. This pump however is not as powerful and with the long and skinny hose snaking all the way back to the discharge thru-hull at the transom the rate at which it pushes the water is only enough to dry a bilge that is not taking in water. This downgrade of the capacity to fight incoming water was not going to fly. I wanted a way to hook up the old pump quickly in the case of an emergency.
The project bilge started in Panamarina where I installed some wiring for an audible alarm in the lazarette, hooked up to nothing. I was thinking big: an audible alarm system that I will eventually connect to not only the float switch but also to the programmable nmea 2000 instrument computer. Maybe program an anchor alarm or high temp alarm etc. Possibilities are exciting, at least for me...
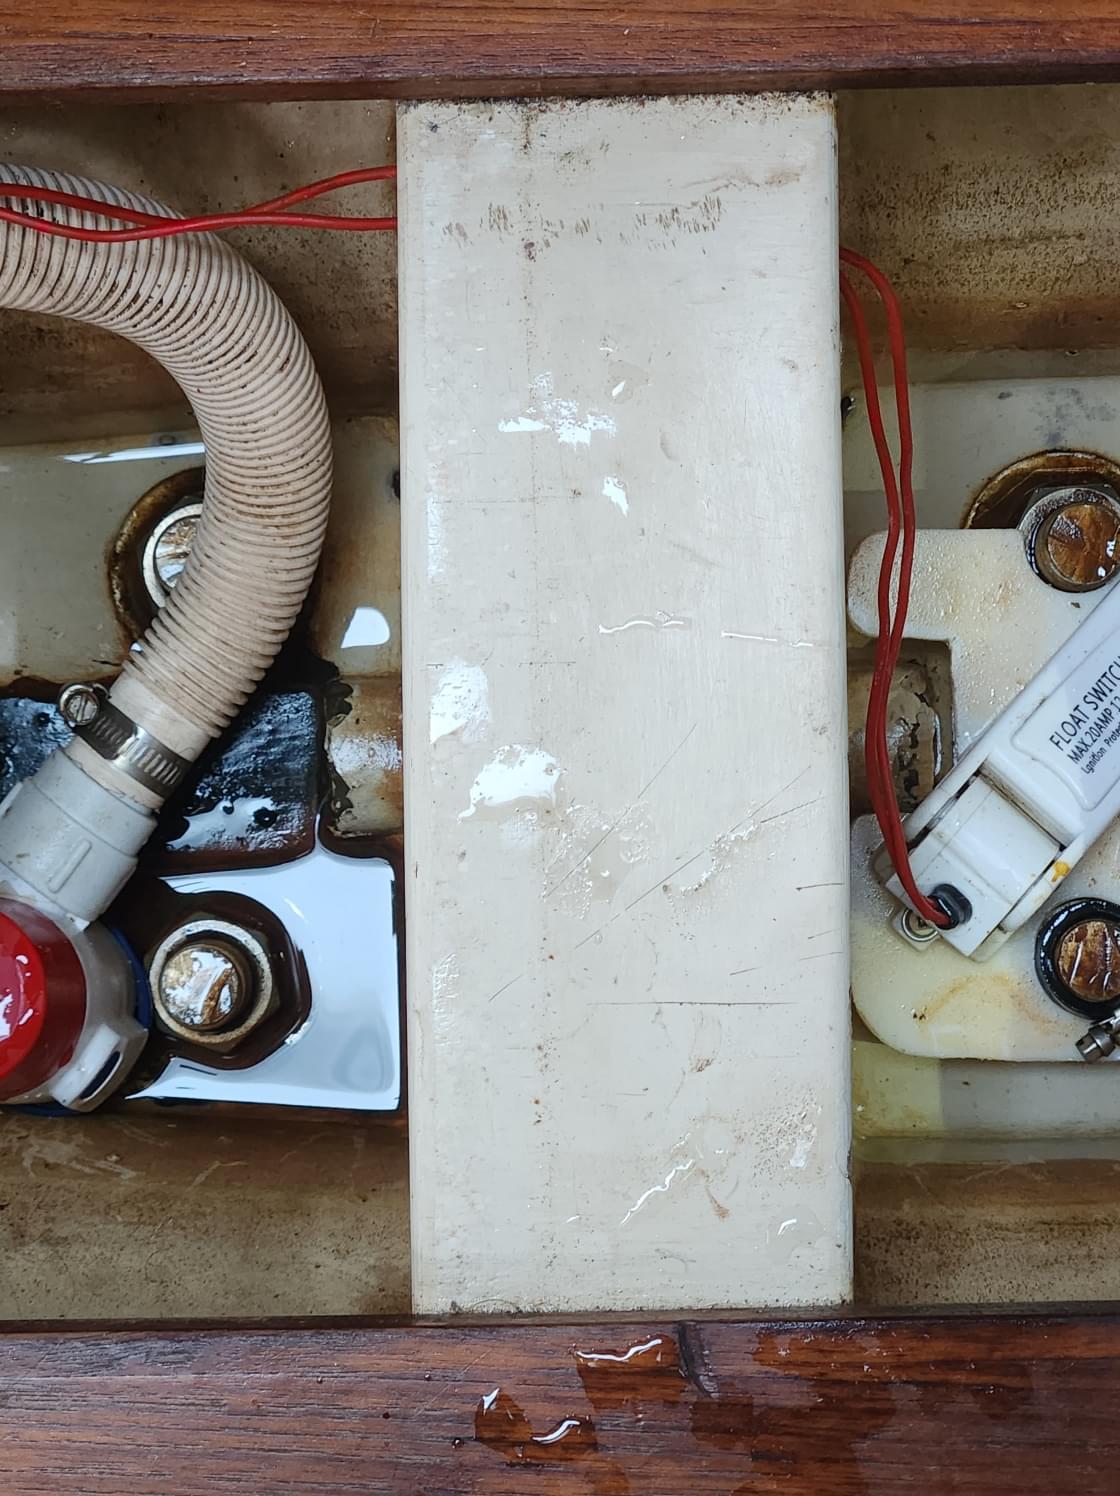
In Cartagena, I was determined to finish the bilge part. I cut a piece of plastic plate to sit on top of the keel nuts, clamped to the keel bolt with a hose clamp. Then screwed the float switch to it. I ran two sets of marine cables to a convenient place behind the companionway ladder from the bilge. One for the float switch and the other for the large bilge pump.
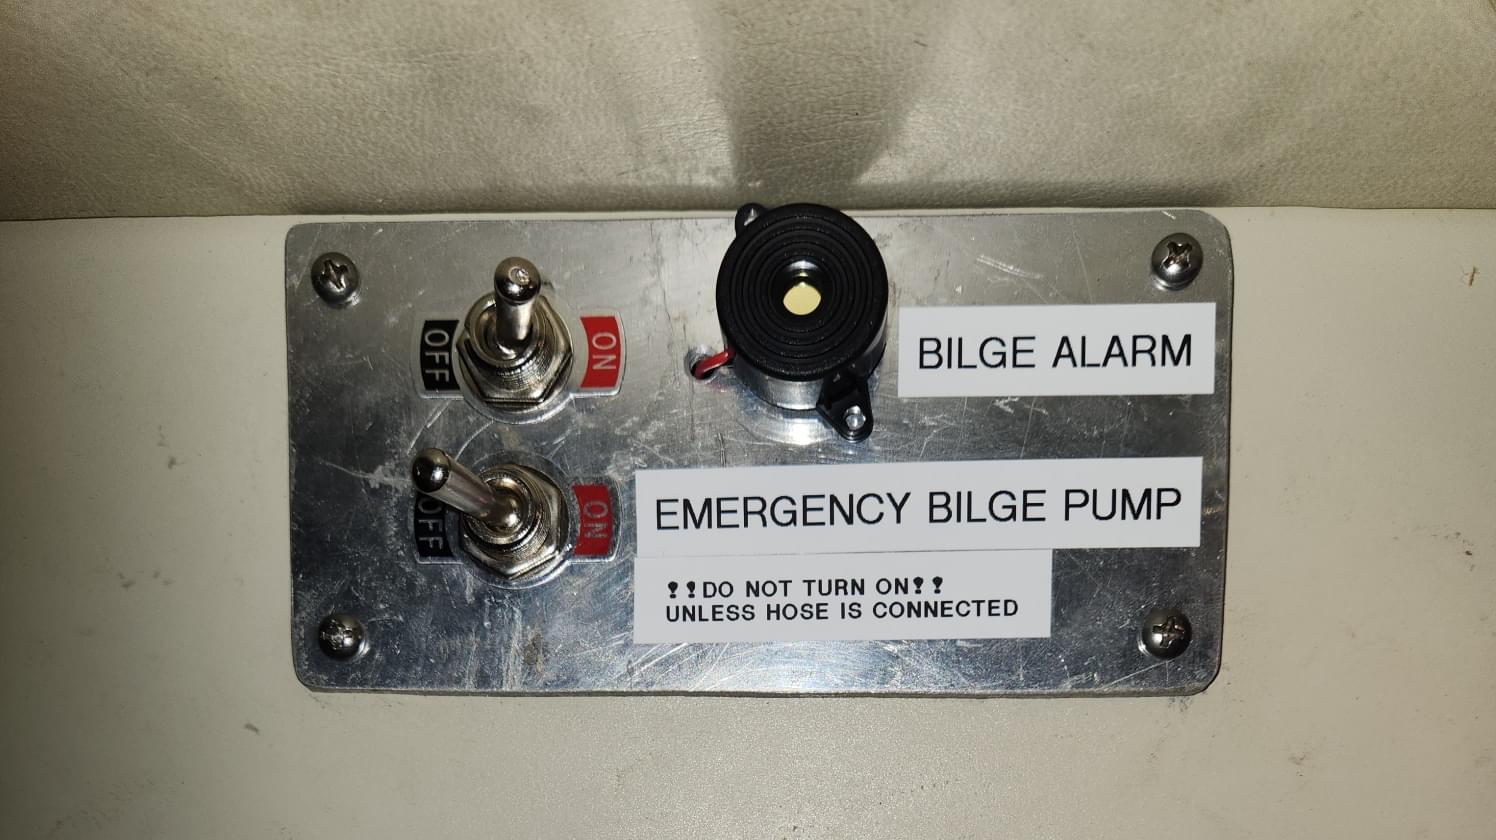
I needed an aluminum plate to make a small electric panel that has literally two switches on it and bunch of written instructions. During one of my solo wanderings outside the marina, I decided to visit the junkyard close-by. I asked if they have some aluminum plate, 3mm or so. They found it. I paid by the weight. It was not pretty but will do the job, maybe at some point I can paint it.
Figuring out all the nitty gritty of the wiring took some time and here is the end result. The audible alarm has it's on-off switch which we keep on the on position all the time. The large bilge pump has it's hose coiled in the bilge. If necessary, we uncoil it and either put it to the kitchen sink or out of the companionway hatch, then turn on the second on-off switch in the panel. At this point, the audio alarm is probably nothing but an extra annoyance to the crew, that's why we have the switch to turn it off right there.
Hopefully, we won't ever need to use any of this.
Project 5: fix the jib and dodger windows
We had an incident with our jib on our passage from Panama. As it flapped heavily while we were trying to furl it in 30 knots, we damaged the leech and the clue where the sunbrella fabric now needed to be restitched. We carry a heavy duty sewing machine onboard for that particular purpose, and that's why, we needed to undetake the repair ourselves. Yet, when we gave our anchor and chain galvanizing, the contractor Alvaro, told us he could also do canvas repair and that got us thinking about our dodger.
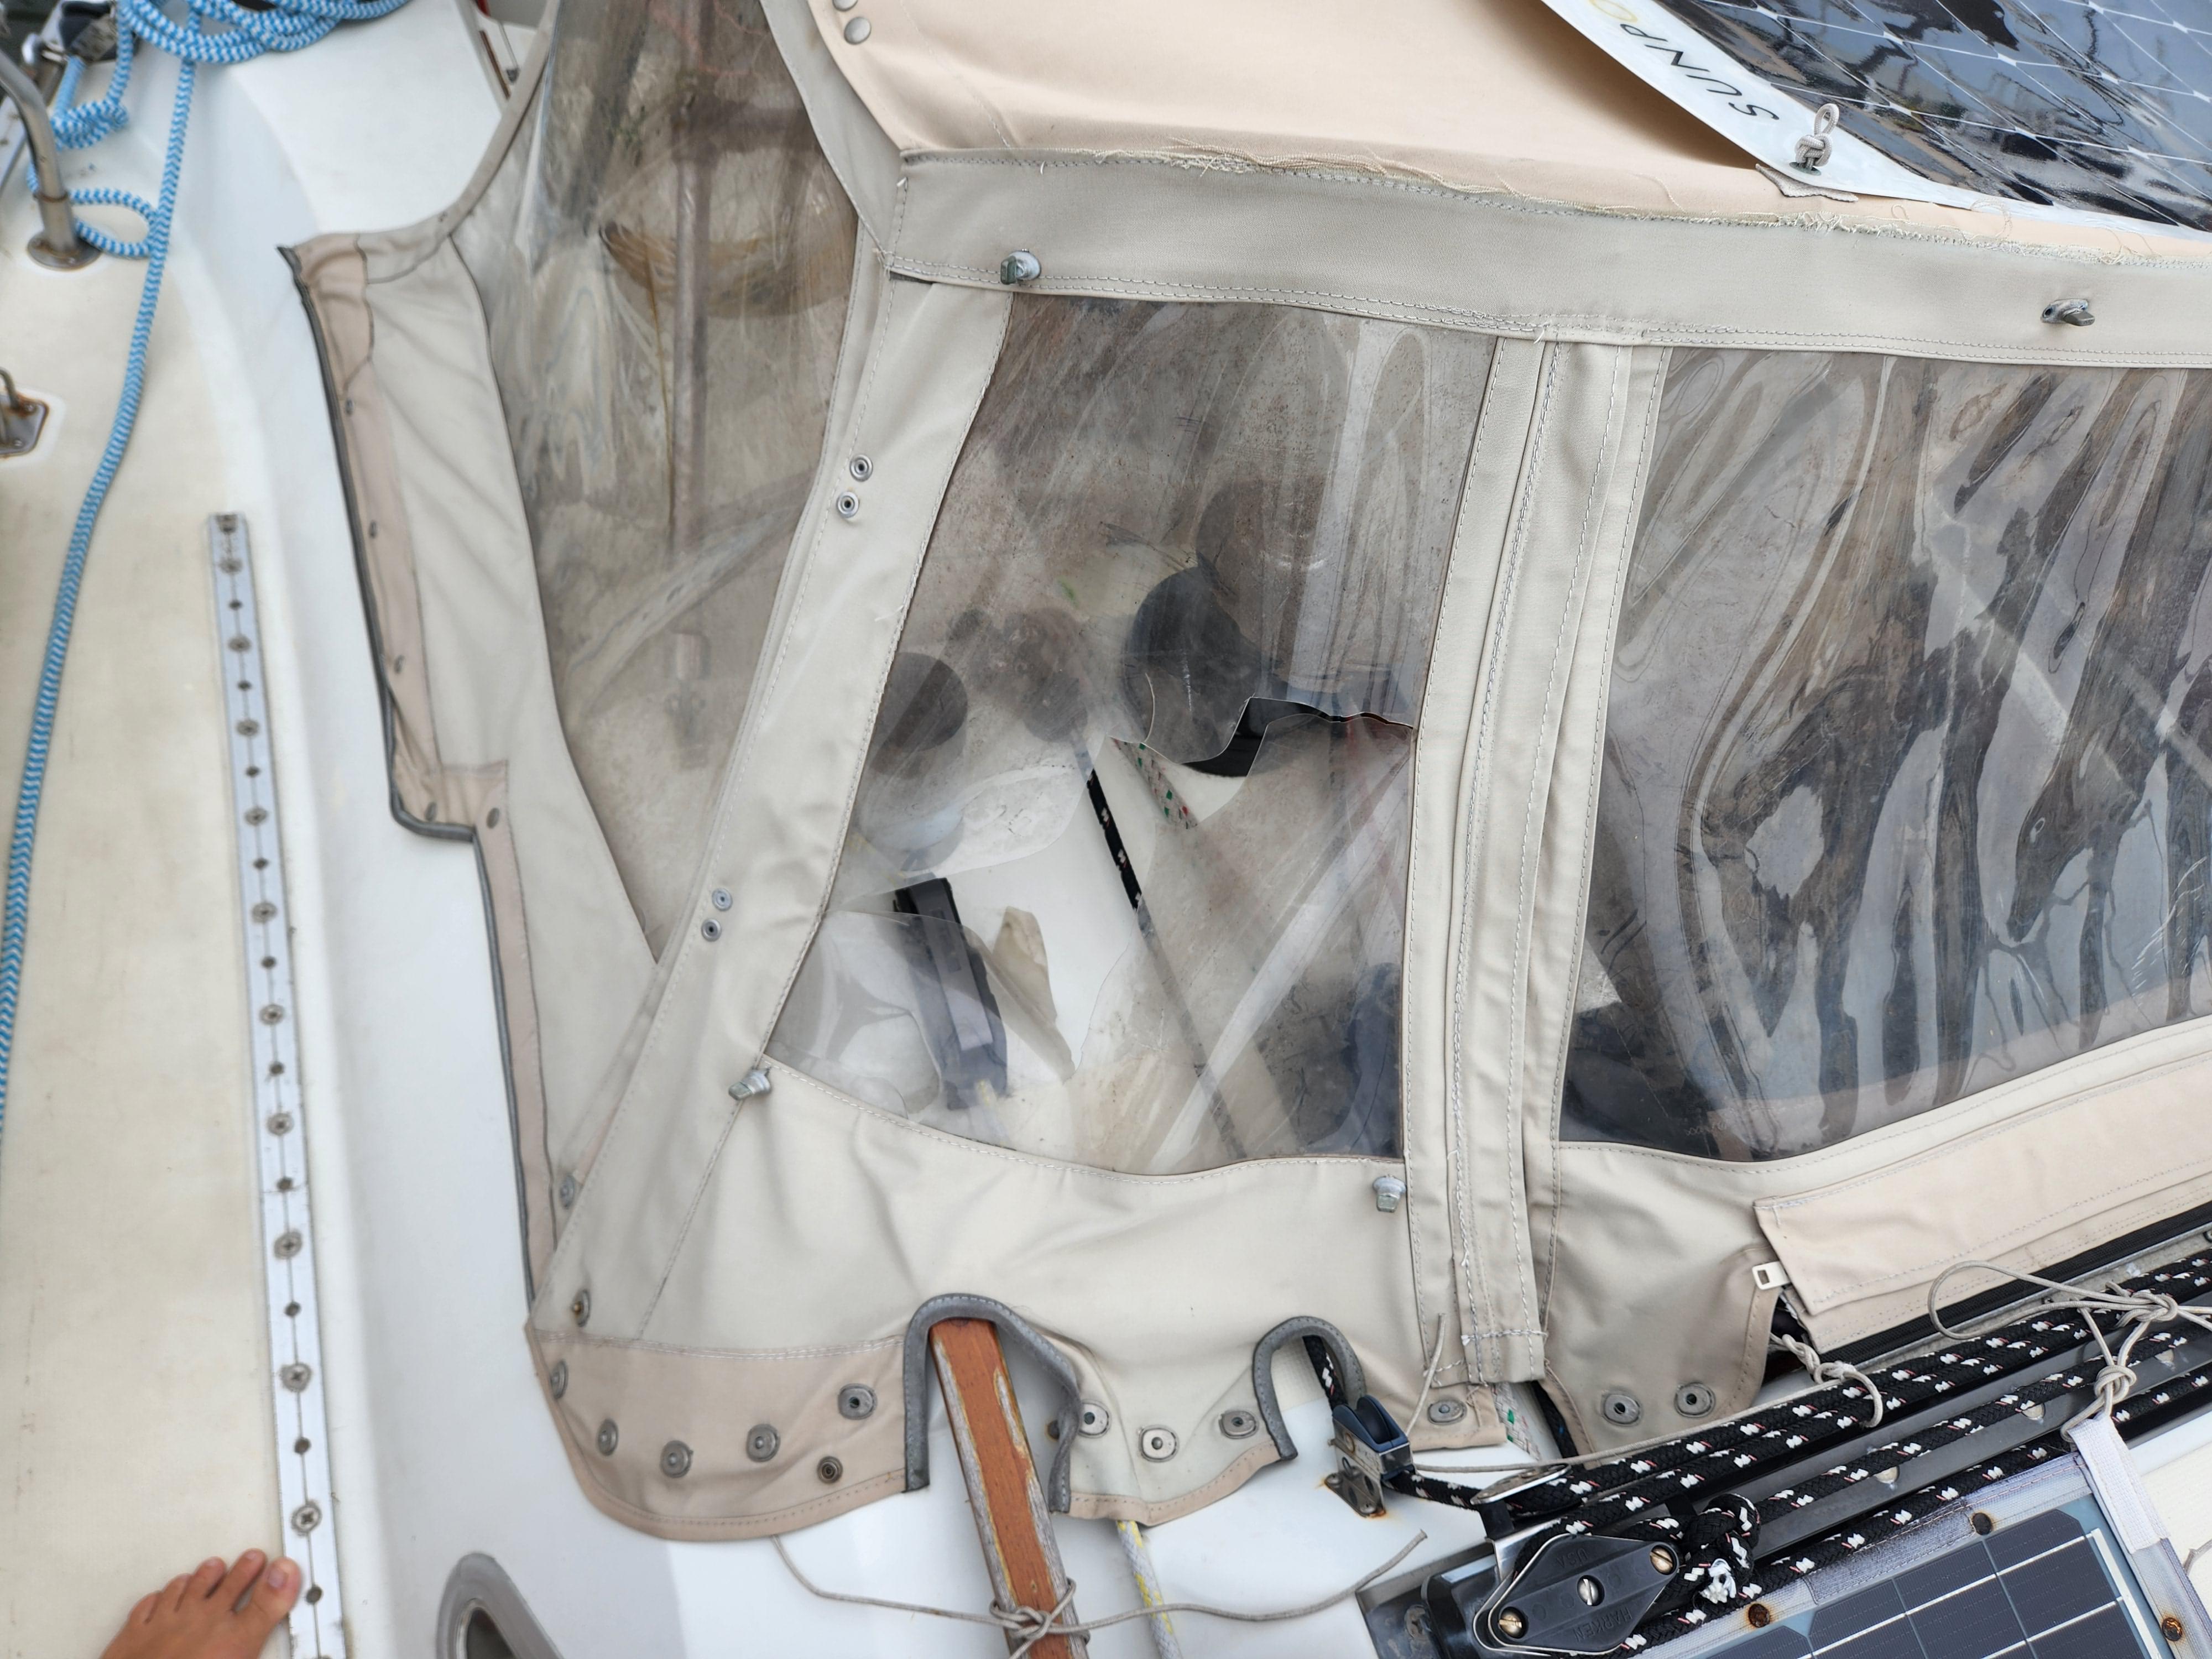
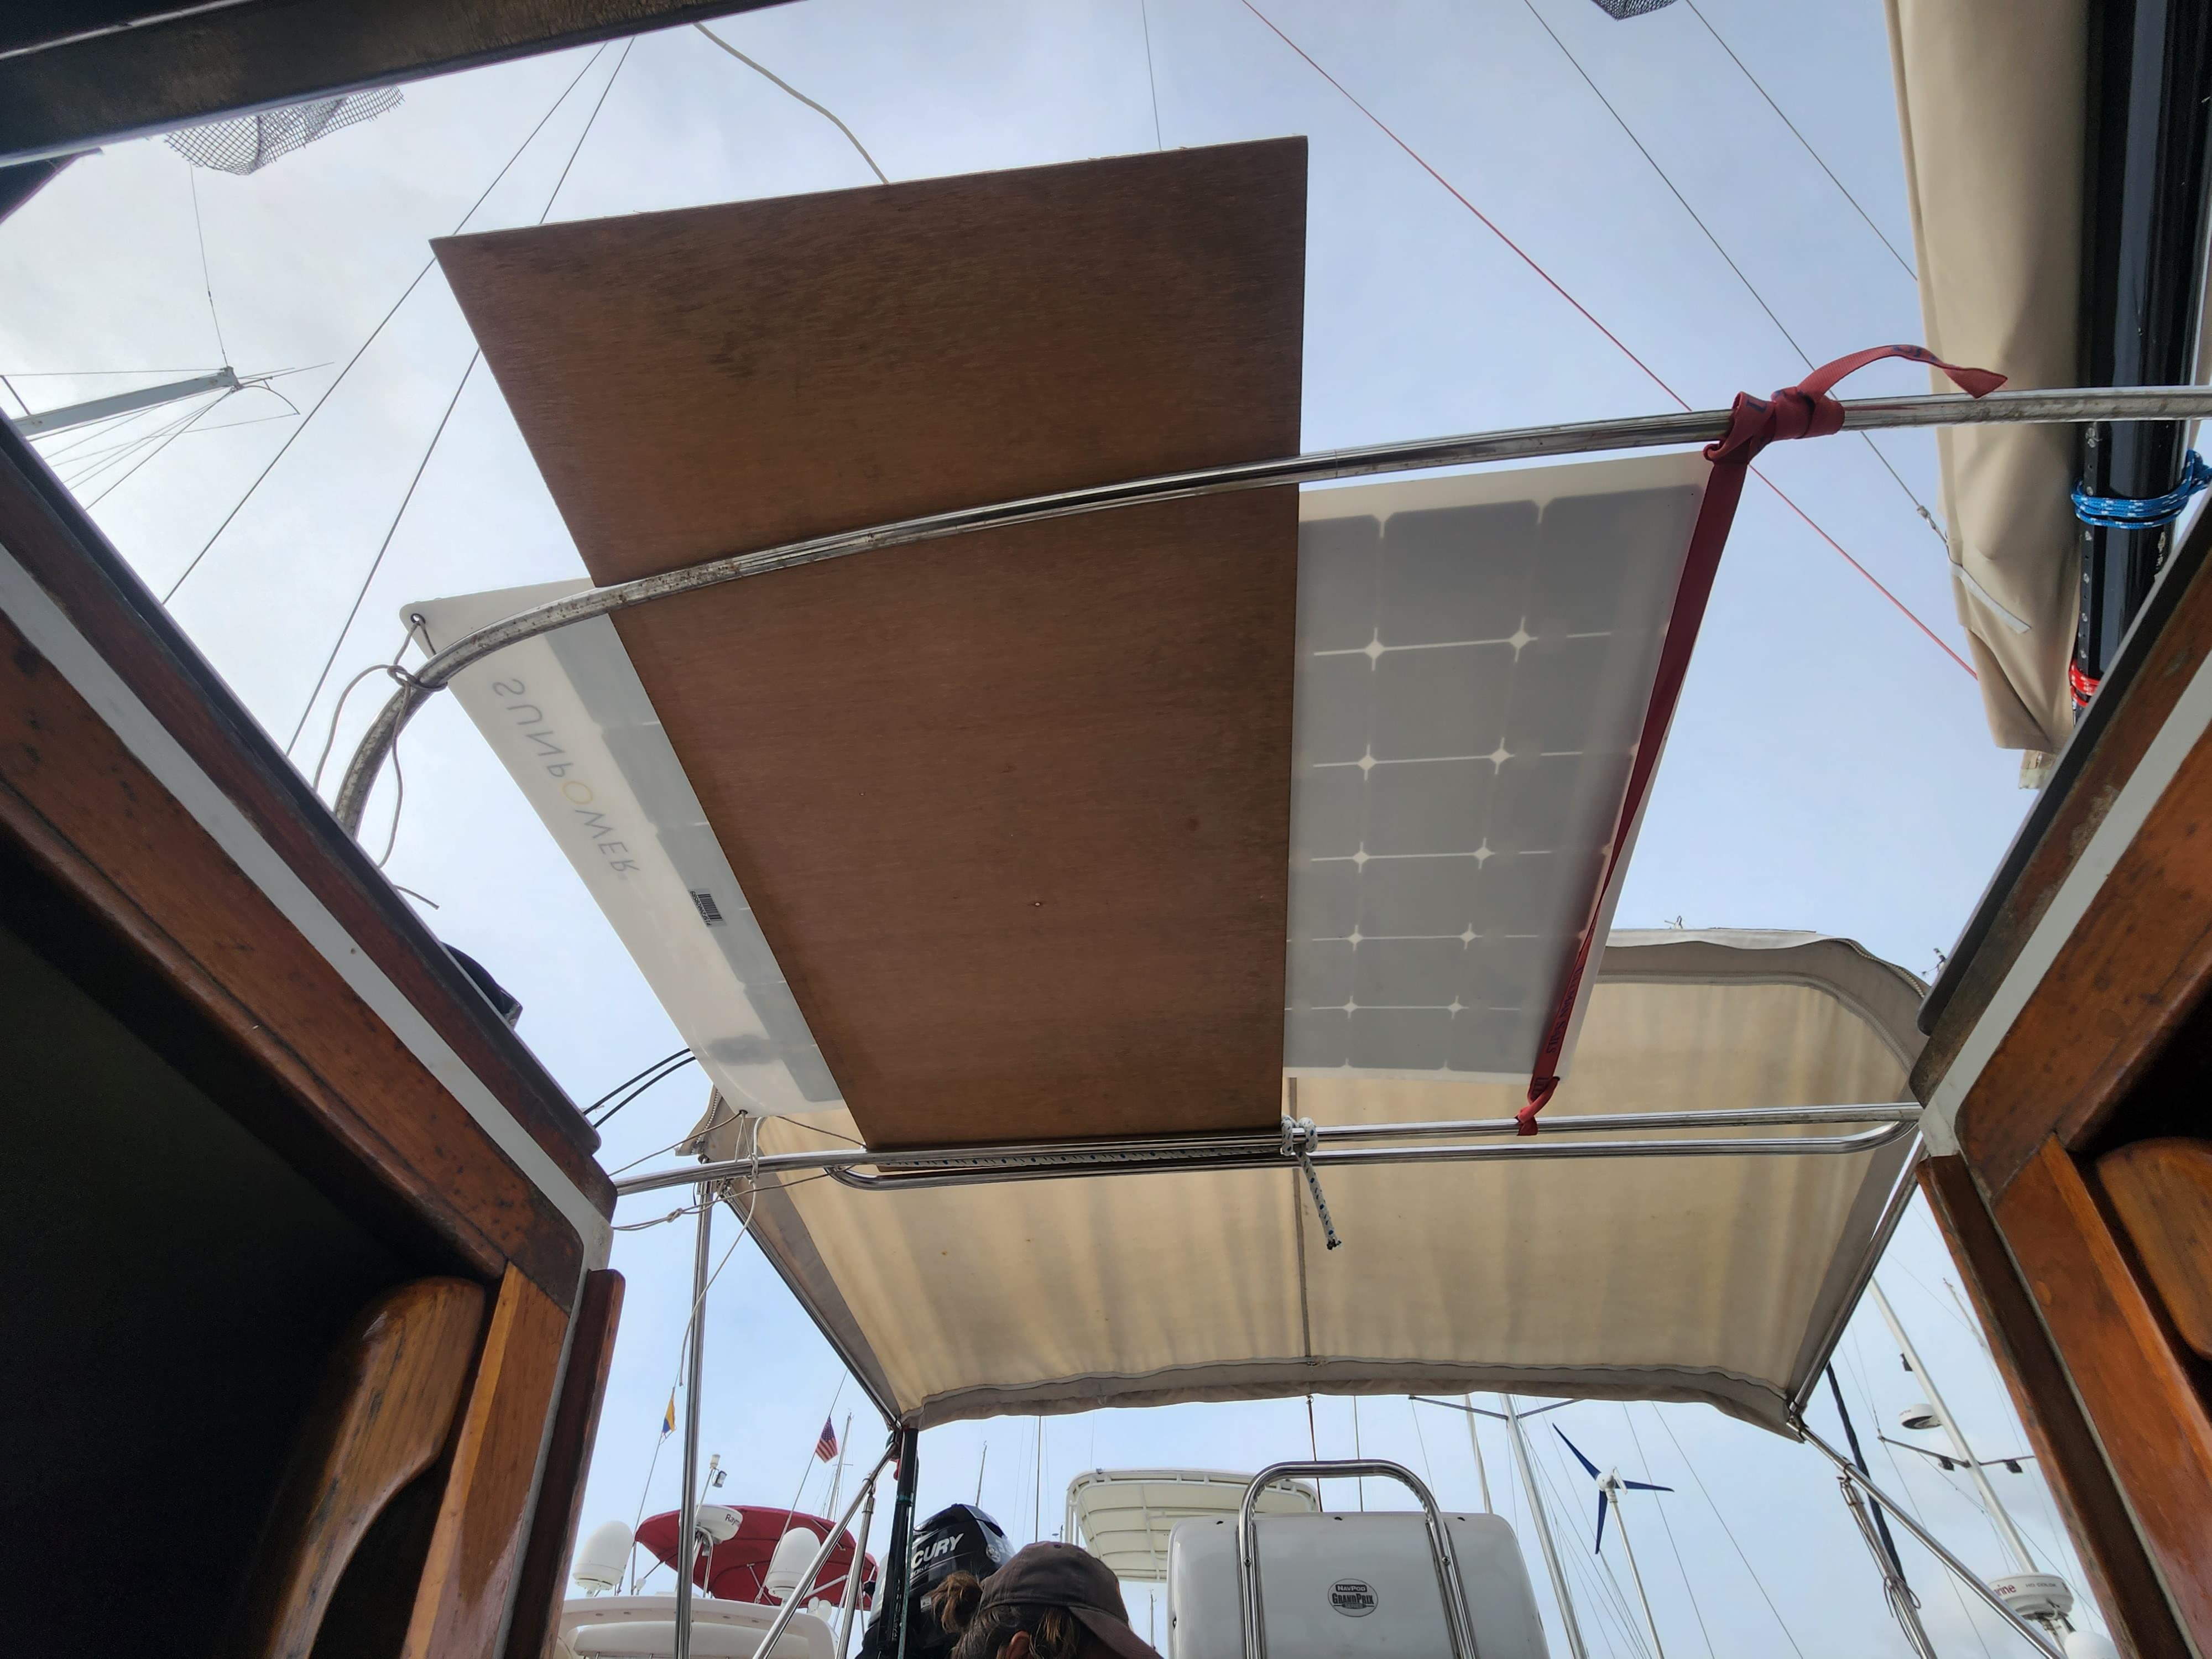
The dodger is the semi-transparent fabric in front of the companion way. It protects us from the elements while in the cockpit and also holds on our only permanently mounted solar panel. At the moment, the dodger fullfills its tasks only partially, the transparent sheets are old and not as transparent anymore. In addition, two of them are torn and not as protective anymore. In this context, getting a quote for replacing those did seem like a good idea, because labor is affordable in Colombia on one hand and, on the other hand, we had been looking for transparent plastic to make the repair ourselves for a while now, with much success. The main expense in the quote from Kevin was the transparent material, so we were seduced and wanted to go for it. Yet, maybe at this point, it's better to get the whole dodger remade. We carry some sunbrella, how much if they use this instead? And how much if instead they only do the sides? ... It took us a while and a few back and forth from Kevin to decide how we were going to go about it. We would get the sides entirely remade with new windows and new sunbrella. For the rest, they would only change the windows. When we got the price for this, Kevin offered us a good price that included the jib repair as well. We had been busy in the marina for close to a week at that point, and since it was indeed quite cheap, it felt like a relieve not to have to worry about doing the jib repair ourselves - we do have the sewing machine, yes, but you still need to find a place to set it up and have enough room to work on a hugeass sail. The boat interior isn't exactly well suited for that, and, as I said, we were busy with other jobs already. So we signed off Kevin at the door who left in a taxi with our sail and our dodger. It was on a Monday and they were bound to be returned on Friday. In the meantime, our task was to find out how to withdraw the money, which we couldn't trivially get in only one go, but that was plenty of time.
We were taken short when, on Tuesday, Kevin WhatsApped me saying he could bring our things in the afternoon. We had heard about jobs being late rather than early, people telling you "yeah, yeah, it'll be ready mañana (tomorrow)". This time, we were the ones not ready. We were not going to be around in the afternoon, too busy to buy filters and all sort of fittings, equipements in the neighborhood, and, most importantly, we hadn't gotten the money yet! Eventually, we got to it and Kevin came back on the Friday (or maybe Thursday). The repairs were okay. They restitched most seams on the entire jib with UV protected thread as Kevin told us. That could extend its life significantly and prevent other more damage in the future. The sunbrella cover wasn't sewn as flat as we would have wished but the quality was overall very likely better than what we could achieve and the job well worth the money.
For the dodger, the view of the crystal clear windowns made us excited and it took us a few weeks to really get used to it. We would walk by the cockpit, we would be amazed at how well we see through. Let's hope it lasts as long as possible. Funny thing though, we also realized we had fully integrated the location of the previous cracks in the windows as I caught myself several times reaching for things under the dodger through where these cracks were as not to have to walk all around to reach them.
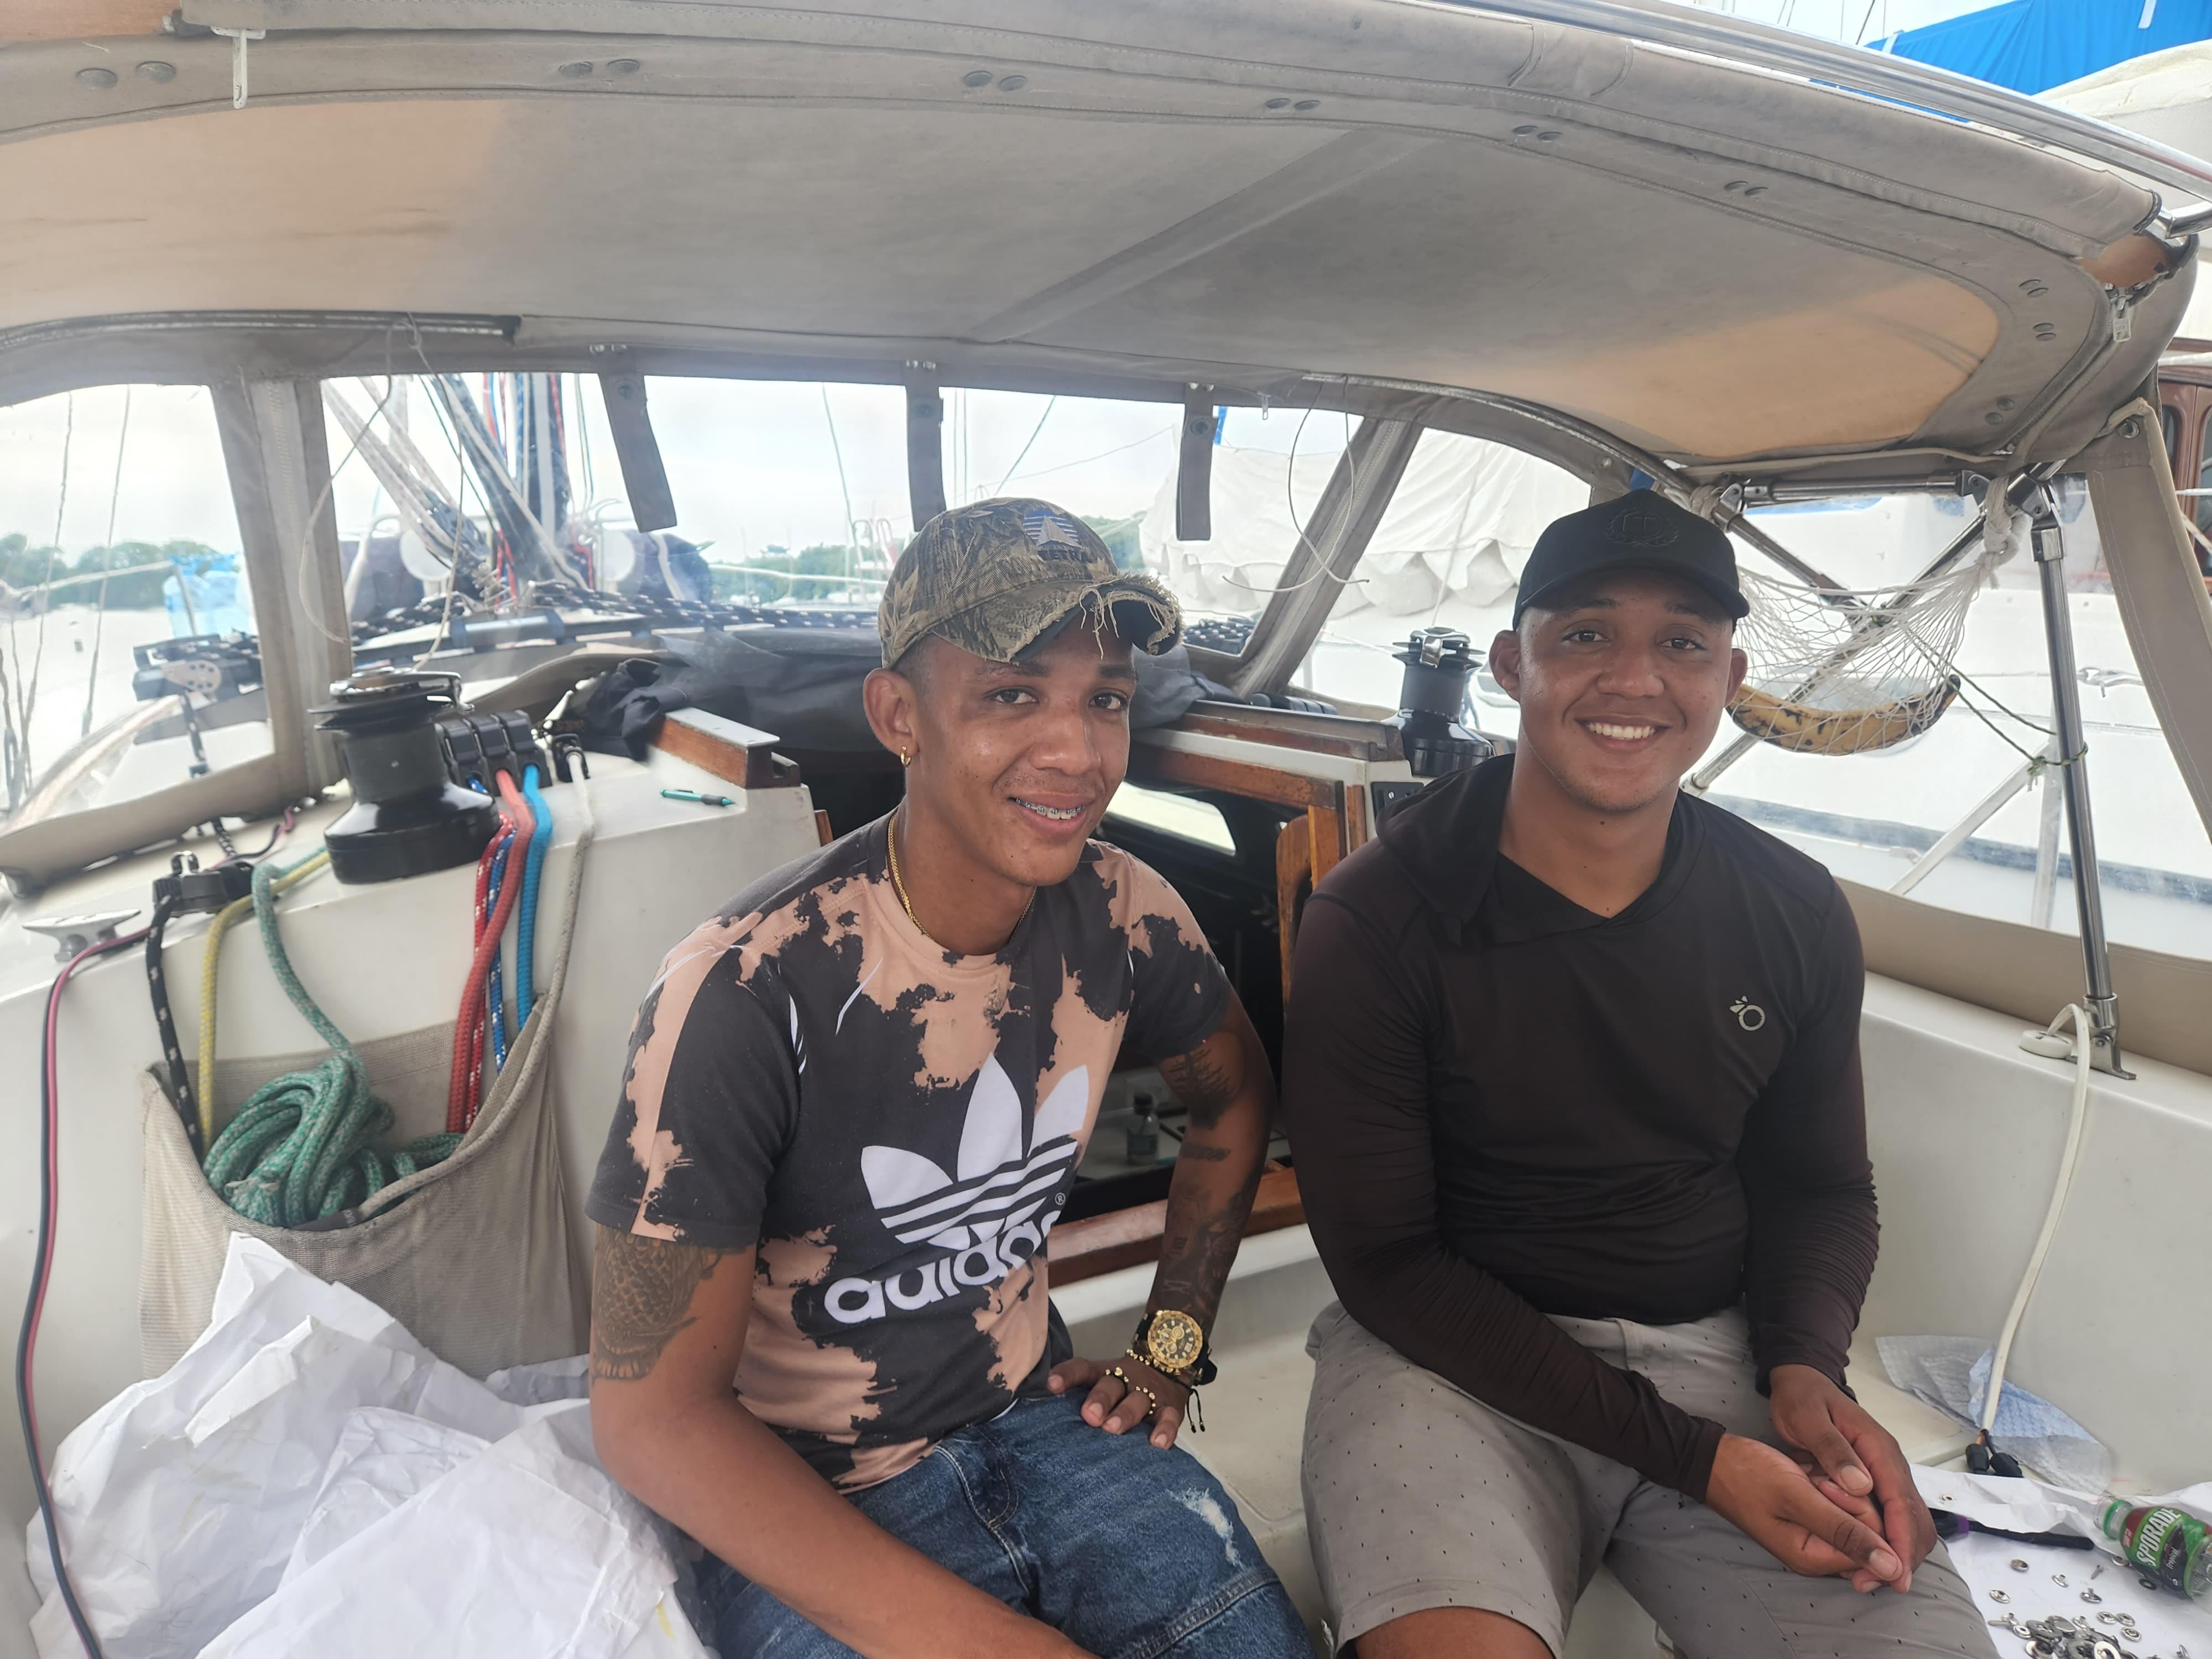
The installation was more involved than we anticipated as the side panels came bare. The new metal fittings needed to be installed onsite to make sure they would fit in the structure. The job was long as the machine to install those easily was with Kevin's brother in one of the downtown marinas. We chatted with Kevin, 8 people from his family were working in the same business, which explained why it went that fast for the job. For him, it looked like a summer job. I understood from my poor Spanish that he was studing management. We provided a tool we had to install fittings, it probably wasn't as good as what Kevin's brother had but it would do the job. Kevin started working those in patiently as we went on with our business. When the lunch break rang for the yard workers, we offered to take him to lunch with us to the cheap worker restaurant we used to take our lunches while boat working. He politely declined. Eventually, his brother arrived and helped him finish the installation. We had been starving and Yalçın had cooked Turkish eggplants. We offered lunch once more and this time, in front of the prepared plate, they didn't refuse. If Kevin had appeared to us as a gentle person, his brother was more curious and outgoing. We chatted over lunch about them, Cartagena life, their business, our life sailing and before etc. We will remember it as one of these priceless moments of cruising. They left more as friends than as business partners. Only stain on the picture, they embarked our needle-nose plyer which I think was by mistake as they diligently gave us back all the other things we landed, several times. Kevin also gave us a bunch of spare for the fittings, saying we'd have a harder time finding new ones at sea than he would. We didn't understand why we'd need new ones that soon, but after one passage, the one he installed are already rusted, staining the dodger new fabric. That was a bit of a hit, but we are still overall quite happy.


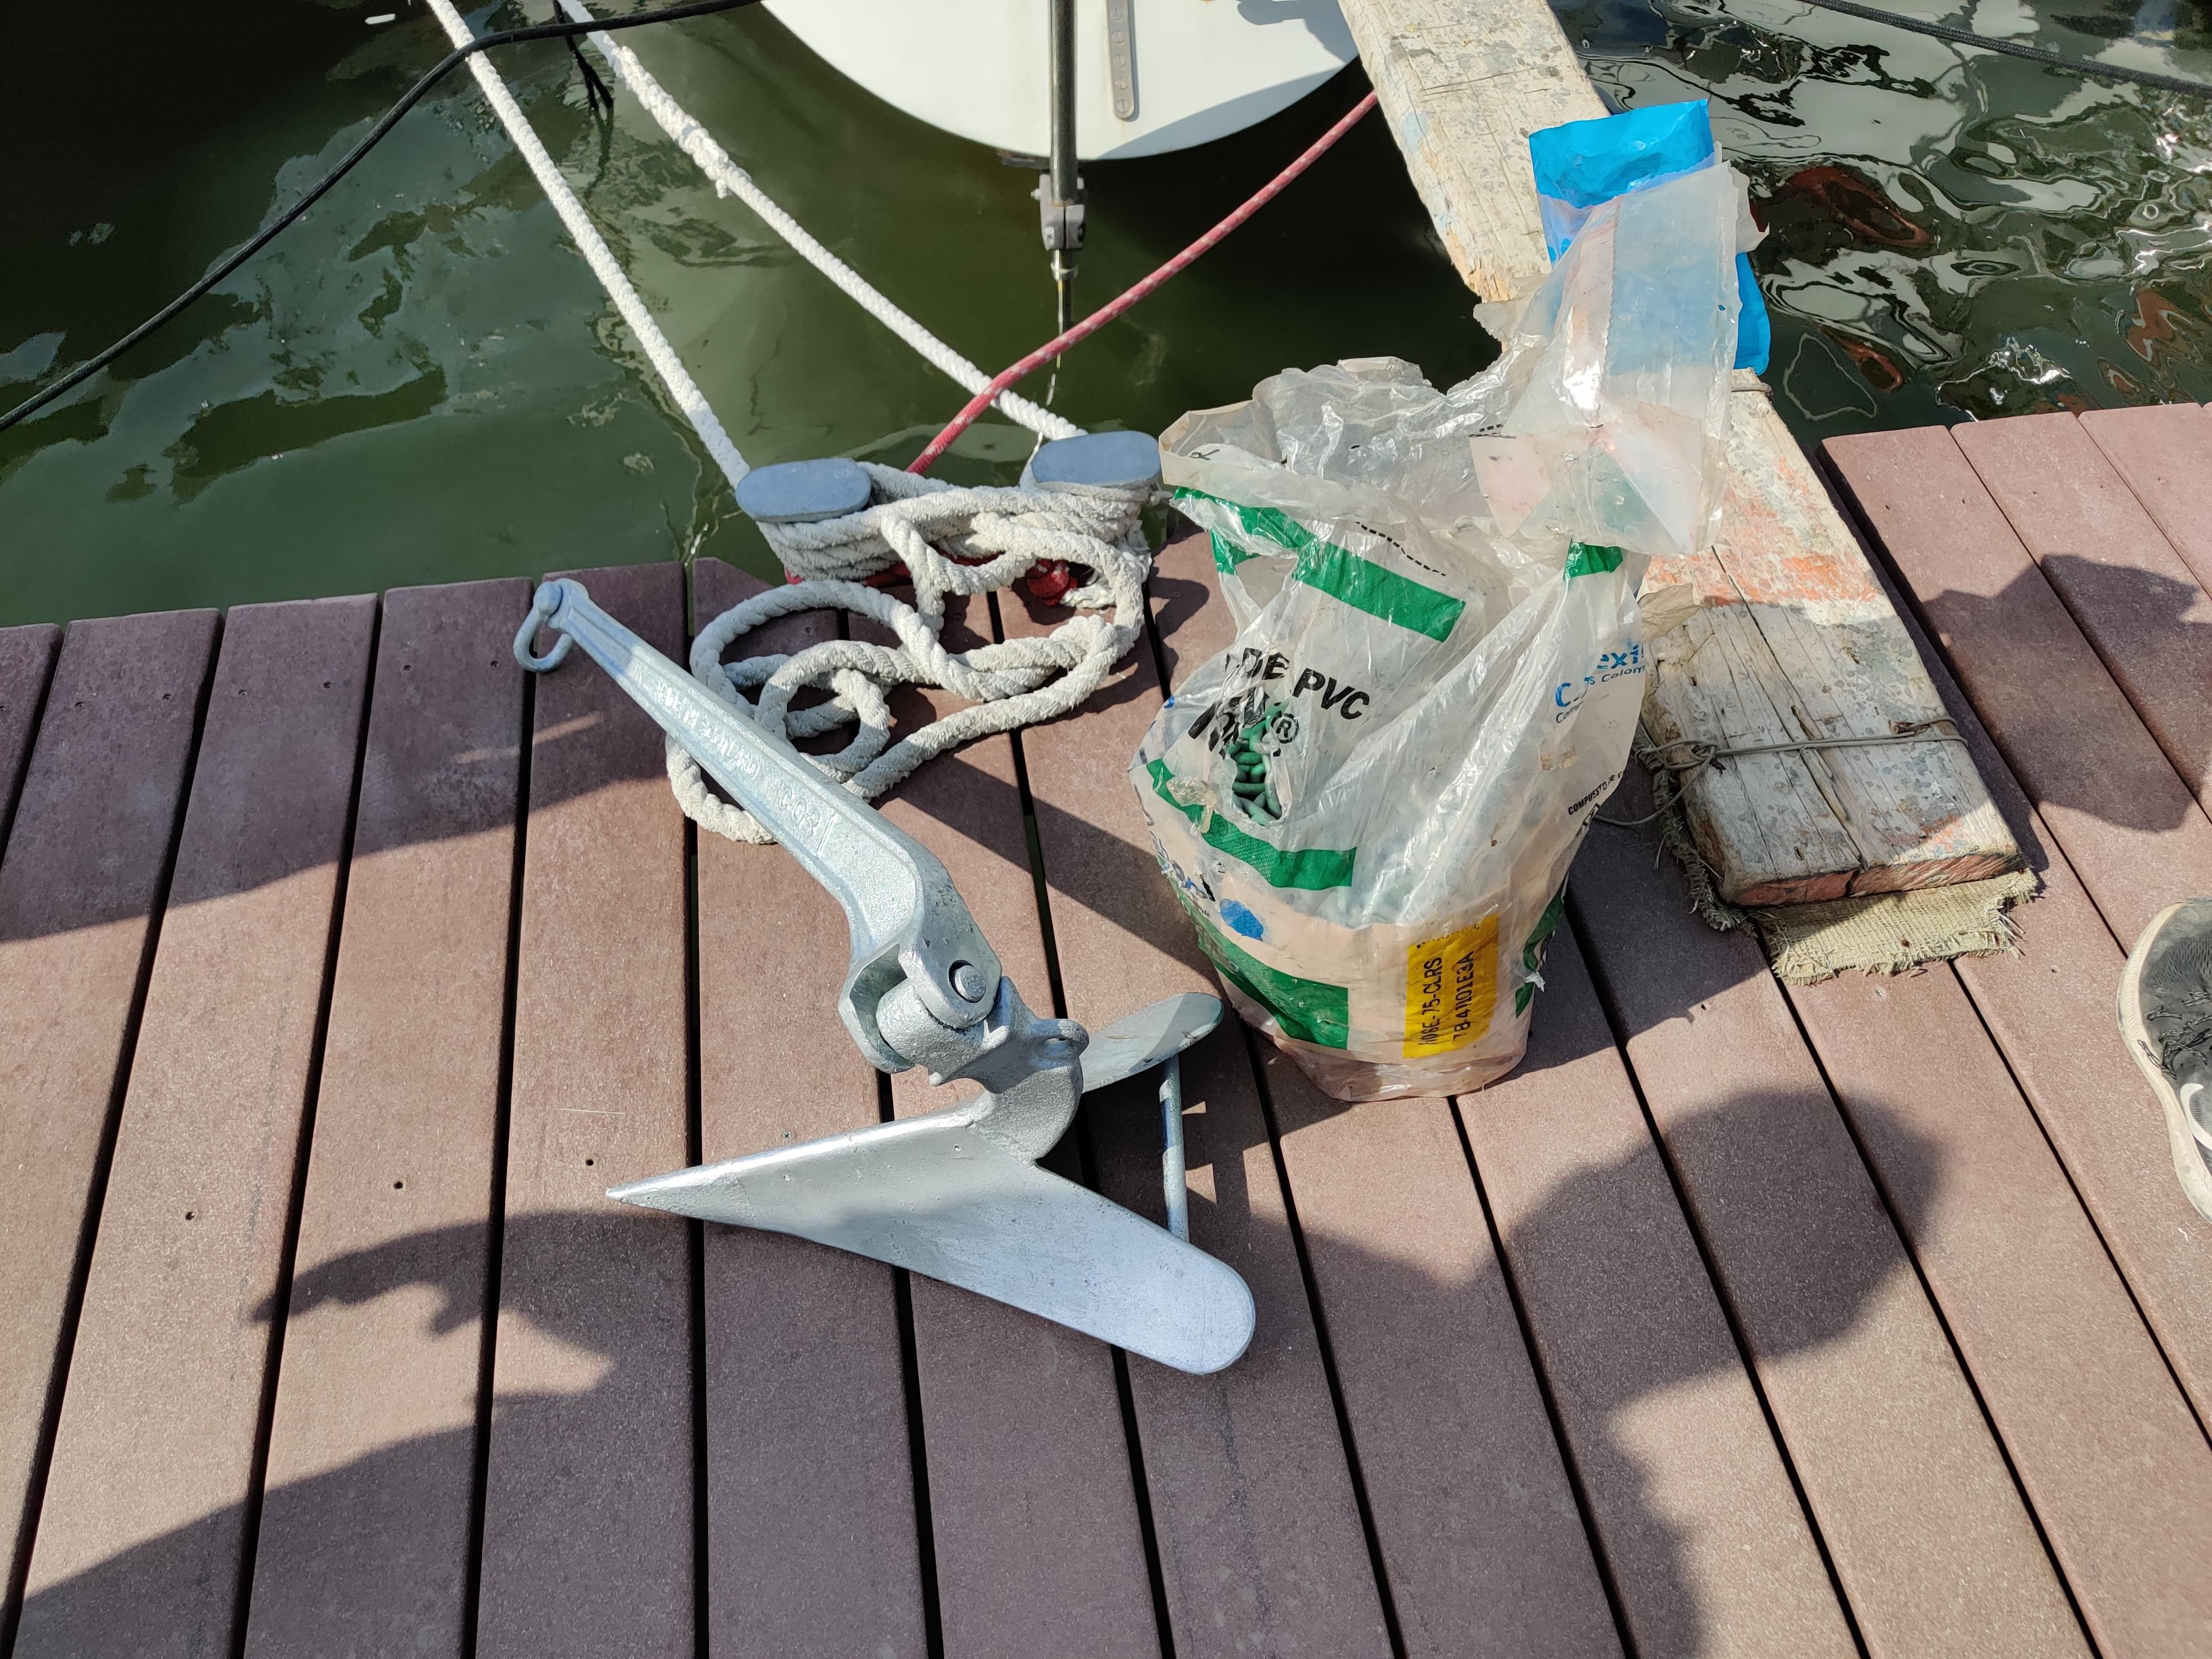
Project 6: regalvanize the anchor and chain
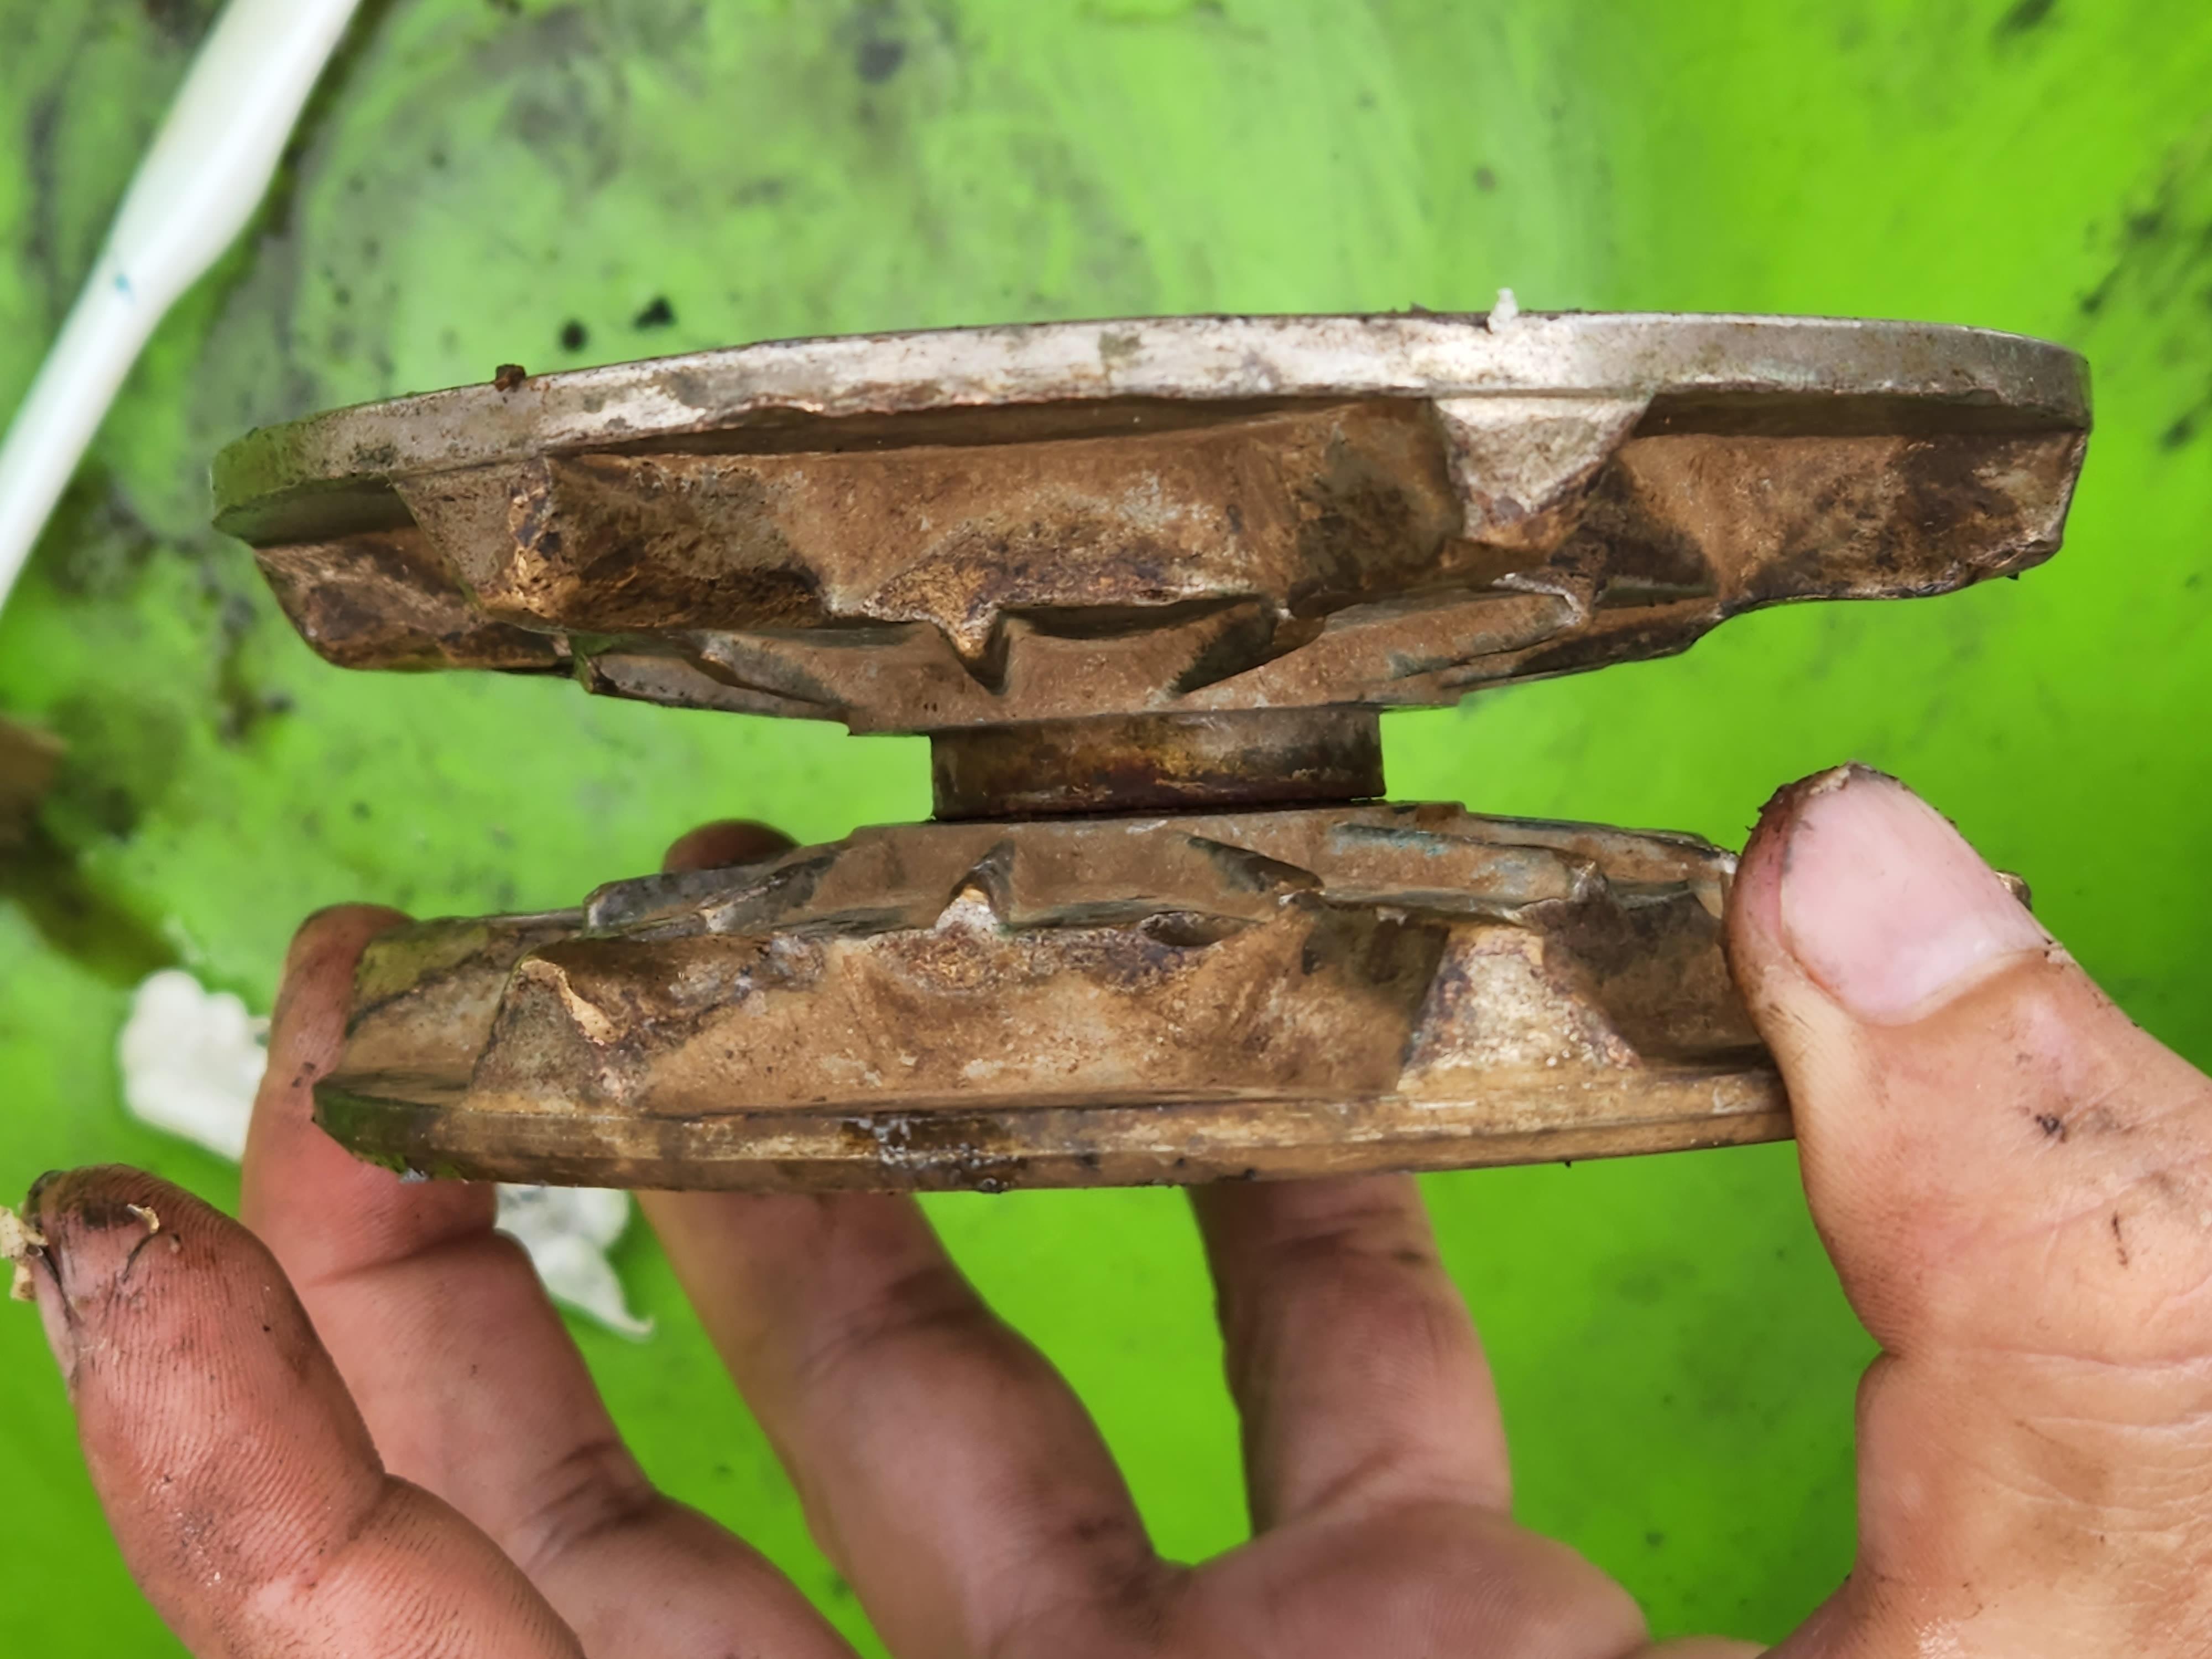
Last but not least, we had the anchor and chain regalvanized. What does that mean? Our anchor and chain spend most of their lives inside corrosive salt water. To prevent rusting, the steel that makes up the anchor and chain is galvanized but over time the protective layer wears out and rust starts to show up. This was the case for our anchor, and you may remember Yalçın spraying the tip was a galvanizing spray. Those allow a touch up but their treatment doesn't last, it's overall expensive and it would be extremely difficult to apply of all the links of the chain, which, of course, wasn't spared by corrosion. The proper way to tackle the problem is to get the anchor and chain regalvanized at a hot dip galvanization facility. Unfortunately, those are rare, in particular the ones who can handle chain as it needs to be done in a specific way during which the links don't cease, which would make the chain unusable. To give you an idea, we didn't find an opportunity for galvanization since Mexico, and in Mexico it was inland near Baja California - at the very beginning of our trip. If you're not in the city of the facility, then transportation gets rapidly expensive as the whole is heavy, and it's usually better to team with other cruisers to drive down the price. In short, a time consuming operation and during the whole time, you have to stay at the marina as your anchor is just... off to a vacation.
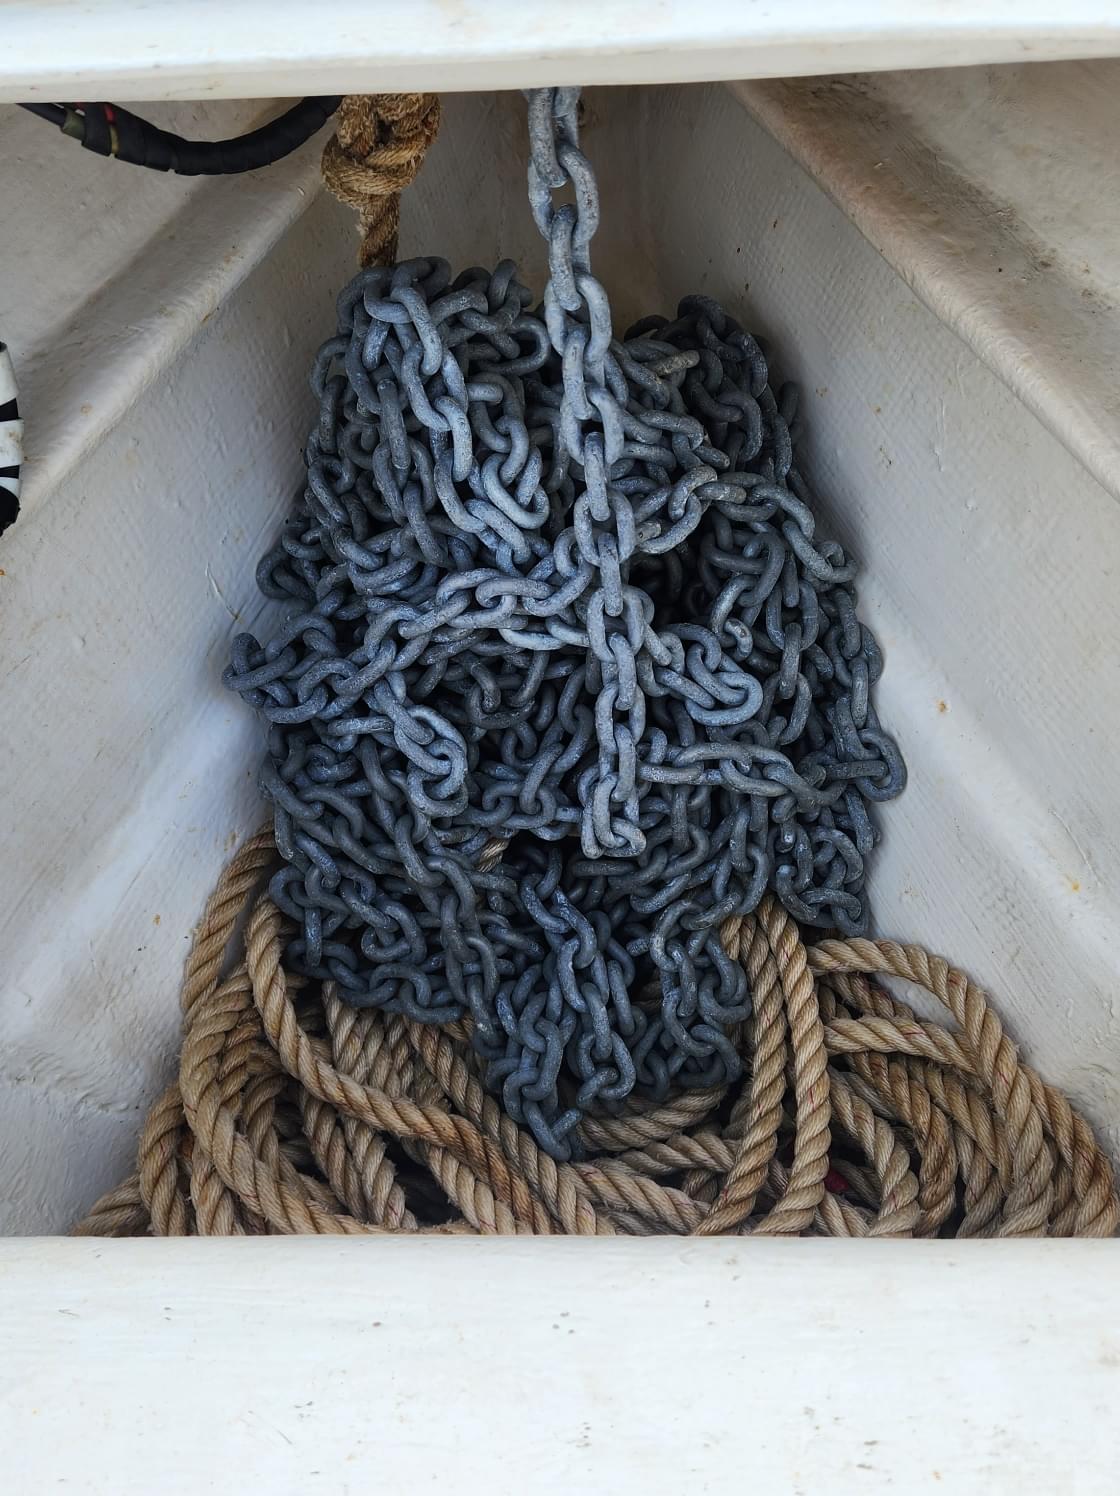
In that context, you can imagine, we were thrilled to discover that Barranquilla, a city a few hours north of Cartagena has such a facility, that there was a guy who can transport it for us and that overall orher cruisers who had done it were happy! Already staying at that marina for the windlass, we gladly gave our 100 feet of rusty chain and anchor to Alvaro and waited a little longer than promised for a regalvanized chain and anchor to come back. The change was drastic and it's such a piece of mind not to have to worry about a chain link failing as we live most of our lives relying on that! Moreover, if you can't regalvanize, eventually, you just have to buy a new chain altogether, I'm glad we had the chance to save it and give it a second life.
Always more projects...
Of course, there were also many small jobs involving epoxy, soldering and other type of maintenance. Here is a quick list, mostly for ourselves but might spark your curiosity. We moved the mounts of the whisker pole to be able to fit it in, we replaced the anchor locking pin that had been broken (we've had the new piece in stock for a while). Moving back on the deck: we sent Yalçın up the mast for a rig check. We installed D-rings with backing plates to have a better installation for our jacklines (the lines to which we tether when we go outside of the cockpit in big seas), we can now clip in more easily from the cockpit directly. We fixed the hinge of the stern locker, removed the mount for the flag pole we never use and gifted it to our dock neighbors who seemed like they needed an extra one. We filled the holes with epoxy as well as little holes left by old fittings for the dodger. We reorganize that same stern locker by getting a new box, items are now easier to access. Of course, we cleaned the deck and cockpit several times taking advantage of having fresh water on the hose. Inside the boat, we fixed and replace some lamps acting up (a short lived fix as one is already not working again). We replaced our fresh water pump, which gives us pressured water on tap, by the spare one we carry onboard, the old one having the issue of not holding the pressure and leaking water back to the tanks. The new pump didn't perform in a satisfactory way, it was extremely loud and constantly pressurizing. A wrong setting resulted in it blowing up the gasket of our water heater. Not a big deal for now as we don't need hot water and if we do, we heat it with the sun, but a bummer still. We put the old pump back... A circular project! Not the most satisfactory kind! We replaced the air filter on the engine. We replaced the ship's clock mechanism. Finally, when we first tried to leave the marina, we had no power with the engine and had to pull back into our spot. The reason? Biofouling! Our prop shaft was entirely covered in a thick layer of barnacles! Especially where the shaft enters the boat. We had the bottom cleaned the next morning before finally taking off.
Boat work continued in our next destination where we made systems to hold the spinnaker, and any other thing we pile up in the shower, in place while we sail, as well as systems to lock the doors in place when the boat heels over. We tuned our rig underway. We also silicon-greased all the portlight gaskets and cleaned the mold on the liners that ever comes back in the tropics.
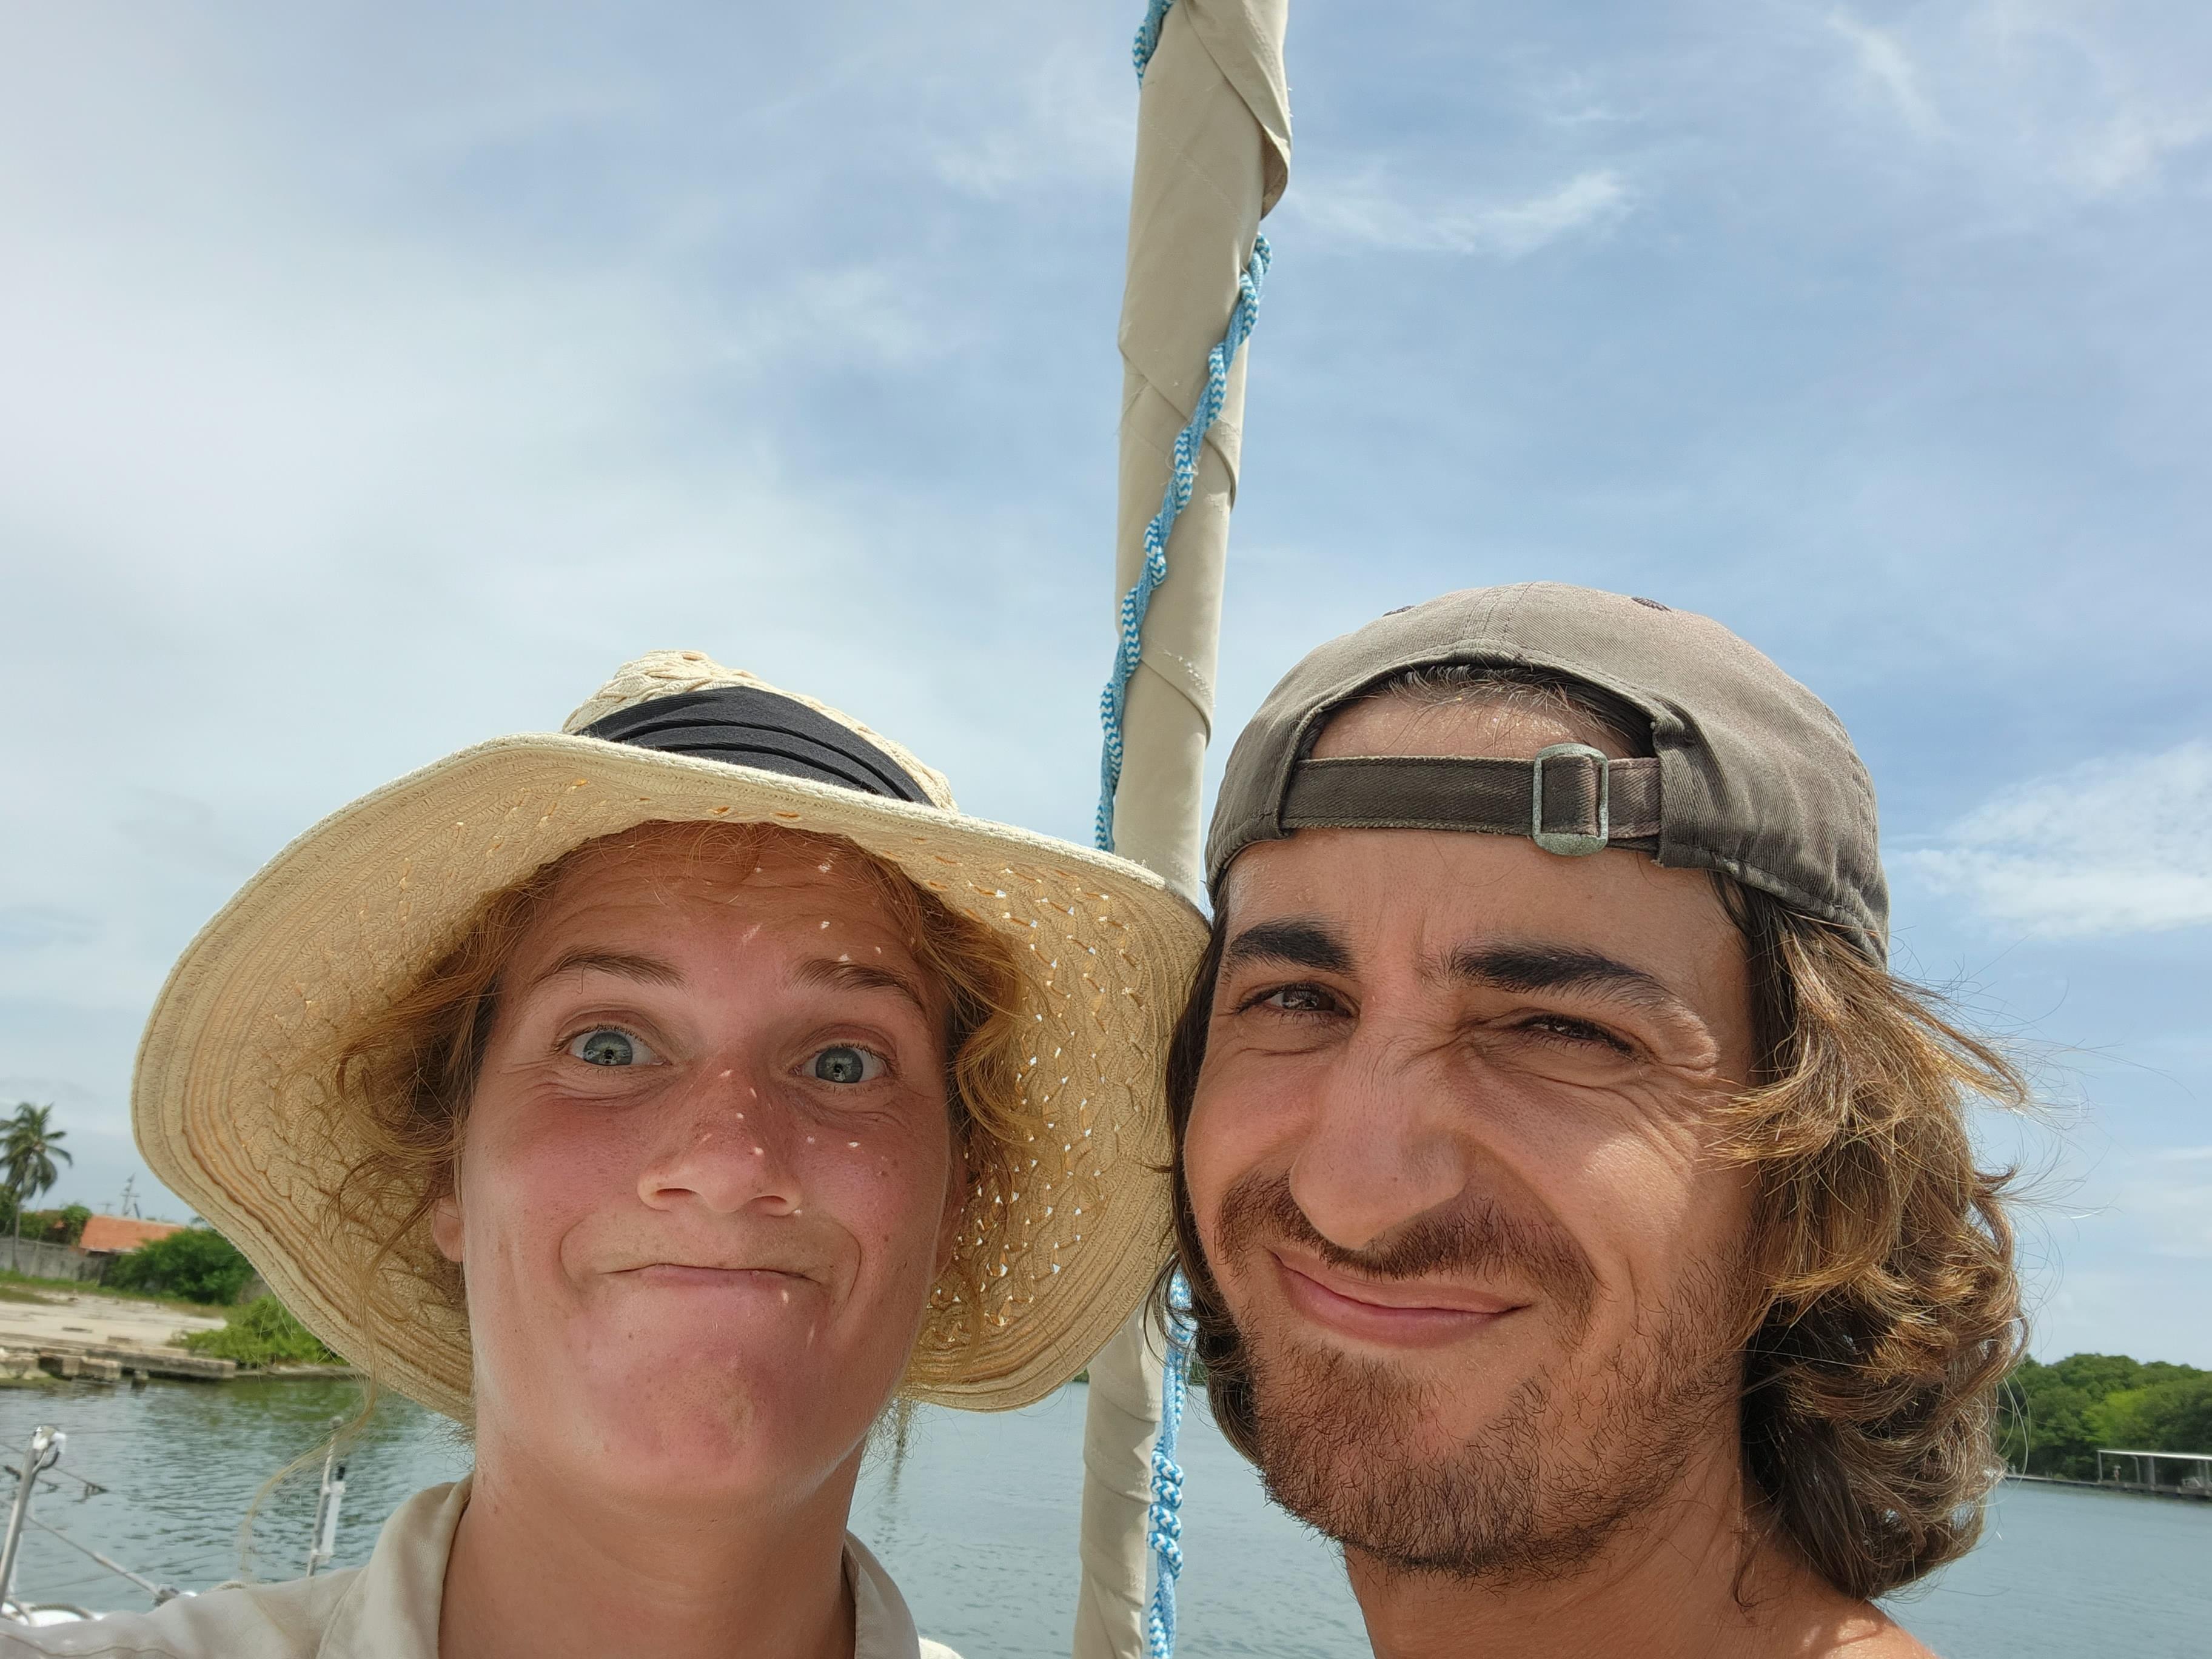
Here you go for the glamor. Some say "cruising is just fixing boats in exotic locations", I let you make up your own mind...